YouTube is a global platform with an immaculate user base that comes from around the world. Because of how global its audience is, YouTube allows you to change the subtitles on a video from its original to one of the most commonly spoken languages in the world. This feature allows you to enjoy a video in your native language or one you’re more comfortable with. Today, we will be discussing how you can change the video subtitles on YouTube from one language to another.
How to change YouTube subtitles language

The process in place here is pretty simple, although it requires you to change the subtitles on each video you watch manually. Here’s what you have to do:
- Open the YouTube video that you want to watch in a language different than your origin’s
- On the bar present at the bottom of the video screen, from the options to the right of the video’s timeline, click on the Settings icon
- Here, select the Subtitles/CC option
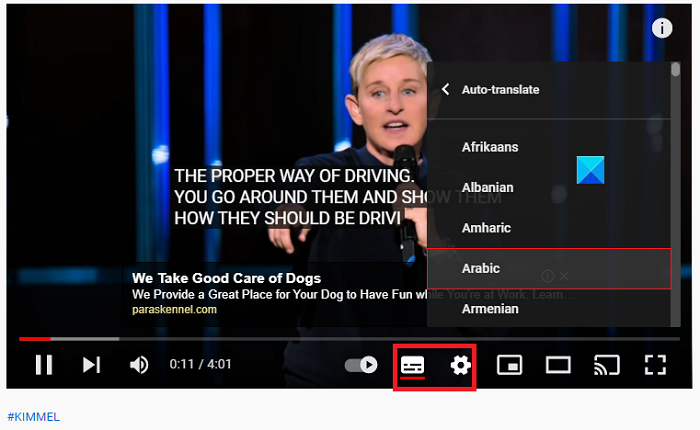
- Further click on Auto-translate which would then present to you a list of languages
- Select the language that you want to change the subtitles to
Make the selection and you’ll see the change take immediate effect. There was an option to change the subtitle language on the YouTube app, where you can change the language settings of all the captions in one go but for the past couple of months that setting is not working. You can, however, replicate the aforementioned process for YouTube.com on your mobile browser.
The question of a different language for subtitles can be flipped around and thought of from the point of view of a video’s creator. A video creator can also make a provision and add subtitles in a language different from the video’s original. Here’s how that can be done:
How to add a different subtitle language to your YouTube video

- Open and sign in to your YouTube Studio
- From the menu to your left, select Subtitles
- Select the video you want to add subtitles to
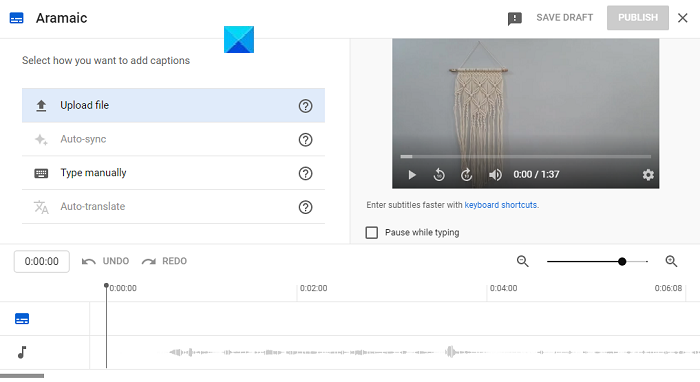
- Click on Add language and select your language
- Under the Subtitles head, pick out the subtitles.
You can make this change while you’re uploading the video as well. What is to be noted here is that the process doesn’t end here. Once you’ve selected the language, you can either upload a ‘.srt’ file of subtitles in that language or type out the subtitles yourself.
How to customize subtitles on YouTube?
If you don’t like the way subtitles look on your YouTube and want to customize them, here’s what you need to do:

- Open a YouTube video
- Click on the settings icon in the video window and select Subtitles
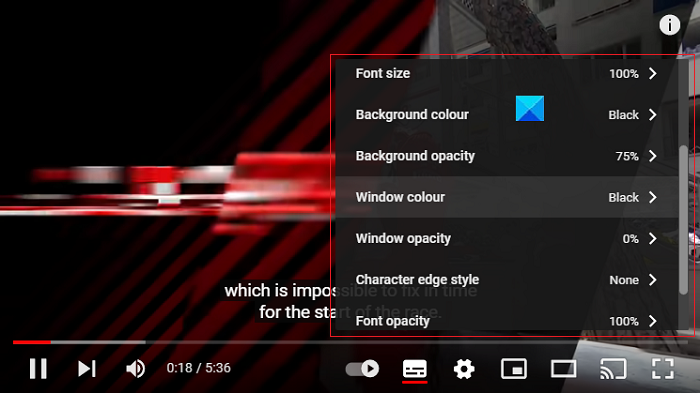
- Select Options in the subtitles window
- Here, you’ll see all kinds of options to make changes to your YouTube subtitles. For e.g., the font color, font size, background opacity, etc.
Changes like these can also be made via the YouTube app on your phone by following these steps:

- Open the YouTube app on your phone
- Click on your profile icon on the top-right and from the list of options, select Settings
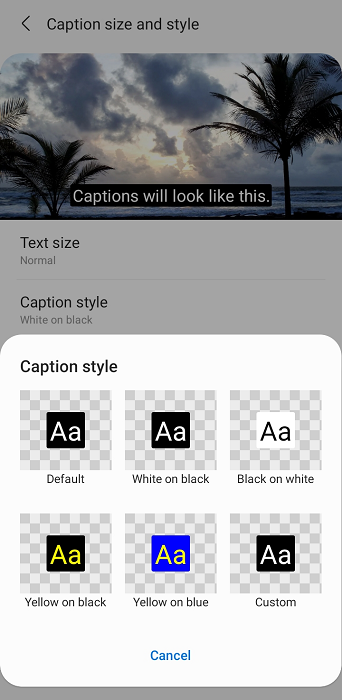
- Scroll down and click on Captions
- You’ll see an option to modify the way your YouTube subtitles look like the font color and the background color
Can YouTube automatically add subtitles?
Another thing that you may have noticed with YouTube videos is that the platform automatically generates. The Speech recognition technology helps it to understand and type out captions/subtitles on its own. YouTube deploys machine learning algorithms to create these subtitles, which is why they vary so much.
Hope this helps!
Leave a Reply