In this post, we shall learn to change the theme and font of Microsoft Office documents. If you intend to change your current theme, switch to a different one, or create a new theme, you may find the Design tab in Word or the Page Layout tab in Excel as the right place to start.
How to change Theme color in Office
First off, open a new document, choose the ‘Designs’ tab, click the drop-down arrow of ‘Colors’, and pick the color of your choice.
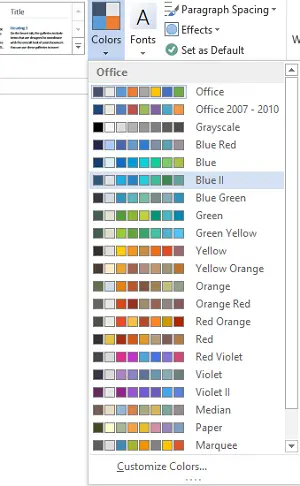
Now, if you would like to create your own set of colors, choose ‘Customize Colors’ option.
Next, from the customize colors window that opens up, click the button adjacent to the theme color of your choice (for example, Accent 1 or Hyperlink), and then pick a color under ‘Theme Colors’.
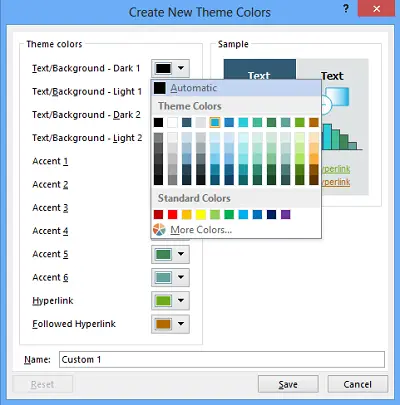
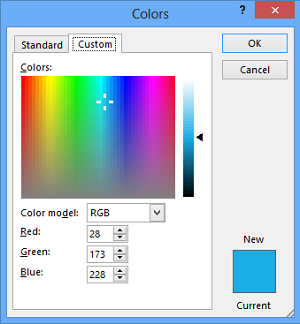
For creating a customized or your own new color, click ‘More Colors’ and pick a color on the Standard tab or enter numbers on the Custom tab.
In the Name box, type a name for the new theme colors, and then click Save.

Read: How to stop users from changing default organization Office theme
How to change the default Font in Office
To change the default fonts, click on the Design tab, then ‘Fonts’ and pick the font set you want.
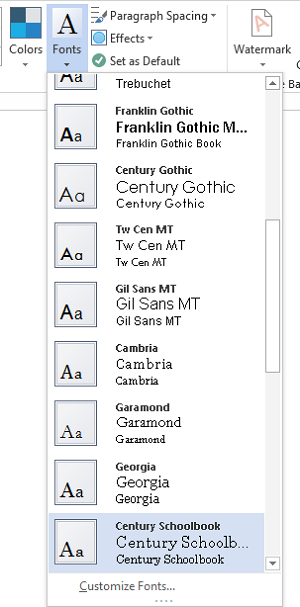
For creating your own set of fonts, select the ‘Customize Fonts’ option.
Then, if the ‘Create New Theme Fonts’ box is displayed, choose desired fonts under the Heading font and Body font boxes.
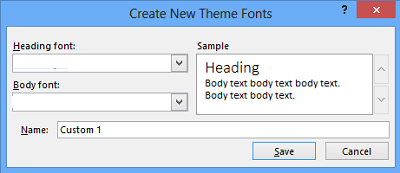
Next, as earlier, in the ‘Name’ box, enter a name, and click Save.
How to save the Custom Theme for use in Microsoft Office
For this, click on the Design tab, click Themes > Save Current Theme.
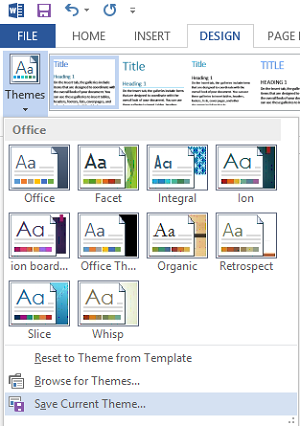
In the File name box, enter a name for the theme, and click Save.
How to set New Default Themes in Office
On the Design tab, click Set as Default.
You can follow a similar procedure using the Page Layout tab in Excel.
I hope you enjoy the change!