Windows Update Delivery Optimization allows you to download updates from sources different from the Microsoft server. So, a computer doesn’t need to go all the way to the Microsoft server, instead, it will look for the update in its network and download it from other computers in the network. However, it is necessary for you to control this feature to make it work accordingly. Therefore, in this article, we are going to Change Delivery Optimization Max Cache Age for Updates in Windows 11/10.
Windows has a policy called Max Cache Size. With this, a user can control the space allocated to the Delivery Optimization cache. It also has Max Cache Age, which is used to specify a time till which the cache will be retained on the disk.
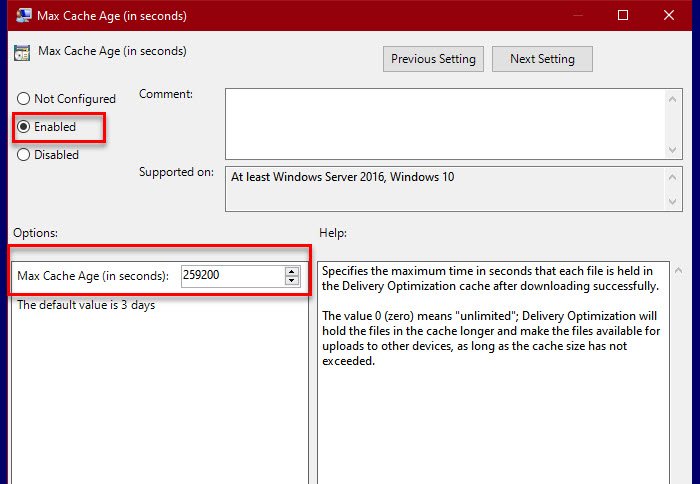
By default, the maximum Cache Age in Windows 11/10 is set to 259,200 seconds, i.e; 3 days. However, depending on your needs you may want to change this value.
Change Windows Update Delivery Optimization Max Cache Age
There are two ways by which you can change Delivery Optimization Max Cache Age for Updates in Windows 11/10.
- By Group Policy Editor
- By Registry Editor
Let us talk about them in detail.
1] By Group Policy Editor

Since Max Cache Age is a policy, the easiest way to alter is via Group Policy Editor. So, launch the Group Policy Editor from the Start Menu and go to the following location.
Computer Configuration > Administrative Templates > Windows Components > Delivery Optimization
Then, look for Max Cache Age (in seconds), double-click on it to open.
Now, if you want to keep the default configuration, select Not Configured or Disabled. However, if you want to alter the settings, select Enabled, and from the “option” section change the Max Cache Age (in seconds) to alter the settings of the policy.
Finally, click Apply > Ok and you will be good to go.
TIP: You can also you can turn off Windows Update Delivery Optimization via Settings.
2] By Registry Editor

Windows 10 Home doesn’t have Group Policy Editor, so, we are going to change Delivery Optimization Max Cache Age by Registry Editor.
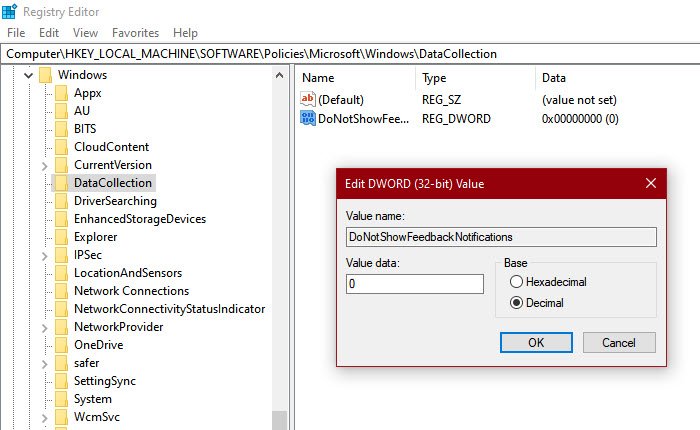
So, launch Registry Editor from the Start Menu and navigate to the following location.
HKEY_LOCAL_MACHINE\SOFTWARE\Policies\Microsoft\Windows\DeliveryOptimization
If you do not have “DeliveryOptimization”, right-click on Windows, select New > Key, and name it “DeliveryOptimization”.
Now, right-click on DeliveryOptimization, select New > DWORD (32-bit) Value, and name it “DOMaxCacheAge”.
Double-click on DOMaxCacheAge, select Decimal, and change the value accordingly.
If you want to revert it back to default, just right-click on DOMaxCacheAge and delete it.
Leave a Reply