If the Channel Surround Sound is not working on your Windows 11/10 computer, this post may help you fix it. This issue can occur on both 5.1 and 7.1 surround sound systems with any audio player. If this issue occurs on your system, you will not get sound from your rear speakers. According to the affected users, this issue is generally associated with the Realtek sound card. However, other sound card users may also face this problem.

Sometimes, we experience several issues due to some minor problems. Therefore, before you proceed, we recommend you check the following things:
- Sometimes, we do not get any output from the speaker due to loose connections. Hence, check all the connections.
- Check whether or not you have the latest version of Windows 11/10.
If the issue persists, try the fixes that we have listed here.
Why is my Surround Sound not working?
This issue could occur if you have upgraded your version of Windows. There could be other reasons for this issue, like loose or damaged wires, incorrect speaker configuration settings, corrupted or outdated drivers, missing HD Audio Codecs, etc.
Channel Surround Sound is not working in Windows 11/10
The following solutions may help you get rid of this issue:
- Run Audio Troubleshooter.
- Download HD Audio Codecs for your device from your sound card manufacturer’s official website.
- Check the Configuration Settings for your Surround Sound speaker.
- Enable Speaker Fill.
- Update, reinstall, and roll back the audio drivers.
- Check your sound settings.
- Enable Mono audio.
- Restart Audio Services.
- Try different audio formats.
Let’s see all these fixes in detail.
1] Run Audio Troubleshooter
Microsoft has designed some automated troubleshooting tools that help users fix some common issues on their system. Run Audio Troubleshooter and see if it fixes the problem.
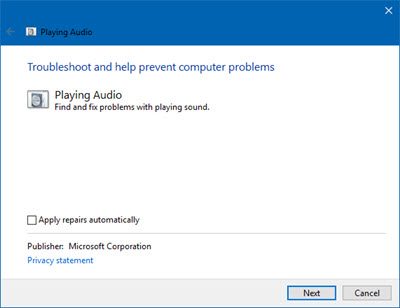
Follow the steps below to run this tool:
- Click on Windows Search and type Audio Troubleshooter. Click on the app from the list.
- Click Advanced and enable the checkbox that says Apply repairs automatically.
- Click Next and follow the on-screen instructions.
After the troubleshooting gets completed check if the issue is fixed. If not, try the next solutions.
2] Download HD Audio Codecs for your device from your sound card manufacturer’s official website
Visit your sound card manufacturer’s website and search for the HD Audio Codecs of your device. If the codes are available, download and install them on your system. This solution has fixed the issue for many users, maybe it will work for you too.
3] Check the Configuration Settings for your Surround Sound speaker
Make sure that your system is set up properly for the 5.1 or 7.1 Surround Sound speaker.
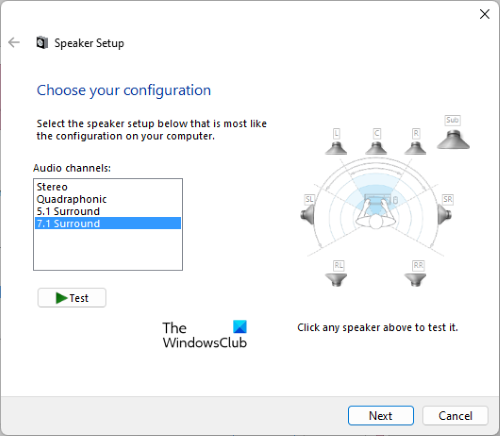
You can check or configure this setting by following the steps below:
- Launch the Run command box and type
mmsys.cpl. Click OK. - Under the Playback tab, select your speaker. Now, right-click on it and select Set as Default Device.
- Click on the Configure button.
- In the Speaker setup, select 5.1 or 7.1 Surround as per the type of speaker you are using. After that, click Next.
- Enable the checkboxes next to Center, Subwoofer and Side pair, and then click Next.
- Wait till the configuration gets completed. After that, click Finish to complete the setup.
4] Enable Speaker Fill
Enable the Speaker Fill option for your speaker and see if it resolves the issue. For your convenience, we have listed the steps below:
- Type
mmsys.cplin the Run command box and press Enter. - Under the Playback tab, right-click on your speaker and select Properties.
- Now, click on the Enhancements tab.
- Enable the Speaker Fill option.
If this option is not available in Speaker properties, you may find it in the Realtek Audio Console.
5] Update, reinstall, and roll back the audio drivers
One possible cause of this issue is corrupted or outdated audio drivers. We suggest you update, reinstall, and roll back the audio drivers and see if it helps.
You can also download & install the latest Audio drivers for your system.
6] Check your sound settings
Check if you have muted your audio devices accidentally or your audio devices are disabled. The following instructions will help you with that:
- Right-click on the speaker icon on the taskbar and select Open volume mixer.
- If the volume of any of your devices is muted, unmute it.
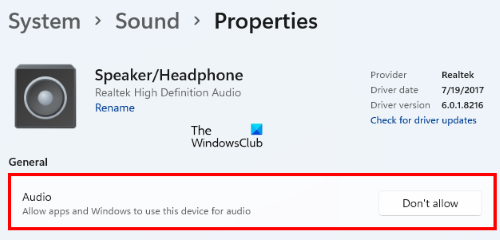
To check whether or not your audio device is disabled, go to “Settings > System > Sound > Properties.” Now, check if you have allowed other apps and Windows to use this device for audio.
Read: How to open old Sound settings panel in Windows 11.
7] Enable Mono audio
You may also experience this issue if the Mono audio is disabled. You can check this in Settings. If you find this option disabled, enable it and see if this makes any difference.
If you are a Windows 10 user, go to “Settings > Ease of Access > Audio.” Turn the switch next to the Mono audio option.
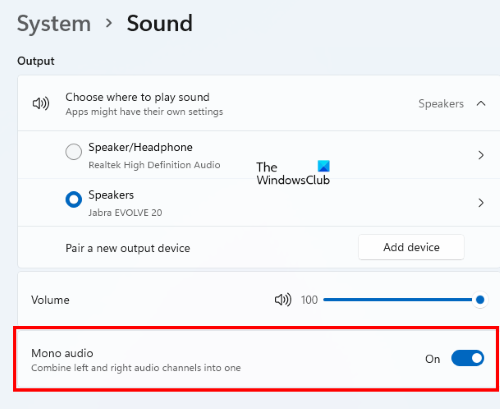
If you are a Windows 11 user, go to “Settings > System > Sound.” Turn on the Mono Audio switch.
8] Restart Audio Services
You can also try restarting Audio Services and check if it solves the issue. We have listed the instructions for this below:
1] Launch the Run command box by pressing Win + R hotkeys. Type services.msc and click OK.
2] In the Services app, right-click on each of the following services and select Restart.
- Windows Audio
- Windows Audio Endpoint Builder
- Remote Procedure Call (RPC)
Read: Headphone jack not working on laptop.
9] Try different audio formats
If restarting the audio services does not solve your issue, try different audio formats.
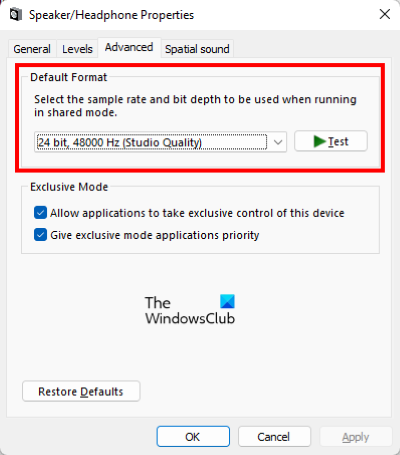
Follow the steps below:
- Launch Run command box and type
mmsys.cpl. Click OK. - Select your speaker from the list and click Properties.
- Go to the Advanced tab and change the audio format from the drop-down menu.
- Click Apply and then OK.
- Now, check if your speakers are working or not.
Similarly, you can try selecting different audio formats for your speaker.
How do I test my Surround Sound on Windows 11/10?
To test Surround Sound for your speakers on Windows 11/10, follow the steps below:

- Type
mmsys.cplin the Run command box and press Enter. - Select your speaker from the list and click Configure.
- Now, select 5.1 or 7.1 Surround (whichever option is available) in the Audio channels section.
- Click on the Test button.
After that, your computer will start testing each speaker one by one. Alternatively, you can also click on any speaker displayed in the diagram after clicking on the Test button. The speaker on which you click will play a sound. This will let you know that the speaker is working properly.
I hope this article helped you solve the issue.
Read next: