Sometimes we need to insert special characters and symbols into a document. Windows 11/10 comes with a built-in tool, Charmap or Character Map, using which you can insert any special character or symbol in your document. The users who know about this tool save time in searching for a special character or symbol on the internet. What if you require to create your own character or symbol? Is there any built-in tool for this? Yes. This tool is Eudcedit, a.k.a., Private Character Editor.
In this article, we will see how you can use Eudcedit and Charmap built-in tools of Windows 11/10.
Eudcedit creates special characters and symbols in Windows 11/10
If you want to create your own special characters and symbols, you can use the Eudcedit tool. Because this tool creates user-defined special characters, it is also known as Private Character Editor. Follow the below-listed steps to open the Eudcedit tool on Windows 11/10:
- Press “Windows + R” keys to open the Run dialog box.
- Type “Eudcedit” and press OK.
Alternatively, you can also open the tool by typing “Eudcedit” or “Private Character Editor” in the search box. When you launch the Eudcedit (Private Character Editor), you will see the interface shown in the below screenshot.
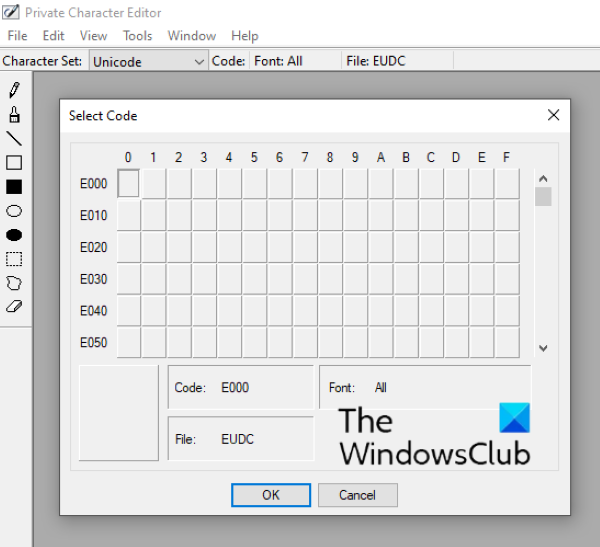
We will explain the process to create a custom special character or symbol using Eudcedit later in this article. But before that, you should know the features of this tool. You have to select a unique code before you start designing the special character. You can select any of the available cells to design a symbol or character. I have selected the cell that lies in the first row and first column. Its code is E000. When you click OK, you will get a grid workspace where you can design your own character or symbol.
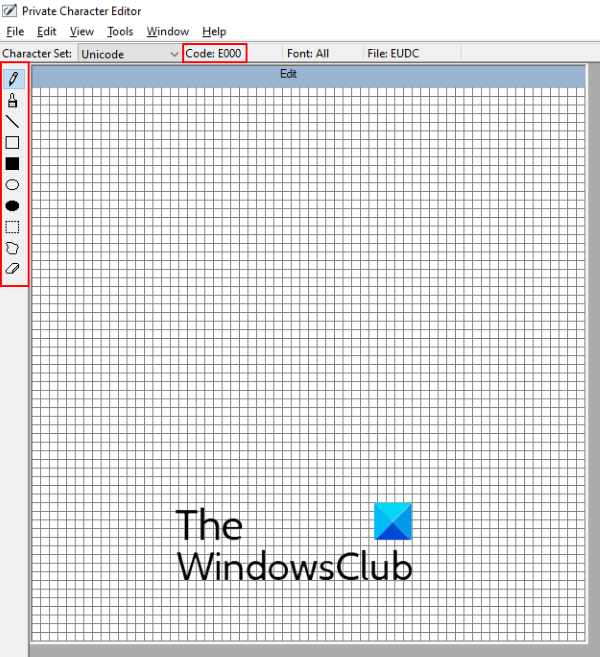
You can see in the above screenshot, the code is displayed below the Menu bar, and all the tools required to draw a character or symbol are available on the left side. Now, let’s see the function of these tools one by one:
- Pencil: The Pencil tool is selected by default. It fills one box on the grid at a time.
- Brush: This tool fills four boxes on the grid at a time.
- Straight Line: You can use this tool to draw horizontal, vertical, and inclined straight lines on the workspace.
- Hollow and Filled Rectangles: As the name implies, you can use these tools to draw hollow and filled rectangles respectively on the space.
- Hollow and Filled Ellipse: Using these tools, you can draw circles and ellipses in both hollow and filled patterns.
- Rectangular Selection: Using this tool, you can select a particular part of the character that you have drawn. After selection, you can move the selected area or delete it.
- Freeform Selection: While the Rectangular Selection tool lets you select only the rectangular part of the character you have drawn, the Freeform Selection tool lets you select any irregular shape.
- Eraser: You can use it to erase a particular part.
You can also access all the above-listed tools from “Tools > Item.” The cut, copy, and paste options are available in the Edit menu. You can toggle the grid view in the View menu.
How to use Educedit in Windows 11/10
Let’s see the process of creating custom characters and symbols using the Private Character Editor on Windows 11/10. The tool offers you to create custom characters or symbols in the following two modes:
- Creating a new custom character without using the pre-existing character.
- Creating a new custom character by using a pre-existing character.
1] Creating a new custom character from scratch in Educedit
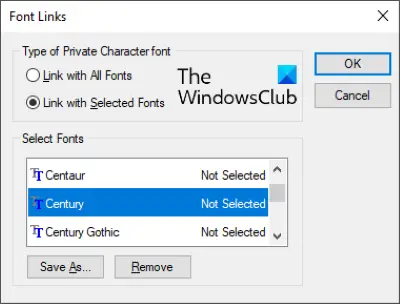
Follow the method explained above in this article to get a grid workspace for drawing a custom character. By default, the sheet is linked with all Fonts on your system. This means that the character you create will be available in all the Fonts after you save it. If you want to make your custom character available for a particular font, you have to change this setting. For this, go to “File > Font Links.”
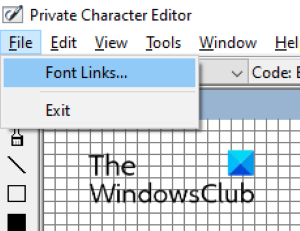
A new window will appear on the screen. Select a font from the list and click on Save As. Give a custom name to your font and click on the Save button, and finally click OK to close the Font Links window.
Now you are ready to design your own character or symbol. Use the tools available on the left side of the app and create a new character or symbol. When you are done, go to “Edit > Save Character” or simply press the Ctrl + S keys on your keyboard. Windows saves all the newly designed characters under the name Private Characters.
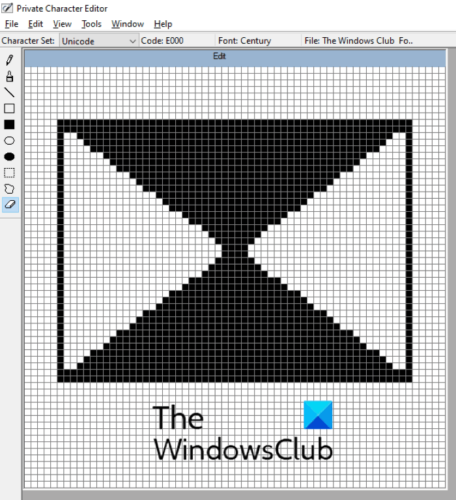
Now, close the Private Character Editor and open the Charmap application. You will find your custom character in the linked font under the name “Private Characters.” For example, I have linked my custom character to Century font. Hence, my custom character will be available in Century (Private Characters).

2] Creating a new custom character using a pre-existing character
Let’s see how to create a new custom character or symbol from a pre-existing character in the Eudcedit tool. For this, you have to insert a character into the workspace. Go to “Edit > Copy Character.”
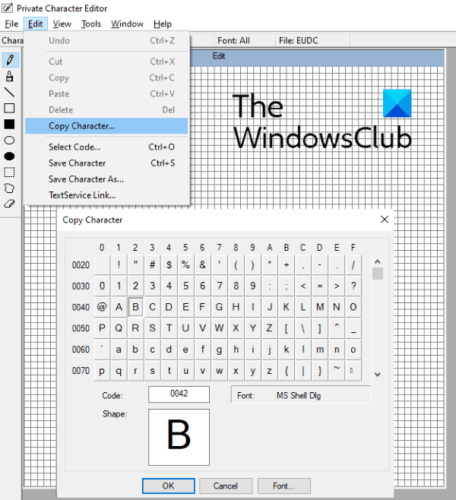
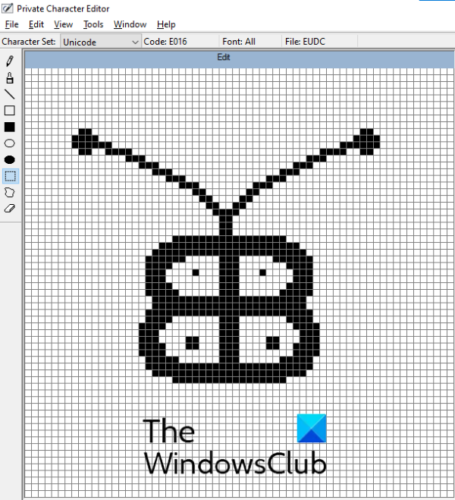
Now, use the tools to edit the inserted character and when you are done, save it by pressing the Ctrl + S keys.
Charmap lets you insert special characters and symbols into a document
Charmap is a Windows 11/10 built-in app that contains many special characters and symbols. Many of you are aware of it. Using this app, you can copy any special character or symbol, say pie, degree, lambda, etc., to the clipboard and paste it into a document or any other compatible program. The search option is also available in the Charmap application that lets you find a particular character or symbol.
This post talks about in detail how to insert special characters using Charmap and other Windows tools. – but we are touching in brief what it does.
If you know the Unicode of a particular character, you can directly insert it into a document without opening the Charmap. Unicode is a universal character encoding standard. This standard is used to define a unique number or code for every character. Follow these steps to open Charmap on Windows 11/10:
- Press “Windows + R” to open the Run dialog box.
- Type “Charmap” and click OK.
After opening it, simply select a character and copy it to the clipboard.
Related posts that are sure to interest you