This post shows you how to check the current BIOS version in a Windows 11/10/8/7 computer, using Windows Registry, WMI Command, System Information Tool (MSINFO32.exe) or DirectX Diagnostic Tool (DXDiag). BIOS stands for Basic Input/Output System and is a type of firmware that is built into the hardware, used during and for the booting process of a computer.
Read: Check if your PC uses UEFI or BIOS.
Check BIOS version in Windows 11
You may need to check your BIOS version if you plan to update the BIOS. Of course, whether you want to do it or whether you should do it is another question. Anyway, there are several ways you can do this. Lets us have a look at them.
1] Using WMI Commands

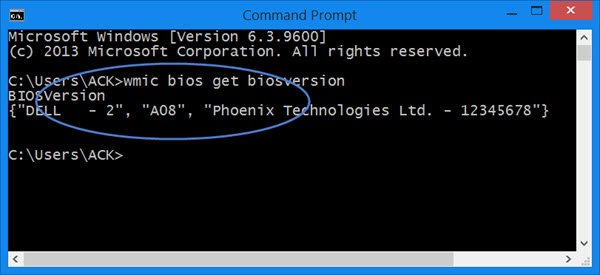
You can use Windows Management Instrumentation to find out the details of your BIOS. To do so, open an elevated command prompt windows, type the following and hit Enter:
wmic bios get biosversion
2] Using MSINFO32

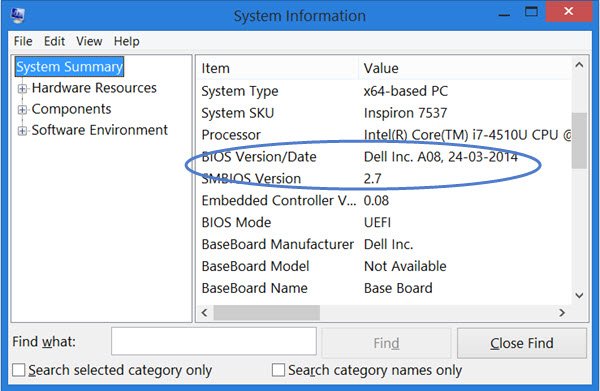
The built-in MSINFO32 or System Information Tool displays this information under System Summary. To open this tool, Run msinfo32 and hit Enter.
3] Using Registry Editor
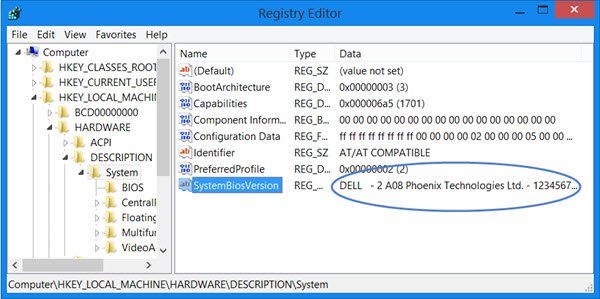
When Windows loads, it stores the BIOS information and other details under the following registry key:
HKEY_LOCAL_MACHINE\HARDWARE\DESCRIPTION\System

Here you will see the details under System. You will also see additional details under SystemBiosDate, SystemBiosVersion, VideoBiosDate and VideoBiosVersion subkeys.
To see the BIOS version Run regedit and navigate to the mentioned registry key.
4] Using DXDiag

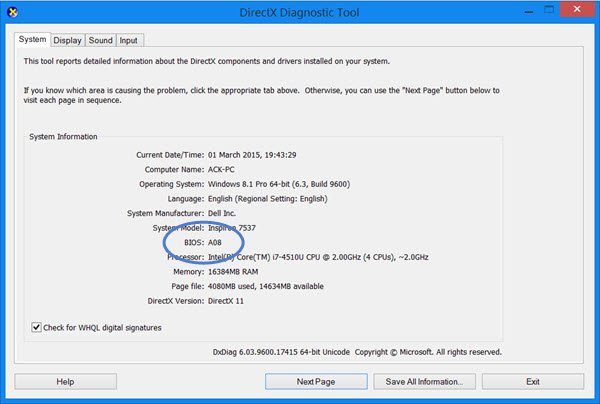
DirectX Diagnostic Tool or DXDiag.exe is basically meant to help you troubleshoot DirectX issues. But if you Run dxdiag to open it, you will see the BIOS version mentioned under the System tab.
Of course, apart from this, you can also use some 3rd-party system information tool like Speccy to see your BIOS version or see it when you enter your machine’s BIOS setup by pressing F10/F12 keys during boot-time.
Check this post if you want to find out Computer RAM, Graphics Card / Video memory of your Windows PC.
Its Awesome Tricks to check bios version.
Secretly Copy files From USB to Computer
Why is videobiosversion missing?