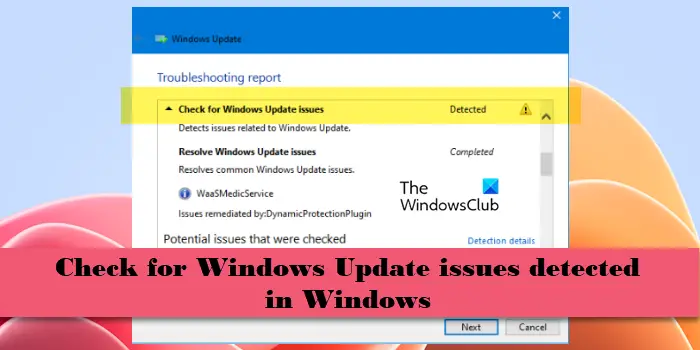
If you encounter the error message Check for Windows Update issues, Detected on your Windows 11/10 PC while running the Windows Update Troubleshooter, read this post to know how to fix the issue.

The Windows Update Troubleshooter usually attempts to check for and resolve issues it finds during a scan. However, in some cases, the troubleshooter cannot check or resolve them due to their complexity. If you see this message and can’t update your device to a specific OS build or version, you must troubleshoot the issue manually.
Check for Windows Update issues Detected in Windows 11/10
If you see the error message Check for Windows Update issues – Detected in Windows Update Troubleshooter, on Windows 11/10, take these steps to resolve the issue:
- Preliminary suggestions
- Reset Windows Update components
- Repair corrupted Windows Update system files using DISM
- Configure Group Policy settings for automatic updates
- Manually install the update
Let us see them in detail.
1] Preliminary suggestions
- If you’re trying to upgrade a 64-bit OS, make sure your device has at least 20 GB of free space (or 16 GB for a 32-bit OS). Restart your PC to finish installing current updates (if any) and again check for updates in Settings.
- Try to run the updates after disconnecting any external storage devices or drives. If you’ve added hardware to your device, try to run updates again after updating the necessary drivers.
- Also, try to install the updates using an administrator account, as some updates require administrator access.
2] Reset Windows Update components
You will have to manually reset each Windows Update component to default and see if it works. You need to take to reset Windows Update Components to defaults in Windows 11/10:
- Stop Windows Update Services
- Delete the qmgr*.dat files.
- Flush the SoftwareDistribution and catroot2 folders
- Reset the BITS service and the Windows Update service to the default security descriptor
- Re-register the BITS files and the Windows Update related DLL files
- Delete incorrect Registry values
- Reset Winsock
- Restart Windows Update Services.

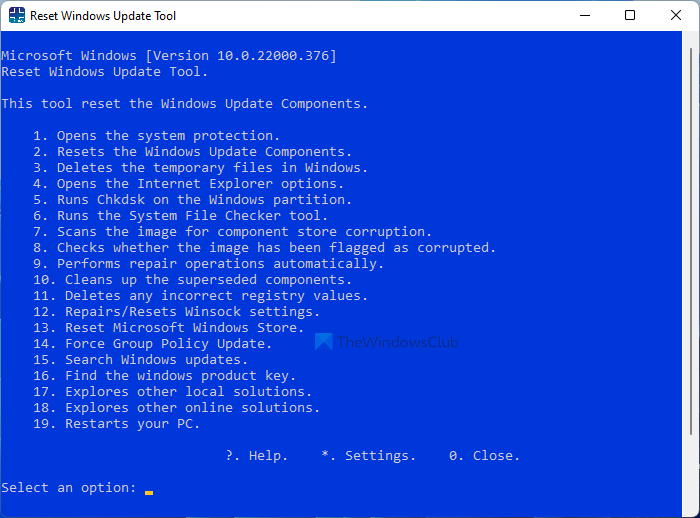
Alternatively, you can use this PowerShell Script to reset Windows Update Client or this third-party Reset Windows Update Tool to restore settings & components to default automatically.
3] Repair corrupted Windows Update system files using DISM
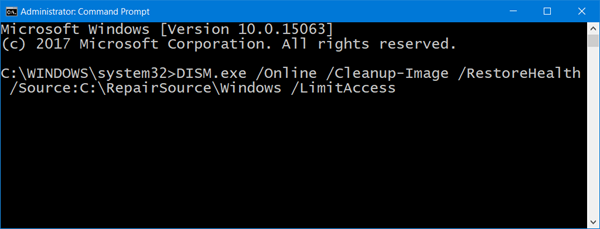
Run DISM and see if it helps. If it does not help, your Windows Update client may be broken. In this case, you will be prompted to use a running Windows installation as the repair source or use a Windows side-by-side folder from a network share, as the source of the files.
You will then be required to run the following command instead:
DISM.exe /Online /Cleanup-Image /RestoreHealth /Source:C:\RepairSource\Windows /LimitAccess

Here you have to replace the C:\RepairSource\Windows placeholder with the location of your repair source.
Once the process is complete, DISM will create a log file in %windir%/Logs/CBS/CBS.log and capture any issues that the tool finds or fixes.
Close the command prompt, and then run Windows Update again and see it has helped..
4] Configure Group Policy settings for automatic updates

Press Win+R and type ‘gpedit.msc‘ in the Run dialogue. Press Enter and select Yes in the User Account Control prompt.
Within the Local Group Policy Editor windows, navigate to Computer Configuration > Administrative Templates > Windows Components > Windows Update.
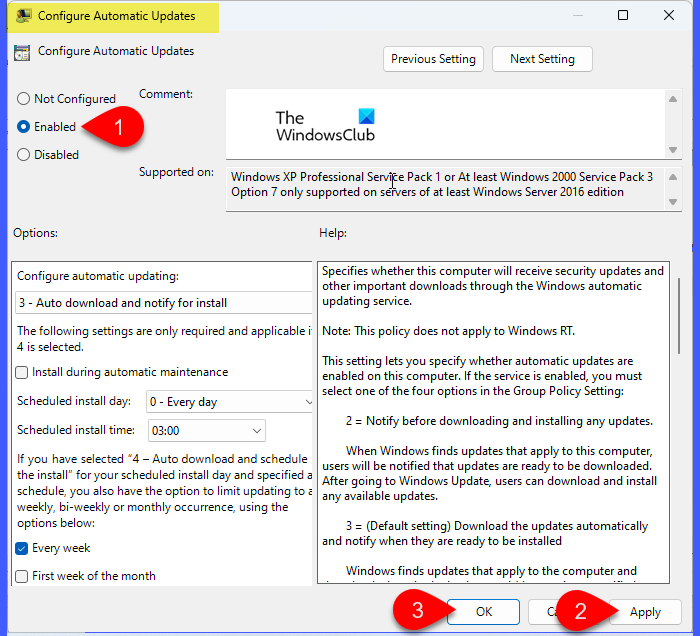
Double-click on Configure Automatic Updates (you may find the entry under the ‘Manage end user experience’ folder).
In the ‘Configure Automatic Updates‘ settings window, select the Enabled option in the upper-left corner. Click Apply and then OK to apply the settings. Exit the Group Policy Editor.
Now restart your PC and try to install the update. If the Windows update still fails to install on your Windows 11/10 PC, follow the next troubleshooting step.
5] Manually install the update

If nothing seems to work, you can try installing the update from the Microsoft Update Catalogue.
Note down the KB number of the update you’re trying to install. You might find it logged under the Update history section (Start > Settings > Windows Update > Update history).
Next, go to the Microsoft Update Catalog website. Enter the KB number of the update in the search box in the top-right corner and click the Search button. A list of available updates will appear. Click Download next to the required update to download its standalone installer.
Next, double-click the downloaded file to run the installer and follow the on-screen instructions to install the update on your Windows 11/10 PC.
Once the update is installed, restart your computer to apply the changes. This should hopefully fix the ‘Check for Windows Update issues, Detected!‘ issue in Windows Update troubleshooter.
Read: Windows Update stuck on Checking for Updates
How do I fix Windows 11 update error encountered?
To fix Windows 11 update errors, run the built-in Windows Update Troubleshooter tool. Select Start > Settings > System > Troubleshoot > Other troubleshooters. Then click Run next to Windows Update under the Most frequent section. Sometimes, security software can interfere with updates. Temporarily disable these software and try updating again. Also, make sure you have enough free space on your system. Windows Update requires space to download and install updates.
Read Next: Windows Update Troubleshooter not working.
Leave a Reply