It’s easy to create a more professional scene by using a different logo for your team in Microsoft Teams. You can customize your team picture either by adding an avatar or uploading your own image. It will then automatically show up any time you create a Teams meeting invitation. Let’s check out the method to do it!
Change the Team Picture in Microsoft Teams
The Teams profile picture or avatar you choose for the team will appear next to your team name.
- Launch your Microsoft Teams app.
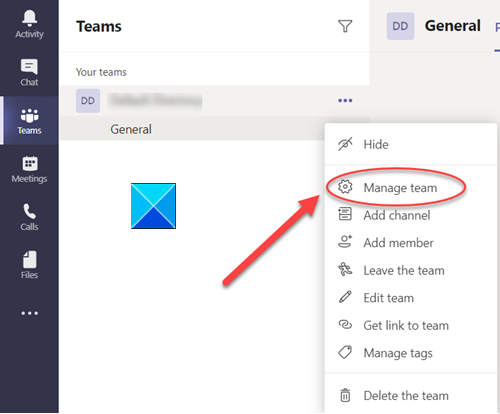
- Navigate to a team and click More options.
- Select Manage team
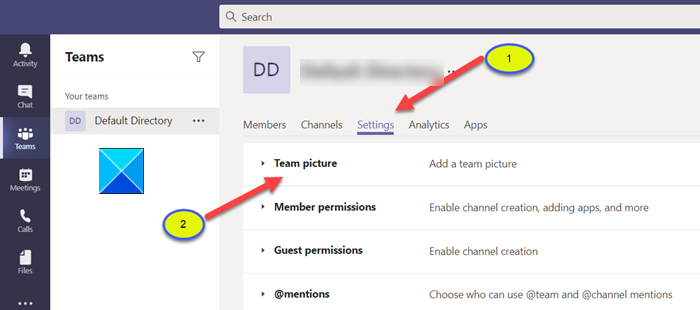
- Switch to the Settings
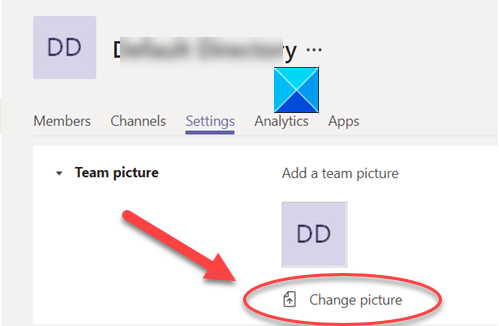
- Choose Change picture
- Select an avatar or choose the Upload picture
- Hit the Update
Please note that you must be a team owner to change the team picture. If you’re a team member, you’ll be able to see some of these things, but you won’t be able to make too many changes. Also, make sure you have the latest version of Teams. Then, proceed as follows!
Launch your Microsoft Teams app by entering login details.
Next, navigate to a team and click More options (visible as 3 horizontal dots).

From the list of options displayed, choose the Manage team option.

Now, switch to the Settings tab as shown in the image above and click Team Picture to expand its menu.

Select the Change picture link.

Choose an avatar or click the Upload picture option. To choose an image from your own files Use the dropdowns to filter by grade level and subject if you’re in a class team. However, note that only class teams allow you to filter by grade level and subject.
If you’ve uploaded the desired picture, just hit the Update button located at the bottom to save your new team picture. You’ll notice, you’ve successfully set a different logo for your team in Microsoft Teams.
Hope it helps!
Read: How to install Microsoft Teams on Linux and macOS.
Leave a Reply