One of the most interesting new features of Windows 11/10 is the option to choose a GPU for apps to improve their performance and save battery in the long term. Many computers have two GPUs installed on their motherboard. One could have been onboard, while the other can be separately installed. If your configuration allows you to use them separately, you should give this feature a try. Using this method, you can increase Graphics performance for specific apps or software.
Choose different GPU for different Apps in Windows 11/10
The first thing you should do is identify apps that need a better GPU. These could be heavy games, video/image editing software, or anything else that requires more processing power.
Once your list is ready, go to Settings > Display > and scroll to the end. Look for a link that says Graphics Settings. Open it.
This section puts up a mention which says that you can customize graphics performance for specific applications. Preferences may profile better app performance or save battery life. Once you change, you will need to close the app and launch it again.’Related read: How to reset GPU Preferences for Apps to Default.
Increase Graphics performance for specific apps
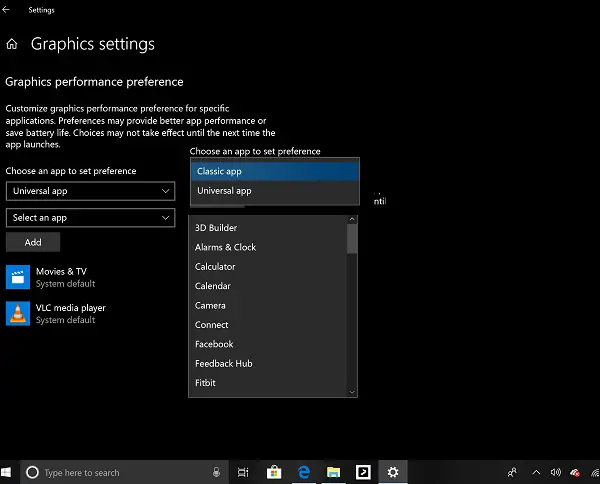
The first drop-down offers you to select a Classic app or a UWP Apps. If you select the classic app, you will need to manually browse and select the EXE file of that application. If you choose UWP app, you will be offered a list of installed apps on your PC.
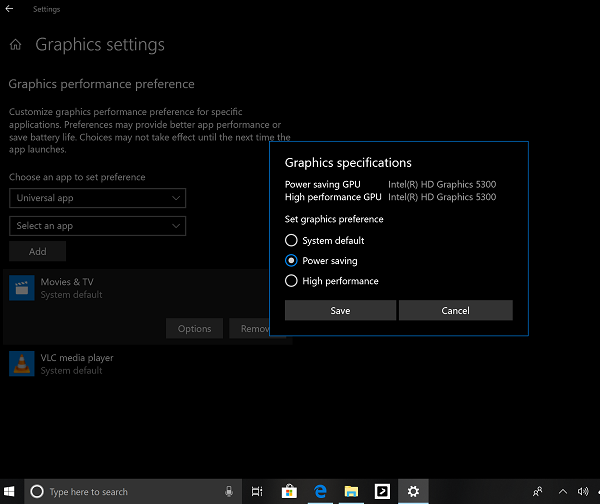
Once you have populated the list, select the app in which you want to customize the graphics performance, and then select Options. The next window will list down the graphics card according to performance. You should Power Saving GPU and High-performance GPU with their name.
Choose between the following three:
- System default,
- Power saving,
- High performance.
Then save it.
Allow users to specify a default high-performance GPU or pick a specific GPU on a per-application basis
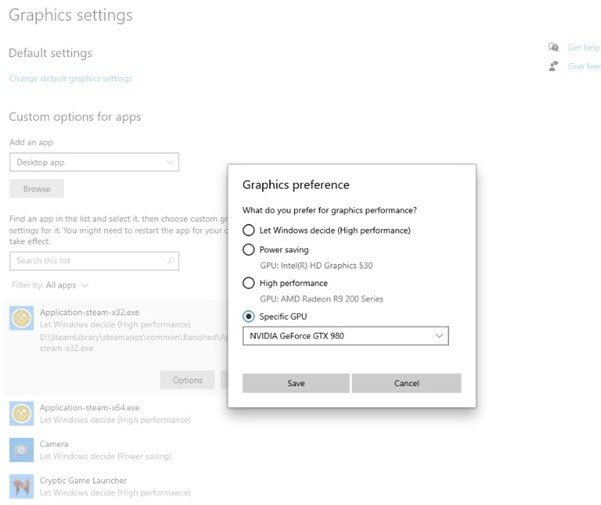
Microsoft has updated the Graphics Settings to allow users to specify a default high-performance GPU. You can pick a specific GPU in Windows 10 as shown above, on a per-application basis.
How to set Graphics Preference for programs in Windows 11
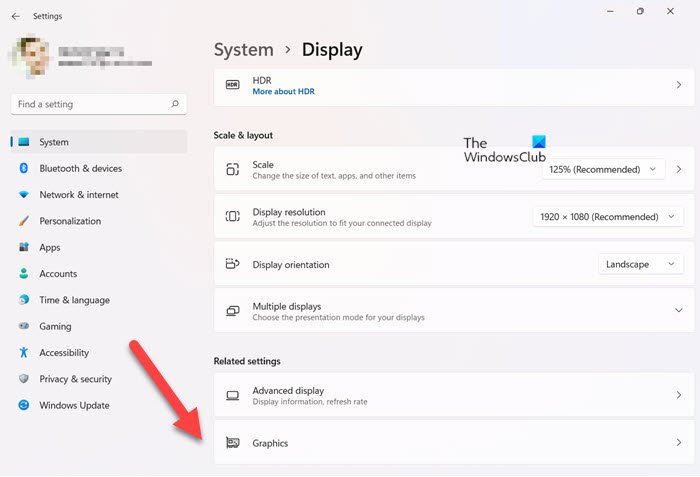
In Windows 11, the settings appear like this: Open Settings > System > Display > Graphics.

Locate the app and click on Options.
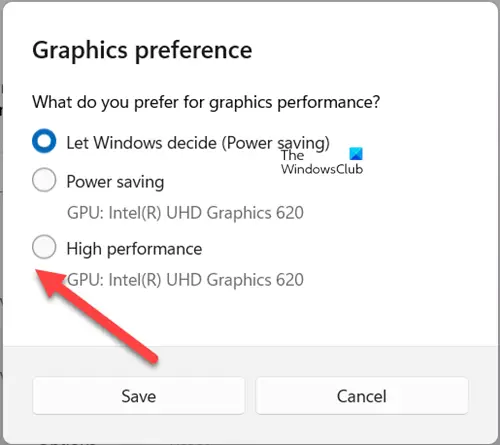
You can set your Graphics performance in the panel that opens.
When the Graphics preference window opens, choose an option you prefer for graphics performance. Three options are displayed namely,
- Let Windows decide (Power saving).
- Power saving.
- High performance.
When done, hit the Save button and exit the settings.
If your PC has multiple high-performance GPUs and would like to specify which of those GPUs should be the one used for high-performance uses cases, you can now do that.
They have also added the ability for you to specify exactly which GPU you want an app to run on using the new “Specific GPU” option.
While Windows manages everything on its own, but it is great to have this option available for the user to manage. In case you have an application that is heavy and uses GPU, you can force assign it to use a power-saving GPU to save battery. You can mark this tip under Battery saving tips for your laptop.
This will also help to reduce the burden on your primary onboard GPU, and doing two tasks, one medium, and one heavy would be easier.
To remove an app, select it and click the Remove button. It will not ask for confirmation, so be careful.
How much GPU usage is normal?
There’s no such threshold limit, so even 100% GPU usage is considered normal. However, it means you’re using your hardware to its full extent and not leaving any performance on the table. Instances such as these usually occur during graphics-intensive gaming.
How do I make my computer graphics better?
The most preferred way is to increase FPS or Frame Per Second on your PC. This can be done by updating graphic and video drivers, optimizing in-game settings, or investing in FPS booster software.