With Chrome Remote Desktop, you can stream your Windows PC over the internet to your Chromebook, MacBook, Linux device, or other phone or tablet. This will then give you remote access to access Office or your other apps from your Windows 11/10 PC. In this post, we will show you how to stream Windows 11/10 to Chromebook and other non-Windows devices using Chrome Remote Desktop.
Chrome Remote Desktop is a remote desktop software tool developed by Google that allows a user to remotely control another computer through a proprietary protocol developed by Google unofficially called “Chromoting”.

Stream Windows to Chromebook, MacBook, Linux devices
To stream Windows 11/10 to Chromebook, MacBook, Linux device, follow the 4-step process outlined below in that order.
- Install the extension
- Launch Chrome Remote Desktop
- Set up your Windows PC for remote access
- Head to the Chromebook or device you want to stream Windows 11/10 on
Let’s see the detailed description in relation to each of the steps involved.
Chrome Remote Desktop isn’t a native on-device solution to getting Office and Windows applications on your Chromebook. You’re just using the internet to stream Windows programs to a Chromebook or any other non-Windows device. The performance will vary based on the speed of your internet and your Wi-Fi performance. It’s also best when you’re connected to the same network, too, though you can use a different network if you want to.
1] Install the Chrome Remote Desktop extension
To get started, you’ll want to turn on your Windows 11/10 PC and download and install the Chrome Remote Desktop extension for Google Chrome or Microsoft Edge.
To install the extension, open Edge or Chrome and visit the listing on the Chrome Web Store. Once there, click the blue Add to Chrome button. You’ll then want to click the Add Extension pop-up that appears to confirm adding it.
You’ve successfully completed the first step!
2] Launch Chrome Remote Desktop
In step 2, you’ll have to click the newly added extension in Chrome or Edge, that appear on the top bar near your profile icon. The Chrome Remote Desktop icon is of two squares, one of which has a Chrome logo.
Once you click the extension icon, you’ll be launched into Chrome Remote Desktop webpage.
If you’re using Microsoft Edge, you’ll get the following message-
Chrome Remote Desktop needs the latest web features for the best experience.
You can ignore this message. If you’re using Chrome, you won’t see this. In Edge, you can dismiss it by clicking Continue Anyway.
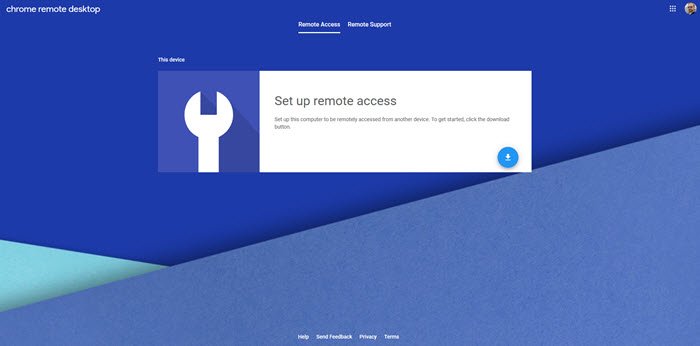
From there, you’ll see a message telling you that you’ll need to set up remote access. To get started with it, click the Download button. This will download a MSI file to your host PC which you’ll then need to double click to launch. When launched, click Run on the installer prompt, click Yes on the UAC prompt. After that, a special host will be installed on your Windows PC in the background.
You’ve successfully completed the second step!
3] Set up your Windows 11/10 PC for remote access

In step 3, you can now proceed to set up your Windows 11/10 PC for remote access. Do the following:
Navigate back to the Chrome Remote Desktop website and click Accept and Install button. If prompted whether you want Chrome or Edge to open the download, click Yes. This will run through the set-up prompt. Follow the instructions on the screen.
When that’s done, you’ll then want to give your PC a name. For the purposes of this post, we’re naming our remote desktop as TheWindowsClub.
Next, input a 6-digit PIN, for your security. Make sure to remember this PIN, as if you forget it, you’ll have to delete and add your PC again. Once the PIN is entered, you can click Start. You also might need to click Yes on the UAC prompt in Windows 10.
You’ll now see your device name appear as Online.
You’ve successfully completed the third step; you can proceed with the fourth and last step but before you do, you might want to change your screen resolution settings to match the device you’re streaming to. This will ensure it will fill up the entire screen (and not be scaled wrong.)
4] Head to the device you want to stream Windows 11/10 on
Finally, you’ll want to open the device where you want to stream your Windows 11/10 PC on. From this device, open Chrome (or any other web browser, if you’re not on a Chromebook), you’ll then want to go to the Chrome Remote Desktop website.
Once in the web browser, you should see your device appear under Remote Devices. If all went well, you should see it appear Green, to show it as online. Click that green icon to connect, and then enter in your PIN. Your Windows 10 screen will then be shared over to the remote PC.
To make this remote session full screen, click the blue arrow which is showing to the right of the screen. Then choose Full Screen. This will make your device seem as if it is running Windows natively!
You can now open every single app that you have on your Windows PC, from your Chromebook. When you’re ready to stop sharing, click the arrow once again, and choose Disconnect.
That’s it on how to Stream Windows 11/10 to Chromebook, MacBook, Linux device!
There is also a mobile, app, too. If you’re on a tablet or phone, you can download the Chrome Remote Desktop app for iOS and Android. Once downloaded, sign in with your Google account, then tap the device you want to connect too. Enter the PIN, and then click the blue arrow to connect. You’ll then be taken into the remote desktop session. To end, tap the hamburger menu, choose Disconnect.
Read: Remotely access another computer using Chrome Remote Desktop.
Leave a Reply