Chromecast is one of the popular components of TVs nowadays. It is manufactured by Google and is used to play media from our other devices like Android phones to our TVs wirelessly. And it is not just casting the screen of a device; it is all about running a miniature version of the app on the TV using that Chromecast and then play that media in a full-featured player that can even be controlled by the device you are playing it from. This makes it a really good option to work in the living room where the whole family or the group are consuming digital content together.
However, this is not the exact way Windows computers work with Chromecast. If you have a computer running Windows, it can only play content on other displays with a Chromecast attached using Google Chrome. However, people also use Chromecast to Mirror their display on the big screen. But many times, even this functionality does not work as the Chromecast does not show up on the Windows computer. We will talk more about this today.
How to cast display from Windows PC to Chromecast
For this, you have to do nothing much. Just click on the Action Center icon on the right bottom part of the screen on the taskbar to reveal the taskbar or just hit the WINKEY + A button combination on the keyboard.
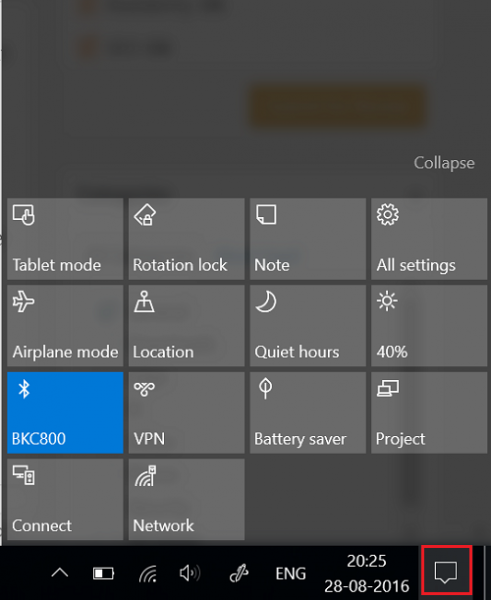
Now click on Expand located on the top portion of the quick toggles. Finally, click on Connect.
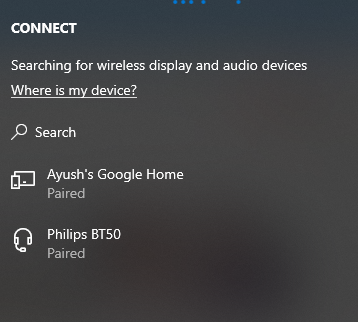
Now, you can just see your Chromecast in the list. Click on it to start projecting your screen via the Chromecast on the bigger display.
Chromecast not showing up on computer
First of all, make sure that your Windows computer and the Chromecast are connected to the same WiFi network and are turned on properly.
Now, we will start troubleshooting it.
1] Turn on Network Sharing
Use the Cortana search box and type in Network Status. And from the list of results, click on Network Status to open the appropriate page.
Now, click on Network and Sharing Centre. You will find it in the bottom right part.
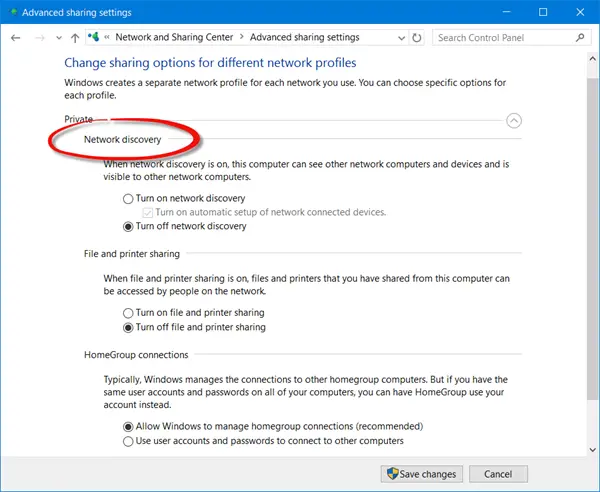
Then, click on Change advanced sharing settings.
Now, for your current profile, make sure that Network Discovery and File and Printer Sharing is turned on.
Click on Save Changes.
2] Update network card driver
You will have to update your network card drivers.
This can be done by going into the Device Manager and updating driver for Network Adapters.
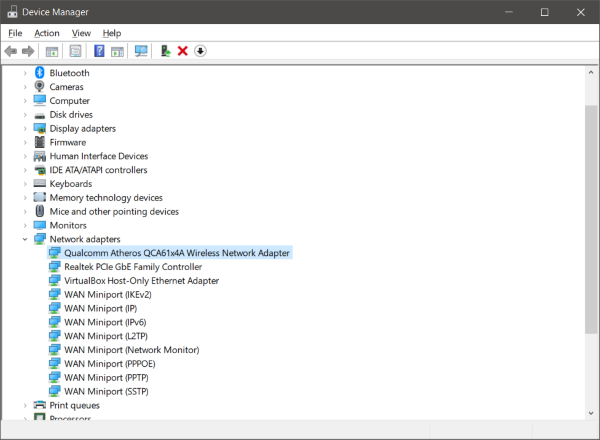
Reboot your computer for the changes to take effect.
3] Reset Stream Permissions
This is going to be a bit long.
Here, type in Windows Media Player in the Cortana search box. Then click on the appropriate entry to open the Windows Media Player.
Now, click on Stream and then click on Allow Internet access to home media…
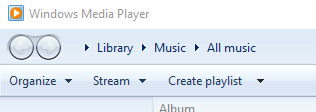
In the next step, you will get a small mini window, inside it, click on Allow Internet access to home media.
You will get a message saying, “You have successfully allowed Internet access to home media”. There, click on OK.
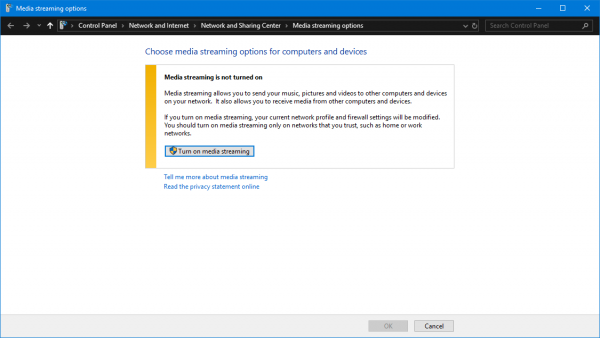
Then, click on Stream again and then click on Turn on media streaming…
In the windows that you see, click on Turn on media streaming and click on OK.
Now, in the list of your Devices, make sure that you are viewing them on the Local Network and click on Allow All.
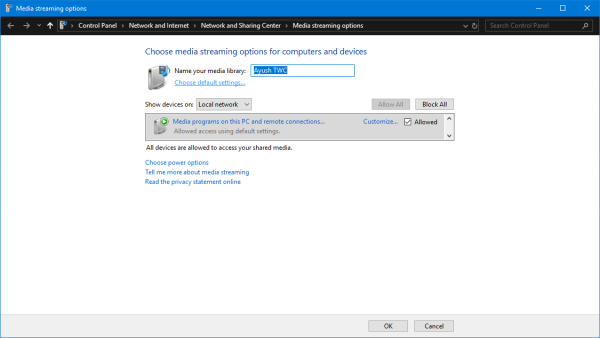
Click on OK. Again, click on Stream and make sure that the option labeled as Automatically allow devices to play my media is ticked. CloseWindows Media Player.
If you need more suggestions, you can check our guide on fixing Media Streaming not working.
Let us know if your issue is fixed or not.