These post feature solutions to fix the Click-to-Run error (12) when installing Microsoft Office. This error typically indicates a problem with the installation process. Fortunately, you can follow some simple suggestions to fix it.
Fix Click-to-Run error (12) when installing Microsoft Office
To fix the Click-to-Run (12) error while Office installation, verify the REGDBVersion and clb or see if COM+ is enabled in the registry editor. If that doesn’t help, follow these suggestions:
- Exclude the COM+ app in Windows Defender
- Verify the REGDBVersion and clb File
- Clear Temporary Windows Files
- Check COM+ Enabled Setting
- Install Office in Clean Boot Mode
Let’s now see these in detail.
1] Exclude the COM+ app in Windows Defender
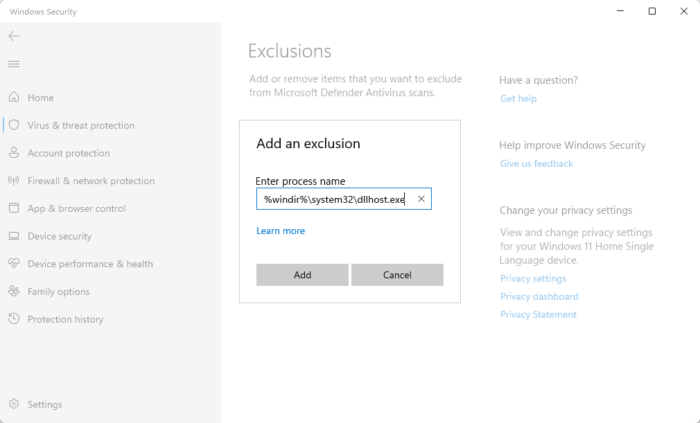
The COM+ app registration can fail due to interruptions with Windows Defender and cause Click-to-Run error (12) when installing Microsoft Office. Excluding the app in Windows Defender Firewall can help fix the error. Here’s how:
- Press Windows + I to open Settings.
- Navigate to Privacy & Security > Windows Security > Virus and threat protection.
- Here, click on Manage settings below Virus & threat protection.
- On the next page, click Add or remove exclusions under Exclusions.
- Click on Add an exclusion and add %windir%\system32\dllhost.exe to the list of allowed programs.
- Restart your device once done, and try installing Office again.
Read: How to repair, update, uninstall Microsoft Office Click-to-Run
2] Verify the REGDBVersion and clb File
Next, try verifying the REGDBVersion and clb File. Doing so will ensure the COM+ registration database and the associated clb file are consistent and in sync. Here’s how:
- Click Start, type regedit, and hit Enter.
- Once the Registry Editor opens, navigate to the following path:
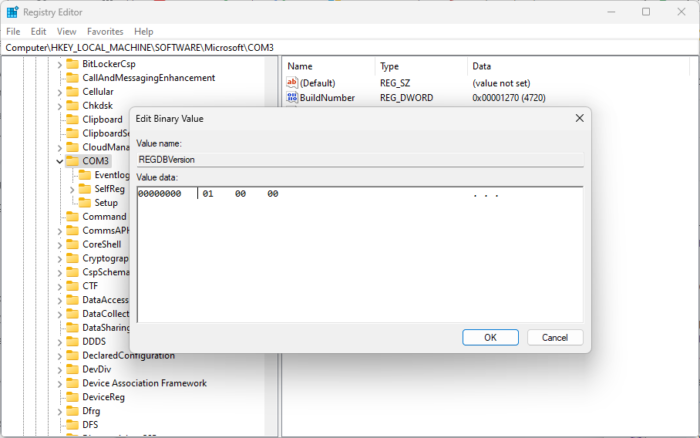
HKEY_LOCAL_MACHINE\SOFTWARE\Microsoft\COM3
- Right-click on the REGDBVersion value and note it.
- Next, press Windows + R to open Run, type %windir%\Registration, and hit Enter.
- Here, locate the clb file and check its version.
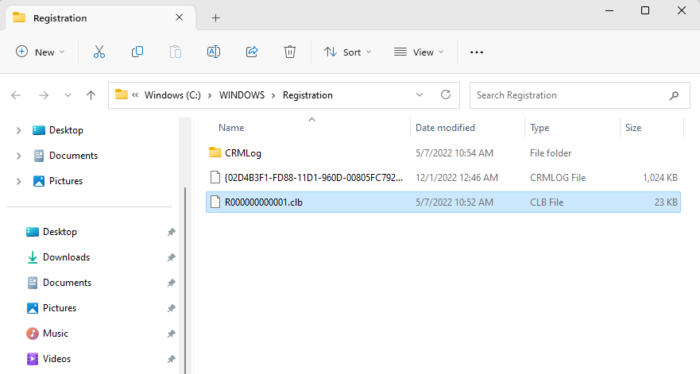
- Now compare both these versions and make sure they’re the same. However, if they aren’t, continue with the next method.
3] Check COM+ Enabled Setting
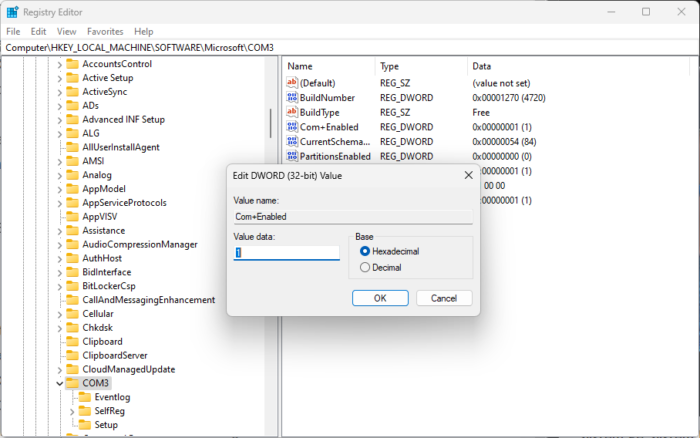
The Click-to-Run error (12) during Office installation can occur if COM+ is disabled in the Registry Editor. If that’s the case, enable it and see if the error’s fixed. Here’s how:
- Click Start, type regedit, and hit Enter.
- Once the Registry Editor opens, navigate to the following path:
HKEY_LOCAL_MACHINE\SOFTWARE\Microsoft\COM3
- Here, search for the COM+ Enabled entry, right-click on it, and check its value.
- If the value is 0, change it to 1 to enable COM+.
- Click on Ok to save the changes.
Read: Office Click-To-Run (OfficeC2Rclient.exe) High CPU usage
4] Clear Temporary Windows Files
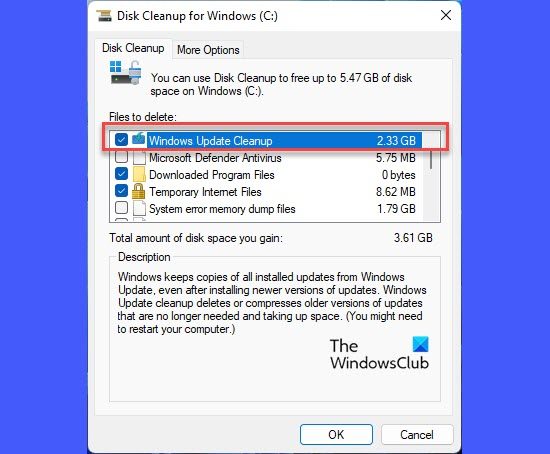
Windows creates temporary files to store information temporarily. These files serve no purpose and should be deleted timely, or they can cause errors. Here is how you can delete temporary files in Windows.
Read: MSI vs Click To Run Office installations
5] Install Office in Clean Boot Mode
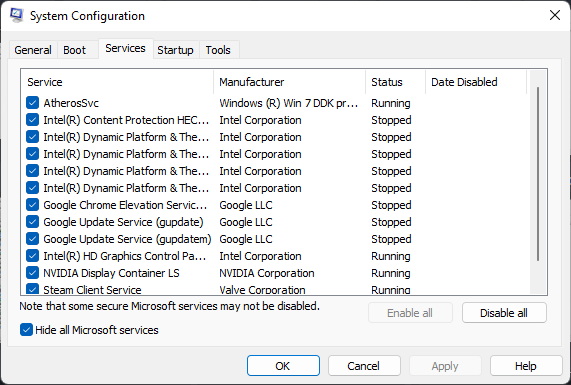
If none of these suggestions helped you, try installing Office in Clean Boot mode. Interruptions due to other applications can be why the Click-to-Run error (12) occurs. Performing a clean boot will boot your device with minimal drivers and startup programs.
I hope this helps.
Read: Office Click-to-Run Extensibility Component Error
What is the Microsoft Office Click-to-Run?
Microsoft Office Click-to-Run is a technology by Microsoft used for installing and updating Office applications. It offers a streamlined and efficient installation process, allowing users to access and use Office products quickly.
How do I activate Microsoft Office installation?
If you’ve bought a new Microsoft Product, then to activate Office, navigate to Office.com/setup or Microsoft365.com/setup and follow the on-screen prompts. Doing so will add your newly purchased product to your Microsoft account.
Leave a Reply