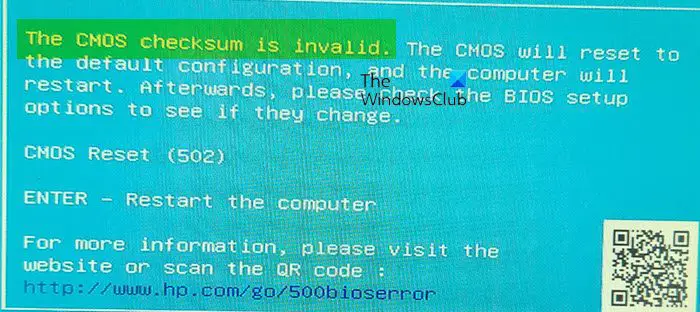
After turning on your laptop or desktop, if you encounter the “The CMOS checksum is invalid” error, this article will help you resolve the issue. The CMOS checksum errors or issues usually occur when a conflict happens between a CMOS and BIOS. There are many causes of these problems, like a dead CMOS battery, a corrupted or damaged BIOS, corrupted CMOS data, etc.
The complete error message is as follows:
The CMOS checksum is invalid, The CMOS will reset to the default configuration, and the computer will restart CMOS Reset (502)

CMOS stands for Complementary Metal Oxide Semiconductor. It is a chip embedded in the motherboard, and it stores the BIOS settings. The CMOS chip requires a continuous power supply even when your computer is turned off. It gets this power supply from the CMOS battery. When you turn on your computer, BIOS reads its last saved settings from CMOS before booting Windows.
Fix The CMOS checksum is invalid, Reset (502) error on HP computers
When you start your system, first, it performs the checksum test of the BIOS. If the checksum test is incorrect, it is assumed that the BIOS is corrupt and the hidden copy of the BIOS is installed. In this case, the HP computer displays the above error message for 15 seconds after which the startup process continues automatically. If you do not want to wait for 15 seconds, you can restart your system by hitting the Enter key.
Use the following fixes to resolve the “The CMOS checksum is invalid” error on HP computers.
- Reset or clear the CMOS
- Replace the CMOS battery
- Perform an Automatic Repair
- Recover your BIOS
- Take your device for repairs
Before you begin, press the Enter key to restart your computer and see if it makes the problem go away.
1] Reset or clear the CMOS
As stated above, the issue can occur if the CMOS data is corrupted. In such a case, resetting the CMOS helps. This step is also called clearing the CMOS. The steps to reset or clear CMOS are different for different HP computer models. Therefore, you have to visit the official website of HP and enter your product model number, and then follow the instructions provided there.
If you cannot find the steps to reset CMOS for your laptop or desktop, you can follow the generic steps. Go through the following instructions:
- Turn off your system. If it is a laptop, remove the charger (if connected). If it is a desktop, remove the power cord from the wall socket as well as from your computer.
- Press the power button to discharge the electricity from your system completely.
- Open your computer carefully to access the system board. If you do not know how to do that, it is better to take help from an expert.
- Remove the CMOS battery from the system board.
- Make sure that all the power cables are disconnected from your computer. Now, press and hold the power button for at least 60 seconds. This step will drain all the remaining power from the computer and reset the CMOS.
- Reinsert the CMOS battery and reassemble your computer.
- Connect the power cord to your computer. Now, press and hold the power button for at least 20 seconds.
- Release the power button and let your system boot. You may see a message that the CMOS has been reset. This message may vary for different models of HP computers.
- The time in BIOS should show 00:00. If not, repeat the first 5 steps, but this time you have to press and hold the power button for at least 120 seconds.
Now, check if the issue persists.
2] Replace the CMOS battery
Most commonly, this problem occurs when the CMOS battery is drained out. A lot of users found that the issue was occurring due to the drained-out CMOS battery. This might be the case with you. Replace the CMOS battery and see if it helps. If you do not know how to do that, you should take the help of a technician.
3] Perform an Automatic Repair
One possible cause of this issue is the corrupted system files. Performing an Automatic Repair can help. For this, you have to enter Windows Recovery Environment.
If you can boot into Windows, you can enter Windows RE via Windows Settings.
If you can’t boot into Windows, you must enter Windows RE by disturbing the normal startup process. For this, press and hold the power button until the computer turns off. Then turn it on again. When you see your computer manufacturer’s logo or Windows icon, press the hold the power button again to turn your computer off. Repeat this process until Windows enters Advanced Recovery mode.
4] Recover your BIOS
If none of the above fixes helped you, your BIOS might have been corrupted. Many HP computers have an emergency BIOS recovery feature that lets users restore the BIOS to the last working state. Follow the instructions mentioned below:
- Turn off your computer.
- If you have a laptop, keep it connected to the charger after turning it off.
- When the computer is still powered off, press and hold the Win and B keys at the same time.
- While still pressing the Win and B keys, press and hold the power button for up to 3 seconds.
- Release the power button but do not release the Win and B keys. You will hear a beeping sound. After that, release the Win and B keys. (Your screen may remain blank for up to 30 to 60 seconds).
- Now, you should see the BIOS update screen. If not, repeat the entire process again.
- The BIOS update will begin automatically. Let it be updated completely. After the successful update of HP BIOS, click Continue Startup to restart your computer.
- If you see the BIOS Recovery prompt, hit Enter to continue loading Windows.
If, despite repeating the above process again, you will not see the BIOS update screen, your computer might not support this functionality or there might be a hardware issue with your computer.
Read: The TPM could not be initialized after the BIOS update.
Recover your HP BIOS using a USB flash drive
If the above steps fail to recover your BIOS or if your computer does not support this functionality, you have to recover BIOS using a USB drive. For this, you will need a working computer.

- Visit the official website of HP on a working computer.
- Enter your product number and serial number.
- Select your operating system and click Continue.
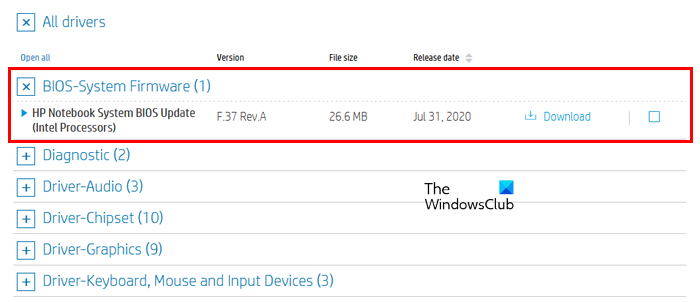
- Expand the All drivers section, then expand the BIOS-System Firmware or the similar section.
- Click Download and save the file on your PC. If you receive the prompt to update the BIOS with HP Support Assistant, ignore it and download the file manually.
To set up BIOS updates on the USB flash drive, connect the USB drive to the computer. It should be empty; hence, backup all your data and format the USB flash drive. Also, the file system of the USB flash drive should be FAT32. If it is NTFS, change its file system to FAT32. You can select a file system in the drop-down while performing the Quick Format. Now, follow the steps provided below:

- Run the BIOS update exe file.
- Click Yes in the UAC prompt.
- Follow the on-screen instructions until the software extracts the files.
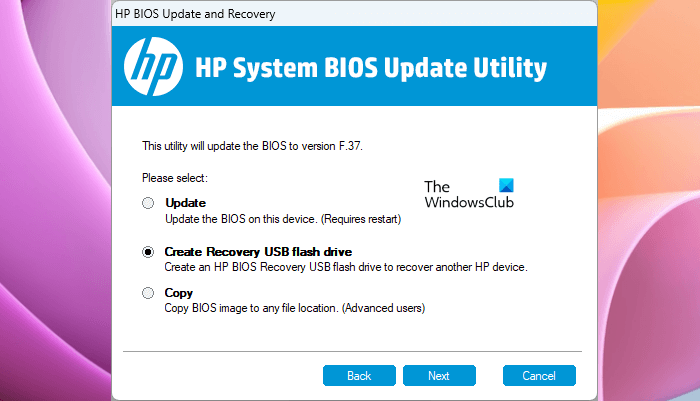
- After extracting the file, the HP BIOS System Update Utility will open up automatically.
- Click Next in the HP BIOS System Update Utility.
- Now, select the Crate Recovery USB flash drive option and click Next.
- Select your USB flash drive and click Next. After this, the BIOS files will be copied to your USB flash drive.
- When the process gets completed, click Finish and then click Cancel to exit the HP BIOS System Update Utility.
Now, power off the computer on which you have to install this update. Wait for 5 seconds after turning it off and then insert the USB drive into it. Make sure that the charger is connected to your system (if you have a laptop). Now, go through the following instructions:
- Press and hold the Win and B keys together while your system is still powered off.
- Keep pressing the Win and B keys and press and hold the Power button for up to 3 seconds.
- Release the power button but keep pressing the Win and B keys until you see the BIOS update screen.
- The BIOS update will start automatically. Let it be finished. After that click Continue Startup.
- If you see the BIOS Recovery prompt, hit Enter.
The above steps will fix your problem.
5] Take your device for repairs
If the problem persists, there may be a hardware issue. Hence, you should take your computer to the HP Service Center.
Read: New CPU installed. fTPM NV corrupted or fTPM NV structure changed.
How to fix checksum error in BIOS?
The BIOS checksum error can occur due to BIOS corruption or the dead CMOS battery. Sometimes, faulty RAM is also responsible for this error. To fix this error, replace the CMOS battery and check if it helps. You can also try removing and placing the jumper and RAM sticks again.
Does removing battery reset CMOS?
Generally not. Only removing the CMOS battery does not completely reset the CMOS. If you want to reset the CMOS, you must follow the process that requires draining out the remaining power in the capacitors. To do so, press and hold the power button for at least 60 or 120 seconds. This will do the job for you. Alternatively, you can use the jumper button on the motherboard to reset the CMOS.
Read next: Fix Alert, System battery voltage is low message.
Leave a Reply