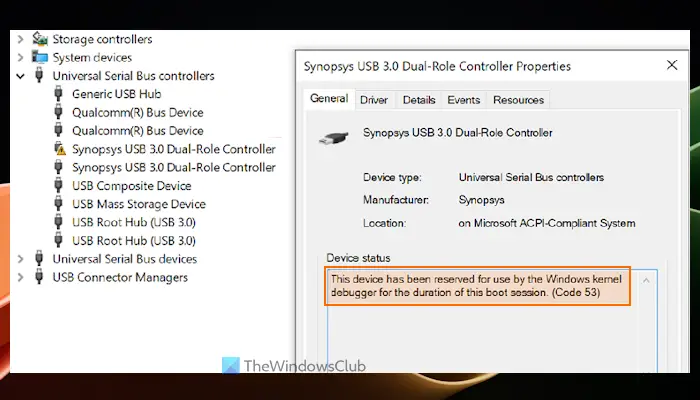
In the Device Manager of your Windows 11/10 PC, if you see a yellow exclamation point for a device, and its device status shows Code 53, This device has been reserved for use by the Windows kernel debugger error message, then this post will help you solve this error message. This happens when a device is reserved for the current session by the Windows kernel debugger. You may see this error for Universal serial bus controllers or some other device type in the Device Manager window.

The entire Device Manager Error Code & Message for the device status goes like this:
This device has been reserved for use by the Windows kernel debugger for the duration of this boot session. (Code 53)
What is Windows kernel debugging?
Kernel mode debugging gives system engineers direct access to any part of the system, including the core Windows OS and device drivers. It is used to debug kernel programs and the kernel. It helps inspect the target program’s memory, control its execution, and manipulate its memory address space. For local kernel debugging, the debugger runs on the same system that is being debugged. And, if you want to establish a kernel-mode debugging session between a host computer and a target computer, then first you need to set up them and connect with a debug cable.
Code 53, This device has been reserved for use by the Windows kernel debugger
To fix This device has been reserved for use by Windows kernel debugger (Code 53) error on your Windows 11/10 PC, use the following solutions:
- Restart your device
- Disable Windows kernel debugging.
1] Restart your device
As the error message indicates, this problem occurs for the active boot session. So, you should restart your device so that a new boot session is started. And, this may help to free the device for use by the Windows kernel debugger and solve the issue.
2] Disable Windows kernel debugger

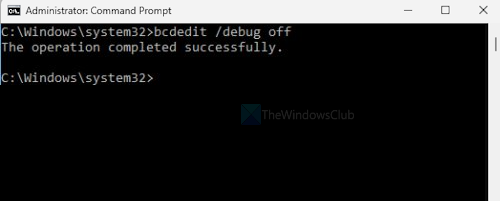
If restarting your Windows 11/10 device doesn’t help, then you need to disable Windows kernel debugger to allow the device to start work normally and then it wouldn’t be reserved for use by the Windows kernel debugger. To disable Windows kernel debugger, you need to use the built-in command-line tool called BCDEdit. Here are the steps:
- Type cmd in the Search box of Windows 11/10
- Right-click on the Command Prompt option that appears in the search results
- Select the Run as administrator option to open the CMD window with admin rights
- Now execute the following command:
Bcdedit /debug off
Restart your PC and your problem should be gone now.
How do I enable Windows kernel debugging?
To enable the Windows kernel debugger on a local computer or set up local kernel-mode debugging, first, open the elevated Command Prompt window. After that, enter the following command and then restart your system:
Bcedit /debug on
You may need to disable Secure Boot, BitLocker, and other Windows security features before you can use bcdedit and execute this command successfully.
Hope this helps.