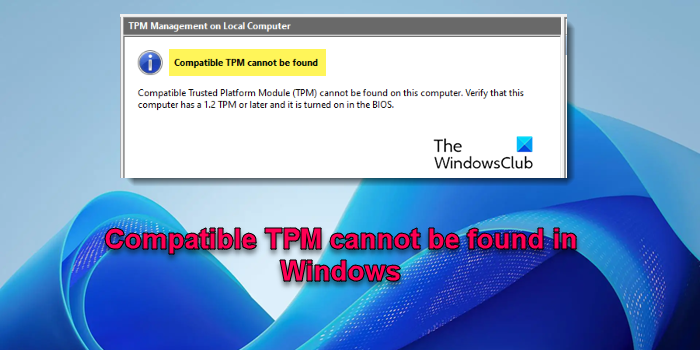
If you encounter the Compatible TPM cannot be found error on your Windows 11 PC, then this post is sure to help you. The error typically occurs when the device does not have a Trusted Platform Module (TPM) enabled or installed, or the system isn’t recognizing it.

TPM 2.0 is a requirement for Windows 11. A hardware-based security feature provides cryptographic operations to secure a Windows device. However, if TPM is disabled in BIOS/UEFI, is not installed, or is malfunctioning, you may encounter an error that reads:
Compatible TPM cannot be found
Compatible Trusted Platform Module (TPM) cannot be found on this computer. Verify that this computer has a 1.2 TPM or later and it is turned on in the BIOS.
Fix Compatible TPM cannot be found error in Windows 11
If your system is experiencing a temporary issue that prevented TPM detection, a restart can often resolve the error. However, if the underlying cause is related to BIOS/UEFI settings, hardware issues, or outdated firmware, use the following solutions to fix the ‘Compatible TPM cannot be found‘ error:
- Check your TPM version
- Verify that TPM is enabled and activated in the BIOS/UEFI
- Update or Reinstall the TPM Driver
- Update BIOS/UEFI Firmware
- Clear the TPM
Let us see this in detail.
1] Check your TPM version

Open Device Manager (Win + X > Device Manager), expand Security devices, and check the details of the TPM. It should list the version. If your TPM is not version 2.0, you will likely encounter the ‘Compatible TPM cannot be found’ error.
To resolve this, you will need to upgrade to TPM 2.0 through firmware updates, replacing the TPM module, or upgrading your hardware.
2] Verify that TPM is enabled and activated in the BIOS/UEFI

The options may vary depending on the OEM, but the process, in general, will be similar.
Reboot the computer and press the designated key to enter BIOS/UEFI. Look for a message during startup that indicates which key to press. It could be F2/F10/Del/Esc.
Navigate to the Security (or Advanced) tab in the Settings menu. Look for the TPM, PTT (Intel Platform Trust Technology), or fTPM (AMD Firmware TPM) option and click on it.
Ensure that TPM is On and change the radio button to Enabled if not already. Also, ensure that Attestation Enable and Key Storage Enable are also checked for proper TPM functionality.
Save changes and exit the BIOS setup. Restart your PC and see if the error is gone.
3] Update or Reinstall the TPM Driver

The error may also appear if Windows is not detecting the TPM due to software issues. Try updating or reinstalling the TPM driver from the Device Manager and see if it helps.
Open Device Manager and expand the Security devices section. Right-click on Trusted Platform Module 2.0 and select Update driver. Choose Search automatically for updated driver software and complete the process as prompted.
Also try reinstalling the TPM driver. Go to Device Manager > Security devices > Trusted Platform Module 2.0. Right-click and select Uninstall device.
A confirmation dialog will pop up. Click Uninstall to proceed with the removal. Windows will automatically reinstall the necessary driver on the next reboot.
4] Update BIOS/UEFI Firmware

If the above solution won’t work, update your BIOS/UEFI firmware and see if it fixes the issue.
Download the latest BIOS/UEFI firmware for your model from the PC or motherboard manufacturer’s website. Insert a USB flash drive (formatted to the FAT32 file system) into your system and copy the downloaded file to the USB. Reboot your PC and press the designated key to enter BIOS. Select ‘USB Storage device’ from the menu and press Return. Select the ‘Update BIOS from Drive‘ option. Then select the BIOS update file and follow the on-screen instructions to complete the update process.
5] Clear the TPM

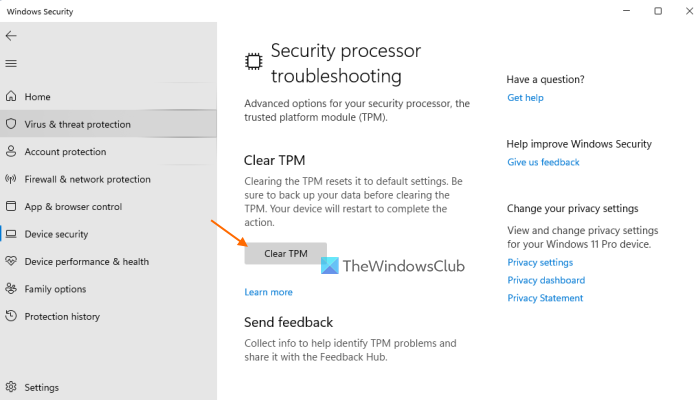
Clearing the TPM should be your last resort if the error can’t be resolved through other means. This deletes all the cryptographic keys stored in the TPM (keys used for features like BitLocker, Windows Hello, and other encryption services) and resets the TPM hardware to its default state. Ensure you have backups of important data and proceed with caution.
After clearing the TPM, re-enable TPM in the BIOS/UEFI if required and reconfigure any TPM-dependent features, such as BitLocker or Windows Hello. Once done, verify that the TPM is recognized and functioning correctly using the TPM Management tool (tpm.msc).
I hope this helps.
Read: The TPM could not be initialized after BIOS update.
How to fix TPM device is not detected?
If TPM device is not detected on your Windows 11/10 PC, enable TPM in your PC’s BIOS or UEFI settings. Reboot your PC and enter the BIOS/UEFI menu. Look for TPM settings under Security settings and make sure TPM is enabled. If the issue persists, update your BIOS/UEFI firmware to the latest version from your motherboard manufacturer’s website. Additionally, check if your operating system has the latest TPM drivers installed.
Can I get Windows 11 if I don’t have TPM?
Having TPM 2.0 is a necessary system requirement to enhance security features in Windows 11. However, if you have an unsupported PC, there are a few workarounds for installing Windows 11 without TPM. You may copy and transfer a few files from Windows 10 ISO to that of Windows 11 or use a registry hack to bypass the TPM check. However, bypassing TPM requirements may result in a less secure system, and you may not receive future updates from Microsoft.
Read Next: TPM missing or not showing in BIOS.
Leave a Reply