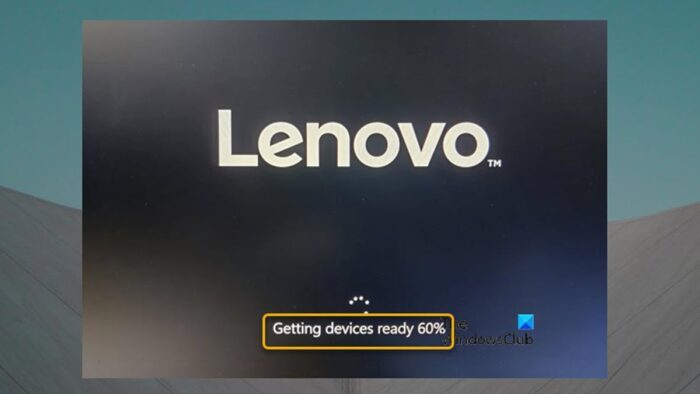
If after you successfully clean install Windows 11 or Windows 10 on your computer, and on the first boot, the computer gets Stuck on the Getting devices ready screen, then this post is intended to help you. In this post, we provide the most adequate solutions affected PC users can easily apply to get past this screen and have the PC complete the boot/setup process.

You’re likely to encounter this issue due to any of the following known reasons.
- A new device driver is initialized.
- Windows Updates are being installed.
- New hardware is being configured.
Computer stuck on Getting devices ready screen
If your computer is stuck on the Getting devices ready screen after you must have successfully performed a clean install of Windows 11/10 on your desktop or laptop PC, then you can apply our recommended solutions presented below in no particular order and see what works for you in resolving the issue at hand.
- Disconnect the computer from the internet
- Perform Automatic Startup Repair
- Disable Automatic Windows Updates
- Reset BIOS to factory defaults
- Redo the Clean Install procedure
Let’s look at the description of the process as it relates to each of the listed solutions.
1] Disconnect the computer from the internet
As already identified, Windows update could be a potential culprit to this issue of Windows 11/10 computers stuck on the Getting devices ready screen. In this case, you can simply disconnect the computer from the internet by unplugging the ethernet cable or switching off your router. Once the PC gets past the screen, you can now reconnect the computer back to the internet as you will require an internet connection to complete the Out-Of-Box-Experience (OOBE) and boot to the desktop.
In addition, make sure to undock the computer if the system is currently in a docking station. Also, unplug nonessential external hardware devices from the computer, such as the following:
- Headphones
- Joysticks
- Printers
- Plotters
- Projectors
- Scanners
- Speakers
- USB flash drives
- Portable hard drives
- Portable CD/DVD/Blu-ray drives
- Microphones
- Media card readers
- Cameras/Webcams
- Smartphones
- Secondary monitors, keyboards, mice
Read: How to install Windows 11 without an Internet Connection
2] Perform Automatic Startup Repair

This solution requires you to perform the Automatic Startup Repair but since the is unable to complete boot, do the following and you may be required to hard shutdown your PC:
- Boot interrupt Windows 11/10 by starting your PC and as soon as you see the Windows logo or the PC manufacturer logo whichever comes first; press and hold the power button to force a shutdown. Repeat this 2-4 times and Windows will open up the Advanced Startup Options menu for you.
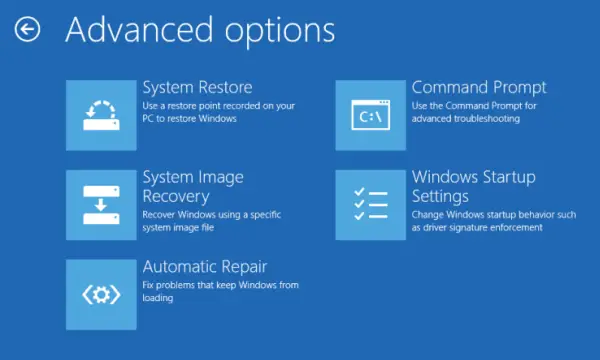
- At the Advanced Startup Options screen, select Advanced Options.
- Select Troubleshoot.
- Under the Advanced options screen, click Automatic Repair.
- Follow the on-screen instructions to complete the Automatic Repair.
Alternatively, you can try an automatic repair using the Windows 11/10 installation media. Here’s how:
- Contact the PC manufacturer (or refer to the manual that came with the PC) to know how to change the boot order of the computer. You will have to change the boot device to a USB drive.
- You can use the USB installation media you already have, or better still, on any working Windows PC, create a Windows installation USB drive. You can create the Windows installation media on a Linux machine or Mac computer if those are what you have access to.
- Boot the faulty PC using the Windows installation media.
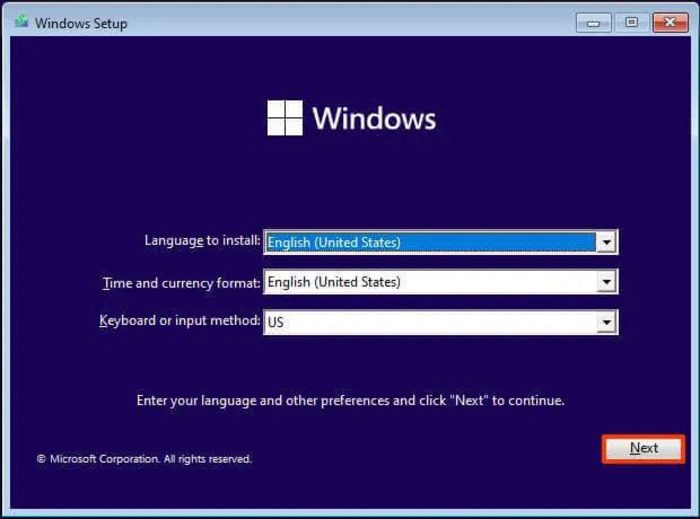
- The Windows Setup dialog box will appear.
- Set the Time and currency format, Keyboard or input method, and the language to install.
- Click Next.
- Click on Repair your computer from the lower left corner.
- From the Choose an option screen, click on Troubleshoot.
- Click Advanced Options in the Troubleshoot screen.
- In the Advanced Options screen, click Automatic Repair.
- Follow the on-screen instructions to complete the Automatic Repair.
When done, eject the installation media and reboot, and see if the issue at hand is resolved. If not, try the next solution.
Read: Windows install is stuck during Installation – Different scenarios
3] Disable Automatic Windows Updates
This solution requires you to temporarily disable Automatic Windows Updates and then try to start the computer again and see if the issue in the highlight will be resolved.
Since Windows 11/10 is unable to boot successfully to the desktop, you can boot into Safe Mode and then follow the instructions in the guide on how to disable or turn off automatic Windows updates. Alternatively, while in Safe Mode or accessing Advanced options as described above, open the command prompt and run the command below:
reg add "HKEY_LOCAL_MACHINE\SOFTWARE\Microsoft\Windows\CurrentVersion\WindowsUpdate\Auto Update" /v AUOptions /t REG_DWORD /d 1 /f
If disabling automatic Windows Updates solves the problem, remember to enable automatic Windows Updates once you complete the Windows setup on the device.
Read: Windows Update keeps disabling itself automatically in Windows 11/10
4] Reset BIOS to factory defaults

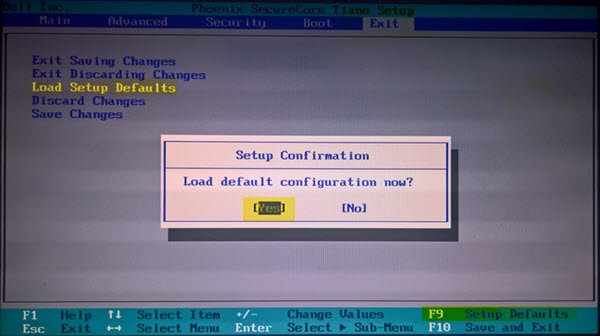
BIOS issues should be uncommon for most PC users. However, you may need to reset your BIOS settings to default values to diagnose or address other hardware issues and to perform a BIOS password reset when you’re having trouble booting up. The BIOS contains a Load Setup Defaults or Load Optimized Defaults option. This option resets your BIOS to its factory default settings, loading default settings optimized for your hardware.
Read: How to reset or clear CMOS on Windows PC
5] Redo the Clean Install procedure

If nothing works to resolve the issue you’re currently facing, you can use the installation media you already have, or better still, simply create a Windows 11/10 bootable installation media on another Windows computer or a Linux or Mac computer, and then proceed to use the media to clean install Windows 11 or Windows 10 as the case may be on the device you are having issues with. If you decide to take this route to redo the clean install procedure, make sure to pay particular attention to the suggestions mentioned in Solution 1] above.
I hope this post helps you!
Now read: Computer stuck on BIOS Splash Screen
Why is my PC stuck at getting things ready?
If your computer is stuck on the getting ready screen, it could be due to slow internet speed or an interruption in your network. A slow PC that can’t quickly boot up might indicate an operating system that hasn’t been updated in a long time and needs to download and install a lot of data. Typically, Windows installation time can take anywhere from 15 minutes to 3 hours depending on the device configuration.
Related read: Windows is stuck on loading some screen
How long does the Getting Ready screen take?
This should vary depending on several factors. Generally, Windows may sometimes get stuck on the Getting Windows ready screen while trying to install an update or start Windows. If you’re stuck on the Windows Getting ready screen, you should allow enough time – anything ranging from three hours, before taking any other troubleshooting steps.