Controlled Folder Access is a security feature included in Microsoft Defender Exploit Guard, a component of Microsoft Defender Antivirus. Its main purpose is to thwart ransomware attacks by preventing unauthorized encryption of your data and files and safeguard against unauthorized alteration of of your files. In this guide, we will see the steps to configure Controlled Folder Access via Group Policy and PowerShell on Windows 11/10.

This feature is optional on Windows 11/10 but when enabled, the feature is able to track executable files, scripts, and DLLs, that attempt to make changes to files in the protected folders. If the app or file is malicious or not recognized, the feature will block the attempt in real-time, and you’ll receive a notification of the suspicious activity.
Configure Controlled Folder Access using Group Policy
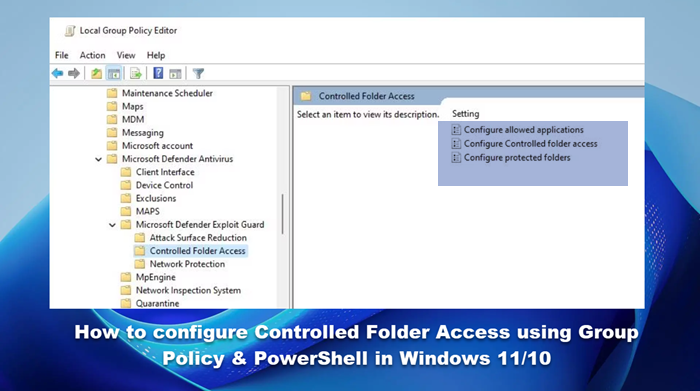
To configure Controlled Folder Access using Group Policy, you first need to enable this feature. Once done, you can proceed to configure the following:
Add a new location for protection via Local Group Policy Editor

If Controlled folder access is enabled, the basic folders are added by default. If you must protect data located in a different location, then you can use the Configure protected folders policy to add the new folder.
Here’s how:
- Press Windows key + R to invoke the Run dialog
- In the Run dialog box type
gpedit.mscand hit Enter to open Group Policy Editor. - Inside the Local Group Policy Editor, use the left pane to navigate to the path below:
Computer Configuration > Administrative Templates > Windows Components > Microsoft Defender Antivirus > Microsoft Defender Exploit Guard > Controlled Folder Access
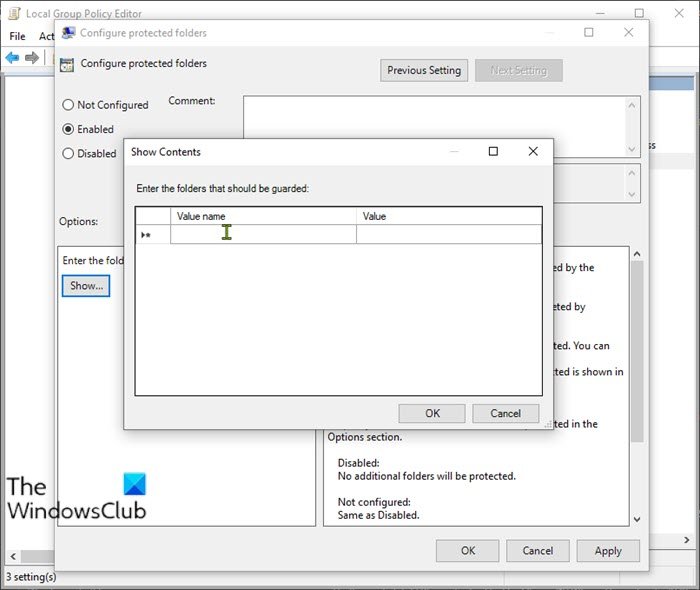
- Double-click the Configure protected folders policy on the right pane to edit its properties.
- Select the Enabled radio button.
- Under the Options section, click the Show button.
- Specify the locations you want to protect by entering the path of the folder (eg;
F:\MyData) in the Value name field and adding 0 in the Value field. Repeat this step to add more locations. - Click the OK button.
- Click the Apply button.
- Click the OK button.
The new folder(s) will now be added to the protection list of Controlled folder access. To revert the changes, follow the instructions above, but select the Not Configured or Disabled option.
Whitelist apps in Controlled folder access using Local Group Policy Editor

- Open Local Group Policy Editor.
- Inside the Local Group Policy Editor, use the left pane to navigate to the path below:
Computer Configuration > Administrative Templates > Windows Components > Microsoft Defender Antivirus > Microsoft Defender Exploit Guard > Controlled Folder Access
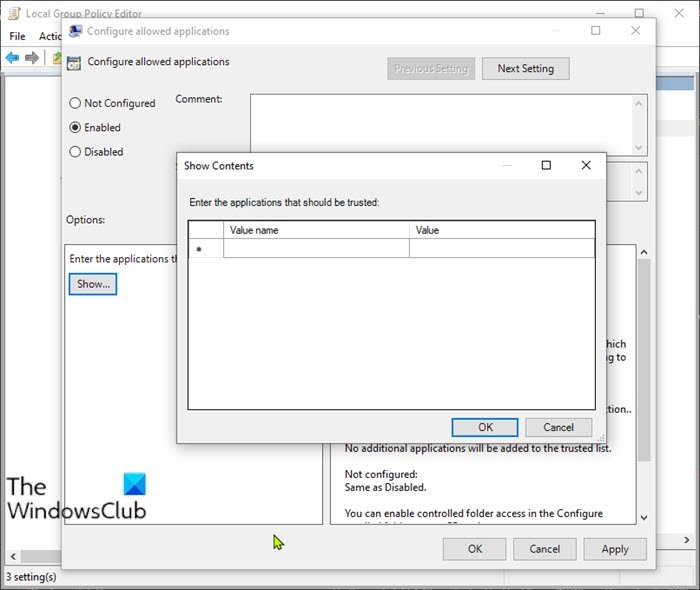
- Double-click the Configure allowed applications policy on the right pane to edit its properties.
- Select the Enabled radio button.
- Under the Options section, click the Show button.
- Specify the location of the .exe file for the app (eg;
C:\Program Files (x86)\Google\Chrome\Application\chrome.exe) you want to allow in the Value name field and add 0 in the Value field. Repeat this step to add more locations. - Click the OK button.
- Click the Apply button.
- Click the OK button.
Now, the specified app(s) won’t be blocked when Controlled folder access is turned on, and it’ll be able to make changes to protected files and folders. To revert the changes, follow the instructions above, but select the Not Configured or Disabled option.
For Windows 11/10 Home users, you can add Local Group Policy Editor feature and then carry out the instructions as provided above or you can do the PowerShell method below.
Configure Controlled Folder Access using PowerShell
To configure Controlled Folder Access using Group Policy, you first need to enable the feature. Once done, you can proceed to configure the following:
Add new location for protection using PowerShell
- Press Windows key + X to open Power User Menu.
- Tap A on the keyboard to launch PowerShell in admin/elevated mode.
- In the PowerShell console, type in the command below and hit Enter.
Add-MpPreference -ControlledFolderAccessProtectedFolders "F:\folder\path\to\add"
In the command, substitute the F:\folder\path\to\add placeholder with the actual path for the location and executable of the app you want to allow. So for example, your command should look like the following:
Add-MpPreference -ControlledFolderAccessProtectedFolders "F:\MyData"
- To remove a folder, type the command below and hit Enter:
Disable-MpPreference -ControlledFolderAccessProtectedFolders "F:\folder\path\to\remove"
Whitelist apps in Controlled folder access using PowerShell
- Launch PowerShell in admin/elevated mode.
- In the PowerShell console, type in the command below and hit Enter.
Add-MpPreference -ControlledFolderAccessAllowedApplications "F:\path\to\app\app.exe"
In the command, substitute the F:\path\to\app\app.exe placeholder with the actual path for the location and executable of the app you want to allow. So for example, your command should look like the following:
Add-MpPreference -ControlledFolderAccessAllowedApplications "C:\Program Files (x86)\Google\Chrome\Application\chrome.exe"
The above command will add Chrome to the list of allowed apps and the app will be allowed to run and make changes to your files when Controlled folder access is enabled.
- To remove an app, type the command below and hit Enter:
Remove-MpPreference -ControlledFolderAccessAllowedApplications "F:\path\to\app\app.exe"
That’s it on how to configure Controlled Folder Access using Group Policy & PowerShell in Windows 11/10!
Read: Add Controlled Folder Access commands to Context Menu in Windows
How do I enable controlled folder access in Windows 11?

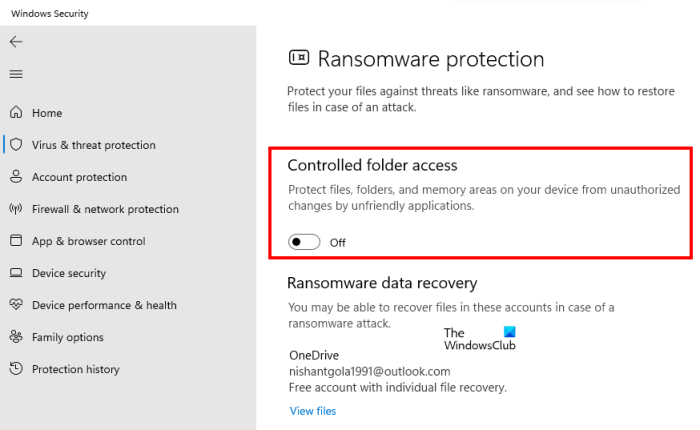
You can pretty easily enable Controlled Folder Access in Windows 11 from the Windows Security app. To do the same, open Windows Security from Start, navigate to Virus & threat protection > Manage ransomware protection, and then enable Controlled folder access.
How to enable controlled folder access by using PowerShell in Windows?
To enable Controlled folder access using PowerShell, first open the command-line utility with administrative access and then run the command – Set-MpPreference -EnableControlledFolderAccess Enabled. This will do the job for you.
Also Read: Allow Apps through Controlled Folder Access in Windows Defender.
Leave a Reply