An MCP Server connects AI models to various tools and data sources using the Model Context Protocol (MCP). This protocol is an open standard that helps ensure effective communication between different systems. In this post, we are going to see how you can configure the MCP Server on Windows 11/10 using Claude.

Configure MCP server on Windows 11 using Claude
An MCP Server uses the Model Context Protocol (MCP) to link AI models with tools and data sources. These lightweight programs securely handle tasks like accessing files, databases, or APIs, enabling AI to integrate smoothly with various resources. They are customizable and versatile, making them useful for tasks such as data retrieval, file operations, and more. Whereas Claude is an AI assistant that we will be using to configure a server.
So, if you want to configure the MCP Server on Windows 11/10 using Claude, follow the steps mentioned below.
- Install NPM and Node.JS
- Generate GitHub token
- Install and configure MCP Server
- Download Claude Desktop
- Configure Claude
Let us talk about them in detail.
1] Install NPM and Node.JS
Node.js is a JavaScript runtime that lets developers run JavaScript outside of a browser, often for server-side applications. NPM (Node Package Manager) is a tool that comes with Node.js and is used to manage packages, libraries, and dependencies for JavaScript projects. So, go ahead and install NPM and Node.js on your computer before getting started with the setup.
2] Generate GitHub token
GitHub has its own implementation of an MCP Server, which integrates with GitHub APIs to enable advanced automation and interaction capabilities. This server allows developers to automate workflows, extract data from repositories, and build AI-powered tools that interact with GitHub’s ecosystem. So, in order to run the MCP Server, we need to access the Personal Access Token (PAT) from GitHub, which will allow our server to connect to the repository. To do this, you need to follow the steps mentioned below.
- First of all, go to the hyperlink, github.com, it will redirect you to the tokens page and might ask you to sign into your account.
- Now, click on Generate new token > Generate new token.
- Give any Token name, most preferably, “MCP Server Access”, “New MCP Server”, or “MCP”, something recognizable.
- Now, set a Description, set the Expiration date, and Resource Owner
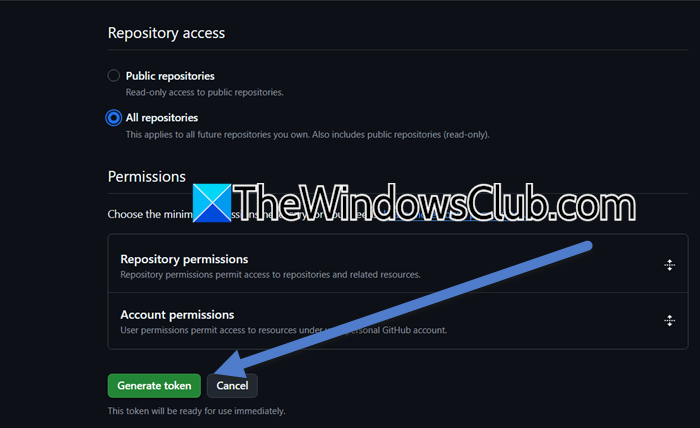
- In the Repository Access, tick All repositories and click on Generate token.
This will create a token that you need to copy and paste somewhere to access later.
3] Install and configure MCP Server
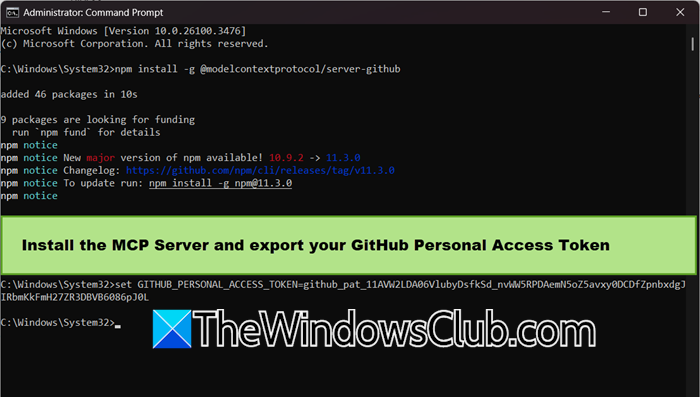
Now that we have the MCP Server Access token, we can go ahead and install the MCP Server. To do so, launch either PowerShell or Command Prompt as an administrator and then run the following command. Do keep in mind that we are installing the MCP Server globally.
npm install -g @modelcontextprotocol/server-github
You need to wait a few minutes as it takes a little time to install the server; however, once it is done, you must set the token. For that, run the following command. Make sure to replace the placehold token_value with the actual token that we generated earlier.
set GITHUB_PERSONAL_ACCESS_TOKEN=token_value
Check the attached screenshot in case of any confusion.
4] Download Claude Desktop
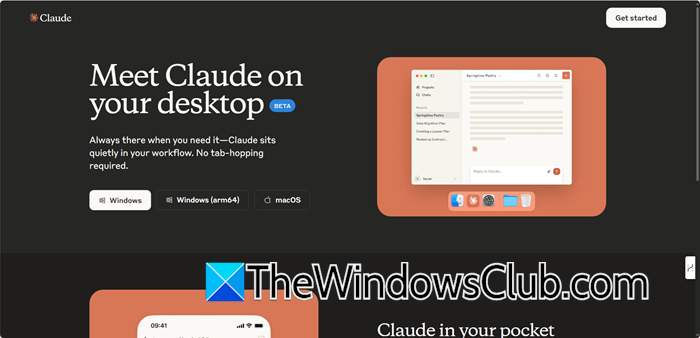
Claude Desktop is a program that we can install on our computer to use the Claude AI. It integrates seamlessly with your workflow, allowing you to brainstorm ideas, analyze images, and get answers efficiently. In order to download it, you need to go claude.ai and then click on the Windows icon (as we are going to install it on a Windows computer). Then, go to the Download folder and run the installer to complete the installation process. You will be asked to sign in as well. After setting up Claude, move on to the next step.
5] Configure Claude
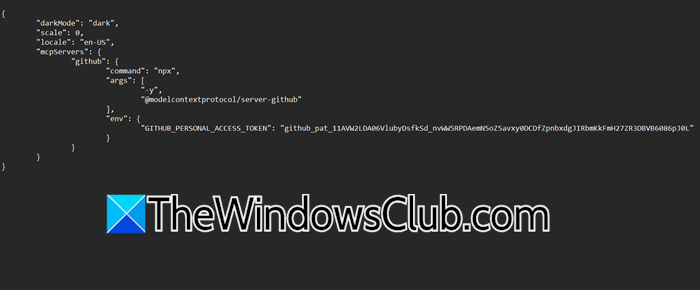
After installing Claude, we need to configure the JSON file. To do so, open the File Explorer and go to %APPDATA%/Claude. Look for config.json and then add the following string of code to include MCP Server.
{
"mcpServers": {
"github": {
"command": "npx",
"args": ["-y", "@modelcontextprotocol/server-github"],
"env": {
"GITHUB_PERSONAL_ACCESS_TOKEN": "token_value"
}
}
}
}
You need to add the aforementioned codes perfectly. You can check the attached screenshot to clear some confusion.
Note: Replace “token_value” with the copied value.
Now you can start using Claude to access the MCP Server.
Read: ChatGPT vs Copilot vs Gemini vs Claude
What are the prerequisites for setting up an MCP Server with Claude AI on Windows 11?
To set up an MCP Server with Claude AI on Windows 11, first install Claude Desktop for seamless integration. Ensure you have Node.js and NPM installed for running MCP commands. A valid API token, like a GitHub Personal Access Token, is needed for authentication. Confirm that the required MCP package is installed. Lastly, locate and edit the Claude configuration file to include the MCP Server details and restart the application to apply changes. You can go through the step by step process mentioned earlier to know more.
Read: How to use Browser Use WebUI on Windows 11
What command should I use to activate the MCP Server for GitHub integration?
To activate the MCP Server for GitHub integration, use the command npx - y @modelcontextprotocol/server-github. This should be defined in the configuration file under the property for the GitHub server. Ensure that Node.js and NPM are installed, and include the environment variable for authentication
Also Read: Create AI agents using LLMs Claude, Copilot, ChatGPT, Gemini.
Leave a Reply