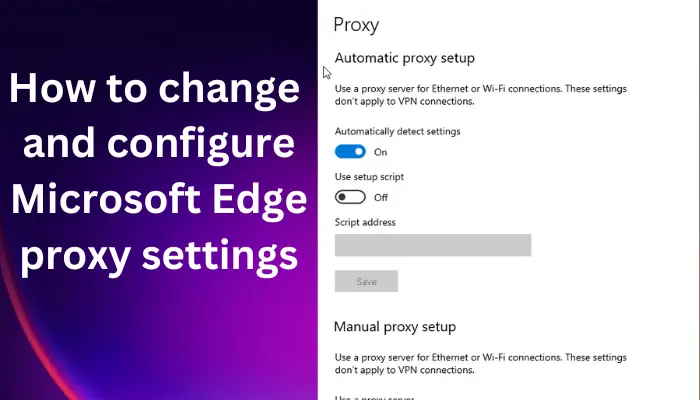
Learning how to change and configure Microsoft Edge Proxy Settings is quite important to users who would like to protect their online privacy. Many web browsers, including Microsoft Edge, have features that support proxy. However, some users don’t know to go about it, which is relatively simple. A proxy server intercepts your computer network traffic before it gets to you; it’s just another remote computer. The are many reasons why users switch to a proxy, but the main one is to get an extra measure of online security.

What is Edge Proxy Server?
The Edge proxy server is a server that is located on the intranet and connects to the main server via the Internet. It is not bound to other proxy servers. It resolves a request for content from a local cache and proxying from the original server. Edge proxy server cannot request to any other proxy server.
The proxy works so that your IP address will not be revealed. You access the Internet using the proxy’s IP address. It is a great way to ensure you are safe online, especially for sites or malicious people tracking your activities online. It’s good to know that there are paid and free proxy server services.
There are two ways to configure a proxy server in MS Edge and it’s simple. You can use the manual way or simply use the automatic configuration. We will discuss this later in this article. This post will elaborate on changing and configuring Microsoft Edge Proxy settings. If you want to access geo-restricted content, protect your devices or conceal your IP address, you are in the right place. Continue reading.
How to change and configure Microsoft Edge Proxy Settings
Changing and configuring Edge proxy settings is a straightforward process, but you don’t need some specific browser proxy settings to surf on standard web pages. However, these settings can be changed to access geo-restricted pages or just for security purposes. To change and configure Microsoft Edge proxy settings, use any of the following methods:
- Manual proxy setup
- Automatic proxy setup
To turn off proxy settings in Microsoft Edge, go to the menu (three dots) on the top right and scroll down to Settings. Choose System and, on the left side, click on Open your computer’s proxy settings. From there, toggle off the buttons next to Automatically detect settings, Use setup script, and Use a proxy server. To complete the process click Save.
1] Manual proxy setup

To set up a proxy setting manually, you need to use Wi-Fi or Ethernet internet connections. If you are connected to any VPN, you need to disable it while setting up and using the proxy server. Here is how:
- Open Edge by clicking the icon on the taskbar or by typing Edge on the search box.
- On the top right, click on the three dots for more options. From the list, go down to see Settings and click on it.
- Scroll down the Settings menu. You will Advanced settings, go ahead and select View advanced settings option.
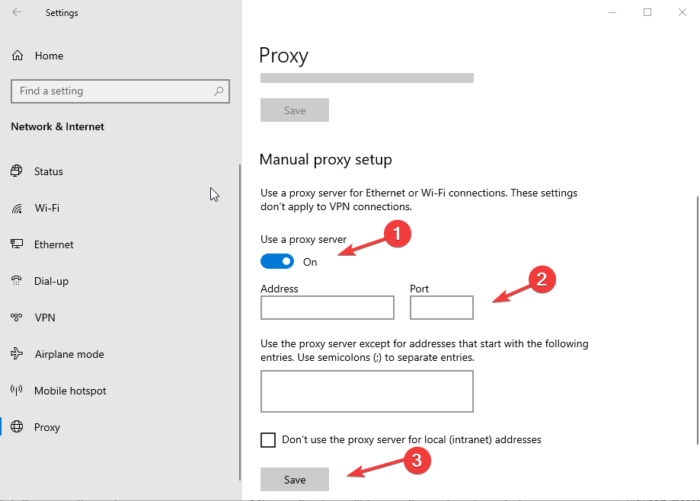
- Select Open proxy settings and head to the Manual proxy setup option and toggle the Use a proxy server button on.
- Enter the required details and select the Save button.
- Now, you will get a prompt asking you to put in a Proxy username and password. Enter these details correctly and your proxy server on Microsoft edge will be configured and ready to run.
Read: Can’t connect to the proxy server says Microsoft Edge
2] Automatic proxy setup

If you feel setting up a proxy server manually is a lot of work, you can choose the automatic mode option. As in the manual setup, you need only to use Ethernet or Wi-Fi connections. Deactivate any VPN running on your computer. This setup automatically detects settings and uses a setup script. Here is how:
- Open Windows Settings by pressings the Windows key + I.
- Head to the Network & Internet and go to the Proxy tab.
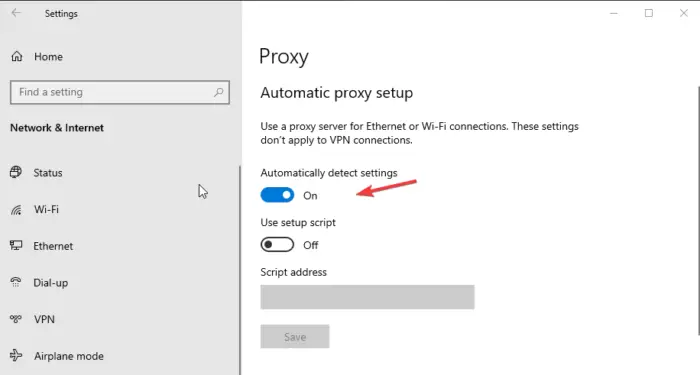
- Here, toggle the Automatically detect settings button on, as well as the Use setup script options.
- Insert the script URL and hit the Save button to complete the process.
Let us know if these methods helped you change and configure Microsoft Edge proxy settings.