Microsoft collects some of your data to provide you with more relevant services and enhance your experience. Though this data collection process cannot be stopped, Microsoft has provided the features in Windows 11/10 OS using which users can harden their privacy settings. In this post, we will take a look at the privacy control and settings available and how to configure & fix default Windows 11/10 Privacy Settings and adjust & configure Microsoft account, location, camera, messaging, Edge, Cortana, etc. settings, in order to protect your privacy.
Read: Windows Privacy Issues: How much data is Microsoft really collecting?
Windows 11/10 Privacy Settings
Before we start our discussion on how to change Windows 11/10 Privacy Settings to protect your privacy, we would like to give an overview of the Windows 11/10 Privacy Settings panel.
Privacy Settings Panel: Windows 11 Vs Windows 10
In Windows 10, the Privacy panel is divided into two sections, namely, Windows Permissions and App Permissions. Whereas, in Windows 11, Microsoft has combined the Privacy panel and the Security panel into one and named it Privacy & Security. Due to this, Windows 11 UI displays three sections under the Privacy & Security panel; Security, Windows Permissions, and App Permissions.
Windows 11
To open the privacy settings in Windows 11, first, launch the Settings app and then click on the Privacy & Security on the left pane.
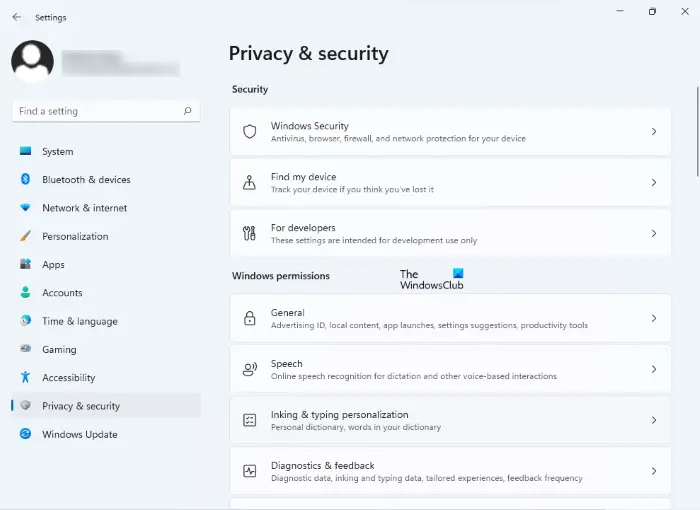
In the Windows 11/10 Privacy Settings panel, you can set Windows permissions as well as App permissions. By default, the General settings tab under Windows permissions opens. Apart from General, you can set Windows permissions for Speech, Inking & typing personalization, Diagnostic & Feedback, and Activity History.
Under App permissions, you can set permissions for various Windows apps such as Location, Camera, Microphone, Voice Activation, Contacts, Phone Calls, and so on.
Windows 10
To access these privacy settings, type ‘Privacy Settings’ in the Windows ‘Search’ field. Now click on ‘Open’ and open the settings.
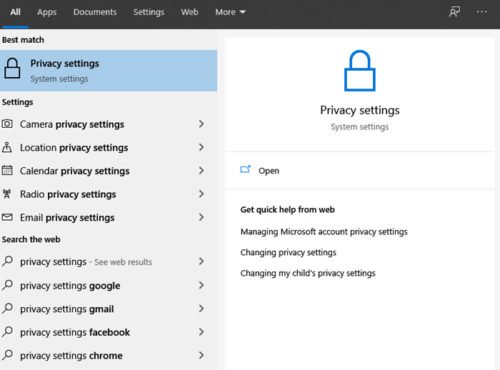
When you open the Privacy settings, you will see the following Privacy settings panel.
1] General Settings
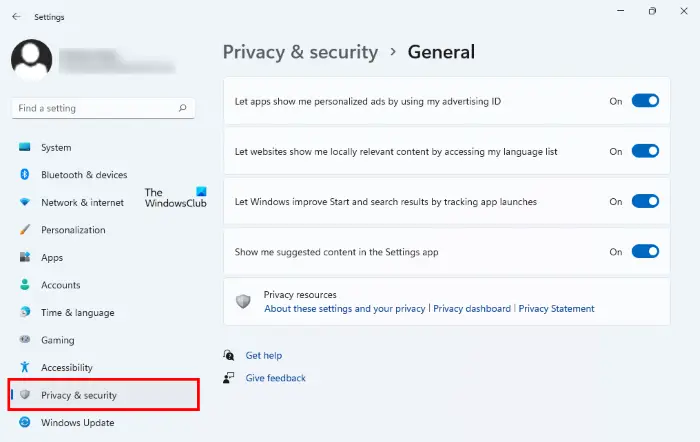
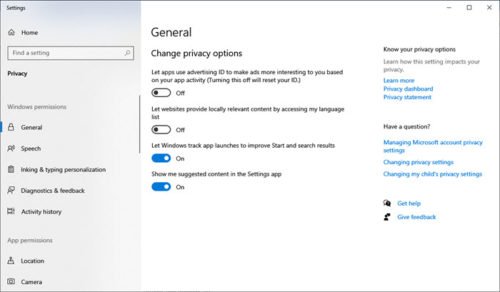
General Settings allow you to adjust the privacy settings and decide if you want to:
- Let apps use advertising IDs to make ads more interesting to you based on your app activity.
- Let websites provide locally relevant content by accessing your language list
- Let Windows track app launches to improve Start and search
- Show your suggested content in the Settings app
Let apps use my advertising ID for experiences across apps
When you install Windows 11 or Windows 10 and log in using a Microsoft Account, an advertising ID is automatically assigned to your PC which is used to keep track of your product preferences and other relevant information. Apps can request access to this ID and it can then be used by App Developers and Advertising Networks to provide more relevant advertising to you by understanding what apps you use and how you use them. This works the same way how YouTube suggests videos based on your watch history and subscriptions.
Turning this off possibly won’t do much. Your advertising ID will be turned off, and you’ll be shown generic advertisements.
Let websites provide locally relevant content by accessing my language list
Microsoft uses this option to seek access to your language list so that it can be used by websites to provide content that is locally apropos to your location and language. You can choose to turn this toggle Off in order to prevent Microsoft from utilizing your information.
Additionally, you can view and add the languages that you want in Region and Language settings under Settings > Time & language > Region & language > Languages (applies to both Windows 11 and Windows 10).
Turning these settings, ON will not risk your online security, but you can choose the options according to your privacy concerns. By default, only two of these settings are turned ON. Rest of the settings you can change according to your requirements.
Read: How to stop Microsoft from tracking you on Windows 11/10 computer.
2] Speech
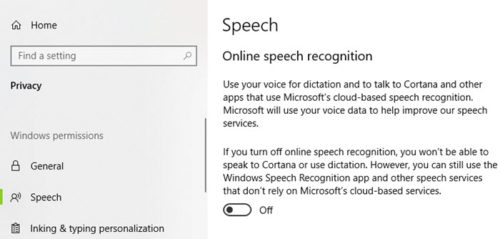
This section lets you adjust the settings with your digital virtual assistant Cortana. You can use your voice for dictation and talk to Cortana and other apps that use Microsoft’s cloud-based speech recognition. Even after turning it off, you can still use the Windows Speech Recognition app and other speech services.
Let’s see how to turn off Online Speech Recognition in Windows 11/10.
Windows 11

Windows 11 users have to follow the steps listed below:
- Launch the Settings app by pressing Win + I keys.
- Select Privacy & Security from the left side.
- Now, click on the Speech tab under the Windows Permissions section on the right side.
- Turn off the button under the Online Speech Recognition section.
Windows 10
If you are a Windows 10 user, go to “Settings > Privacy > Speech.” Now, turn off the button on the right side under the Online Speech Recognition section.
3] Inking & typing personalization
This section lets you adjust the settings with your digital virtual assistant Cortana. You can turn it off, by clicking on Stop getting to know me and Cortana will stop collecting your info like contacts and calendar events.
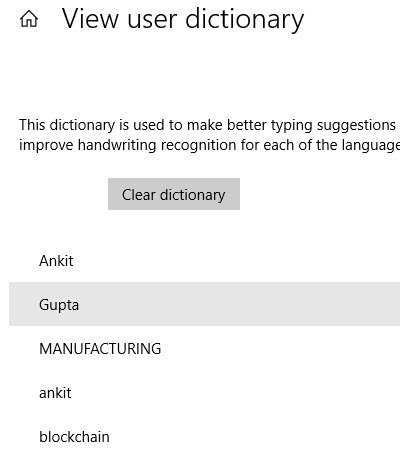
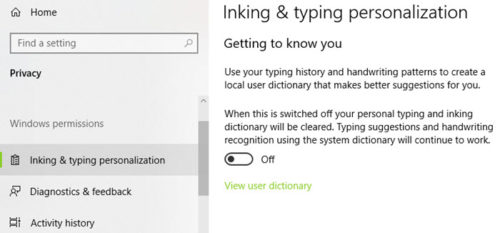
As part of the inking and typing feature, Windows collects unique words such as the names you write and saves them in a personal dictionary stored locally on your device. This dictionary helps you type and ink more accurately.
Windows 11
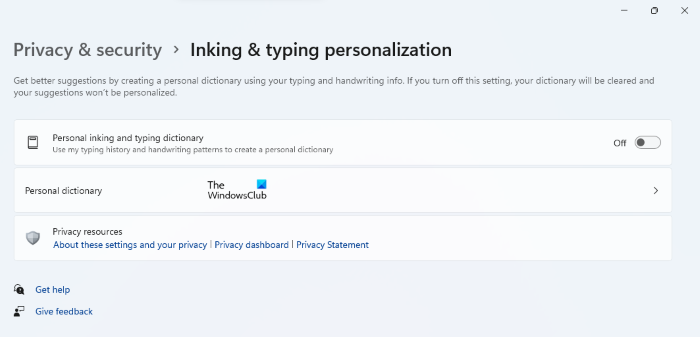
You can turn this feature on or off as per your requirement. Go to “Settings > Privacy & Security” and click on the Inking & typing personalization tab on the right side. Now, turn the button on or off as per your requirement. A Personal dictionary tab is also available there. Click on it if you want to edit your personal dictionary on Windows 11.
Windows 10
In Windows 10, go to “Settings > Privacy” and select Inking & personalization from the left side. Now, toggle the respective button on the right side to turn this feature on or off as per your requirement.
You can access and view the user dictionary by clicking on the ‘View user dictionary’ link.
You can manage the info for all your devices by clicking on Go to Bing and manage personal info for all your devices. This will take you to the Bing page where you can manage Bing privacy settings like personal info, saved browsing history, interests, places, and your settings with Cortana.
4] Diagnostic & Feedback
This is what Microsoft loves – Your feedback! The Diagnostic & feedback section lets you decide how often and how much data you want to send to Microsoft. In addition, the Diagnostic & Feedback section in Windows 11/10 also includes settings regarding improving inking and typing, getting tailored experience, view and delete diagnostic data, Feedback frequency, and recommended troubleshooting. This is one of the most important Windows 11/10 Privacy Settings, as it collects all possible user data.
Windows 11
In Windows 11, you cannot stop Microsoft from collecting the required diagnostic data because there is no option to turn this feature off. Microsoft collects the required diagnostic data to keep your device up to date and provide you with the best user experience.
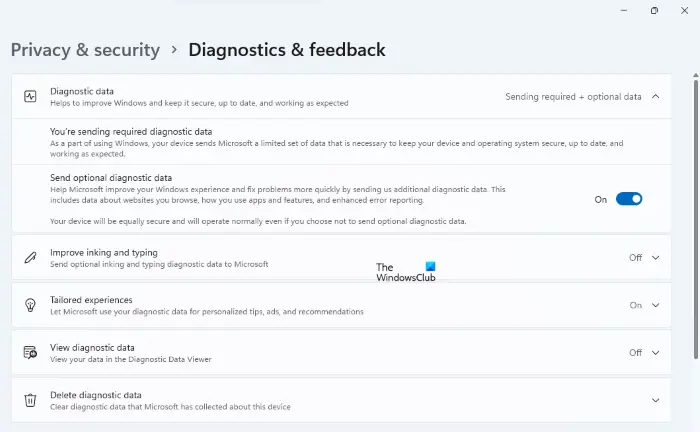
Microsoft also collects users’ additional diagnostic data that includes users’ browsing data, how he/she uses the Windows apps, etc. In Windows 11, this is an optional setting. It means you can turn off this feature if you are more concerned about your privacy. For this, go to “Settings > Privacy & Security > Diagnostics & Feedback” and turn off the button next to the Send optional diagnostic data.
On the same page in Windows 11 settings, some additional settings are also available. You can change these settings to harden your privacy.
Windows 10
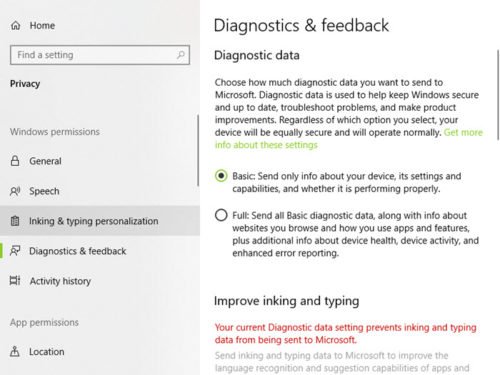
In Windows 10, the Diagnostic data section has two settings, namely Basic and Full. When you select Basic, you choose to send only the information about your device, its settings and capabilities, and whether your device is performing properly. When you select Full, you choose to send basic diagnostic data as well as information about websites you browse, how you use apps and features, and enhanced error reporting.
If you scroll down on the same page in the Windows 10 Settings app, you will find additional settings (described above). You can change these settings as per your requirement.
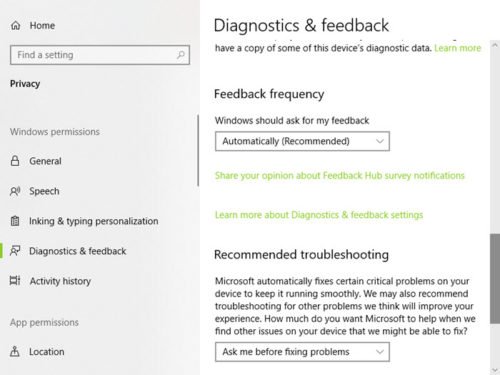 If you wish you can also disable feedback in Windows 10.
5] Activity History
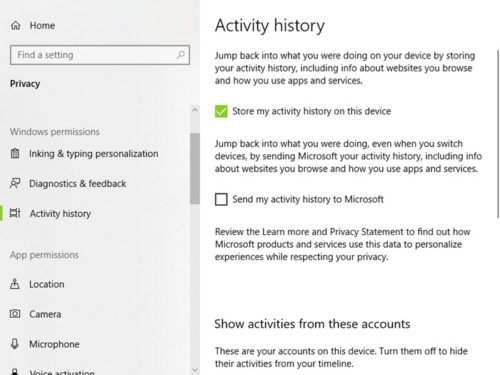
As the name suggests, this is one of the Windows 11/10 Privacy Settings where you can store your device activity. The stored history helps you jump back into what you were doing on your device. It includes your activity history, information about websites you browse, and how you use apps and services.
Windows 11

Windows 11 saves your activity history on your device. This feature is enabled by default. But if you want, you can turn off this setting. In addition to this, you can also clear your activity history on your device. To change these settings, go to “Settings > Privacy & History > Activity History.”
Windows 10
To change Activity History settings in Windows 10, go to “Settings > Privacy > Activity History.” Now, change the options available on the right side as per your requirement.
You can also choose to send this activity history to Microsoft. If you have multiple Microsoft accounts on the same device in Windows 10, you can choose to store or not store activity history for specific accounts. You can clear the history for a selected Microsoft account by clicking the ‘Clear’ tab in the same settings.
Apps permissions under Privacy settings
Under the ‘Apps Permissions’ sections in the Windows 11/10 Privacy settings, you can set permissions for various in-built apps on Windows 11/10 PCs. You can change the privacy settings for the following apps:
- Location
- Camera
- Microphone
- Voice Activation
- Notifications
- Account Info
- Contacts
- Calendar
- Phone calls
- Call history
- Tasks
- Messaging
- Radios
- Other devices
- Background apps
- App diagnostic
- Automatic file downloads
- Documents
- Pictures
- Videos
- File systems.
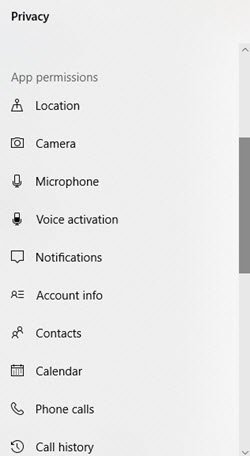
Let us see some of these apps’ settings and how to set permissions for these apps.
1] Location
If you see Your location is currently in use icon, you might want to turn OFF the Location of your device because keeping it ON may allow your apps to access your location. Also, your PC Stores your Location history if the option is turned ON, but you can clear the history just by clicking on Clear.
Your location helps apps and websites to deliver you more relevant services. Moreover, this feature helps you track your device if it is stolen, provided you have not turned it off in Settings.
The users who have privacy concerns can turn off the location in Windows 11/10 settings. We will show you how to do this on both Windows 11 and Windows 10 computers.
Windows 11
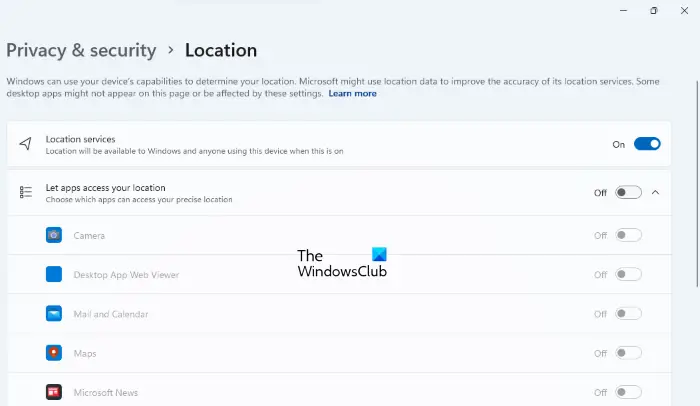
To turn off your device location, go to “Settings > Privacy & Security > Location” and turn off the switch next to the Location Services tab. You can also stop apps from tracking your location by turning off the respective button on the same settings page.
Windows 10
In this Windows 10 Privacy Settings, you can let Windows access your device’s capabilities to determine your location as well as your location data. With this information, Microsoft can improve location services. You can set your default location. Your PC stores your Location history if the option is turned ON. However, you can clear the history just by clicking on ‘Clear’.

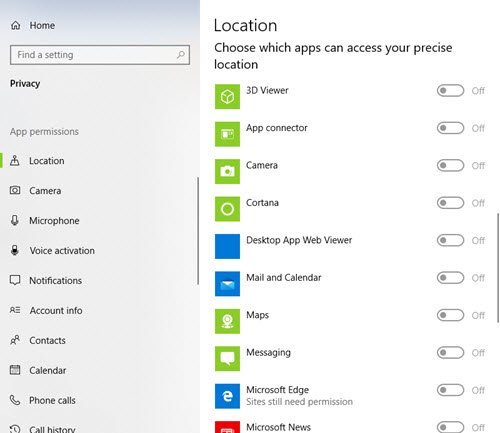
In this setting, you can also choose if apps can access your location. There is a list of Windows apps for which you can set permission whether these can access your precise location. Scroll down to set if the apps like the 3D viewer, App connector, Weather, Cortana, Camera, and Windows Maps can have access to your location or not.
2] Camera
In this section, you can allow Microsoft apps and most desktop apps to access the camera. You can also set permission for accessing the camera for individual apps.
Windows 11
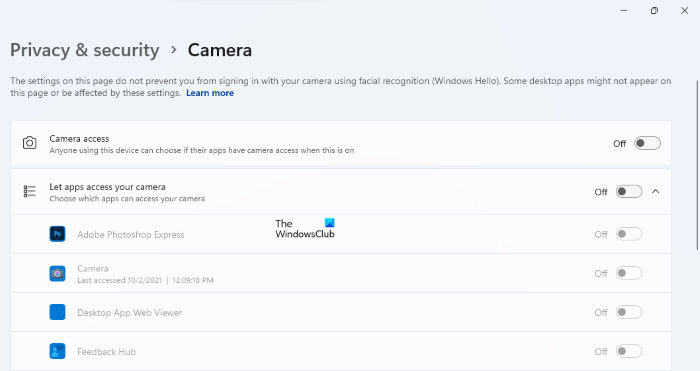
You can prevent apps and other persons from using your camera in the Apps permissions section under the Privacy & Security.
Windows 10
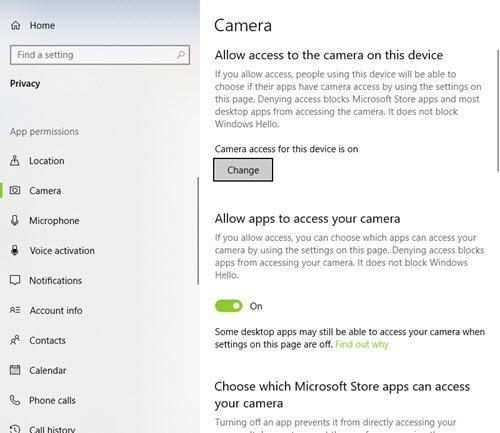
Go to “Settings > Privacy > Camera” to change the privacy settings related to the Camera of your device.
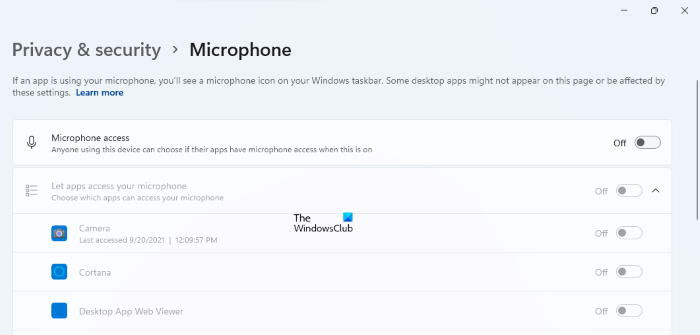
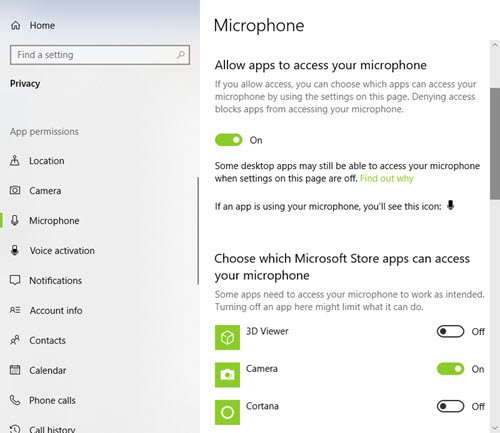
3] Microphone
In this section, you can allow Microsoft apps and most desktop apps to access the microphone of your device. However, it does not allow Windows Hello. You can also set permission for accessing the camera for individual apps.
Windows 11
Windows 10
4] Account Info
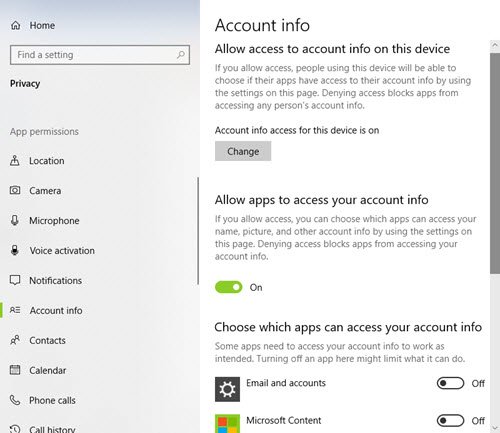
In this section, you can select which apps can access your account info like your name, photo, and other account details.
Windows 11
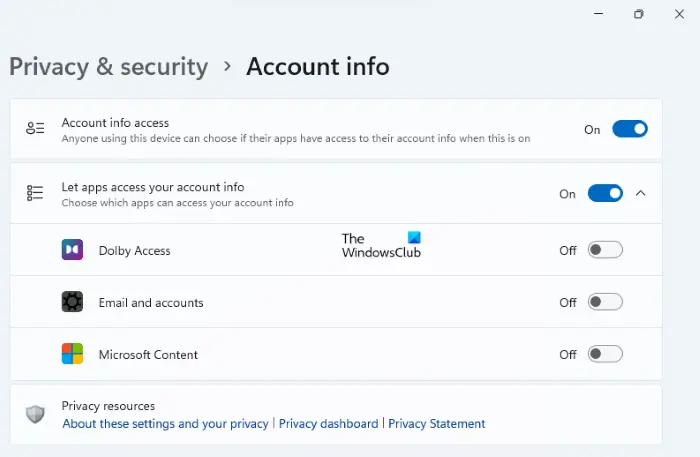
When you open the Account info page in Windows 11 privacy settings, you will see two options, Account info access and Let apps access your account info. You can manage your account privacy settings for different apps here.
Windows 10
To turn off the Account access on this device in Windows 10, click on the Change button.
5] Contacts, Calendar, Messaging, Radio
In these sections, you can allow or disallow the apps to access your contacts, calendar, and events, messaging and control your radios. Allowing the apps to access your message may let them read or send messages.
6] Other Devices
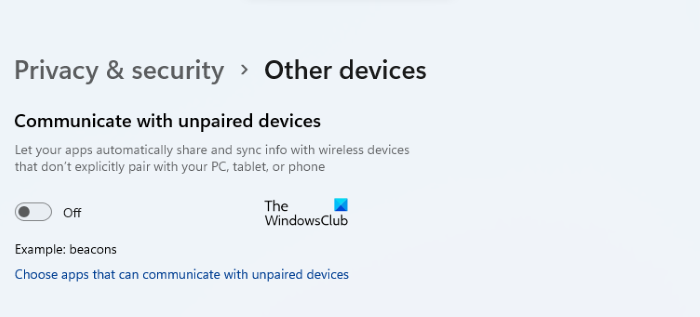
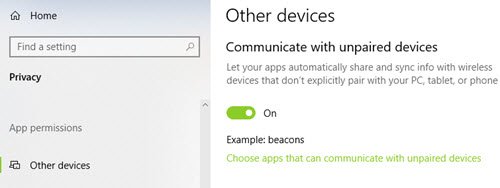
Here you can allow your apps to share and sync info with the wireless devices that aren’t paired with your PC. You can also choose apps that can sync with other devices. All your connected devices will appear under this section. Let your apps use Trusted Devices.
Windows 11
To turn this feature on or off in Windows 11 go to “Settings > Privacy & Security > Other devices.”
Windows 10
If you are a Windows 10 user, go to “Settings > Privacy.” Then click Other devices on the left pane.
6] File System
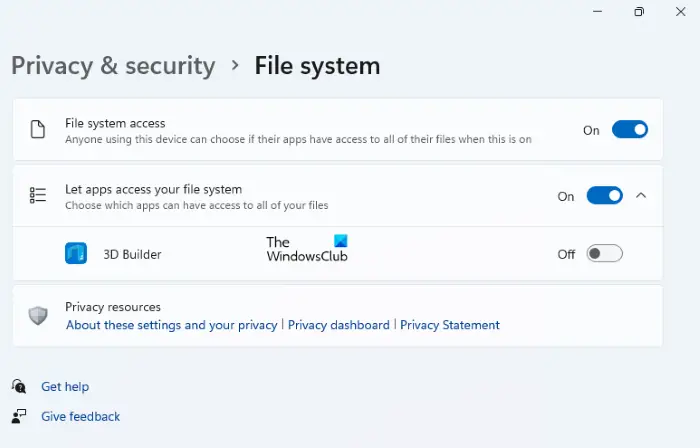
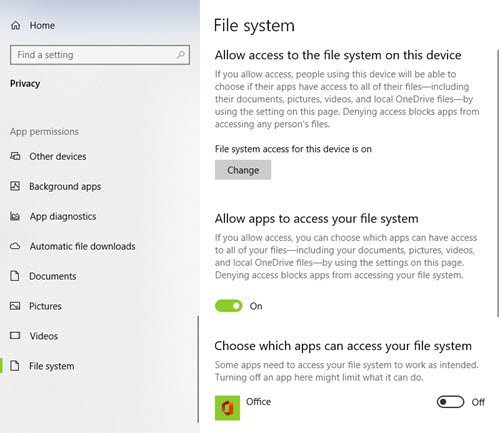
In the privacy settings, you can allow people to choose if your apps have access to all your files. This includes access to documents, pictures, videos, and local OneDrive files.
Windows 11
Windows 10
There are several settings included in Windows 11/10 Privacy Settings. With these settings, you can set permissions whether your personal data and files should be shared or not. Thus, you get complete control over your data and privacy.
We offer additional suggestions below.
1] Harden Microsoft Account Privacy Settings
Microsoft Account is used to sign in, into your Outlook.com, Hotmail.com, and other email IDs. It can also be used to sign in to other Microsoft services and devices like Windows computers, Xbox Live, Windows Phone and so on. Take a look at how to harden Microsoft Account Privacy Settings.
2] Harden Edge browser privacy
Having done this, you might want to also take a look at and configure Privacy settings in the Edge browser.
3] Cortana settings
If you do not use Cortana, you can turn Cortana off. Click inside the taskbar search box. The Cortana settings box will appear as shown below. Move the slider to Off position. Now to delete all that Cortana knows about you, click on the Manage what Cortana knows about me in the cloud link, sign in to your Microsoft Account and then do the needful.
4] Adjust Bing Privacy settings, Opt-out of personalized ads
This post will show you how to opt-out of and stop Personalized ads in Windows 11/10. There are more suggestions here – Opt-out of Data Tracking & Targetted ads.
It is always recommended to check and adjust these privacy settings carefully once so that you can maintain your online privacy.
5] Want to turn off Wi-Fi Sense?
This post will tell you what you need to know about Wi-Fi Sense in Windows 10 and show you how to turn it off if you want to.
6] Use Ultimate Windows Tweaker tool
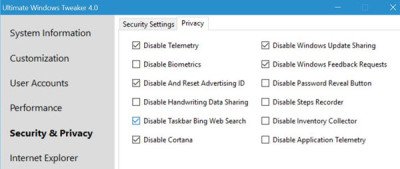
Our Ultimate Windows Tweaker 4 will let you easily tweak Windows 11/10 Privacy settings & more. The Privacy tab lets you disable Telemetry, Biometrics, Advertising ID, Bing search, Cortana, Windows Update sharing, Feedback requests, Password Reveal button, Steps Recorder, Inventory Collector and Application Telemetry.
Here is a list of some more Windows 10 Privacy Tools & Fixers that help you harden your privacy.
Leave a Reply