Integration of Microsoft Bookings with Facebook has made it possible for Office users to schedule appointments from their business’ Facebook page. However, there are certain points to consider before you get started. When booking an appointment, customers should select the service and time that it is suitable for them. So, the first thing you need is to set up Bookings on the web.
Does Microsoft Bookings integrate with Facebook?
Yes, Microsoft Bookings flawlessly integrates with Facebook. You can connect Microsoft Bookings with one or multiple Facebook pages without any problem. However, you must have the Microsoft 365 subscription to use Microsoft Bookings or connect it with other apps.
To link Microsoft Bookings to Facebook, you need to follow this guide. For your information, you need to have a Facebook page to connect to Microsoft Bookings. Then, switch to the Booking page section and choose the scheduling policies. Following that, you can save the changes and hit the Publish button. Then, you need to open the Partner Apps and Services menu of your Facebook page and click the Add Service button to connect them.
Connect Microsoft Bookings and Facebook Page
You can set up Microsoft Bookings from your Outlook on the web email account. To do so, launch your Office 365 portal or app.
Next, select the app launcher and navigate to Bookings option. Then, select Get it now. Enter the name and type of business you run and select Bookings.
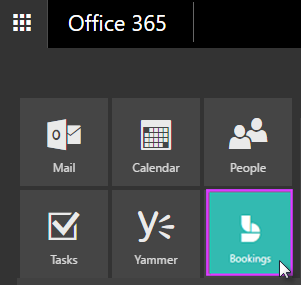
Upon seeing the Bookings home page, go back to your device and log out of the mobile app. Log back in to go to your new booking calendar. The booking page is the page where customers can schedule appointments for conducting business.
For publishing your page, select the app launcher and hit the Bookings tab. Then, in the navigation pane, select Booking page.
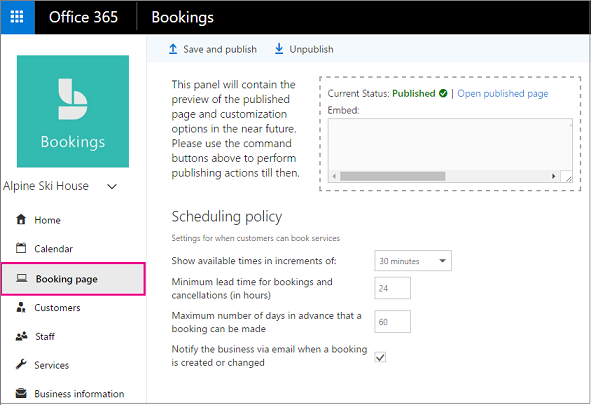
Check if your scheduling policies are set correct. If correct, chose ‘Save’ and hit the ‘publish’ button. A message should pop up on your screen when you confirm the message.
To view your page in a web browser, select Open published page.
Now, to remove or connect Microsoft Bookings and Facebook page, open your business Facebook page.
After that, select Settings from the upper right corner and chose ‘Partner Apps and Services’ option from the left panel.
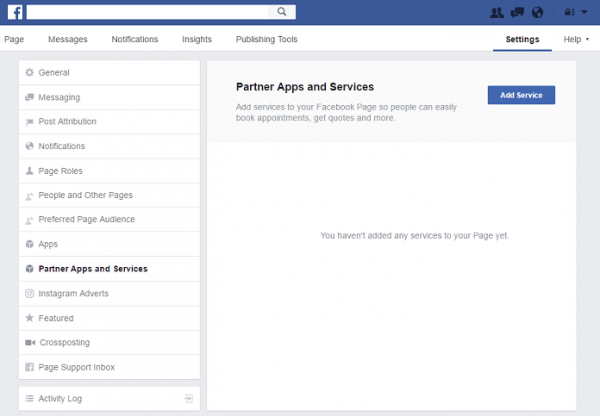
Next hit the ‘Add Service’ button, select Microsoft Bookings and click ‘Add Service’ option.
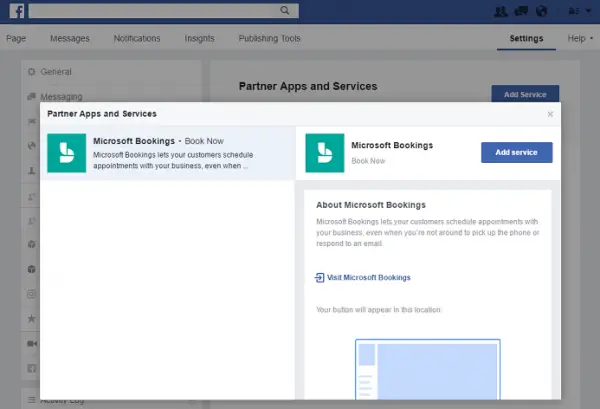
Instantly, a new tab will open. When it is visible, sign into your Office 365 account and find your booking calendars. Here, select the calendar you want to connect to your Facebook page and choose the Connect option.
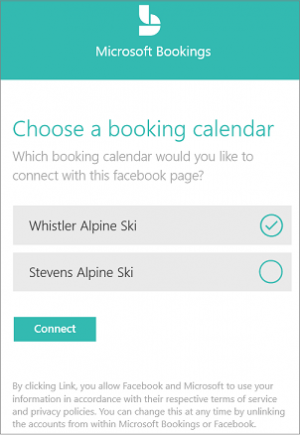
Once you complete the above step, the tab will close, and you’ll return to Facebook. Now you’re all set to receive Bookings through your Facebook page.
If you would like to remove Microsoft Bookings and Facebook page, simply select Remove Service on the Page Action button in the Microsoft Bookings tab.
Read: How to enter Business Information in Microsoft Bookings Business Page.