You are quite used to pair your Bluetooth headphones with your smartphone. But, would you like to know how to connect them to your Windows PC as well? In this guide, we will give you step-by-step instructions for the same. You can connect your headphones to your PC using the Devices section of the Settings on your PC. The process is almost similar to that of pairing with a smartphone. With just a few clicks, you can pair your Bluetooth-enabled headphones to your Windows 11 or Windows 10 PC.
In this guide, we show you how you can connect Bluetooth headphones to Windows 11/10 PC. Nowadays everything is wireless with the advancement of technology. We use a wireless mouse, keyboard, charging adapters, etc. Bluetooth speakers are a rage now as they give the convenience of eliminating long wires to connect to a PC. The audio quality doesn’t decrease with the Bluetooth connection. It works as well as a wired audio speaker system. Let’s see how we can connect a Bluetooth speaker to Windows 11/10 PC.
How to connect Bluetooth headphones to Windows 11 PC
To connect Bluetooth headphones to Windows 11 PC:
- Open Settings app
- Click on Bluetooth & devices
- Then, click on Add device
- Select Bluetooth
- Then, click on the device to add
Let’s get into the details of the process.
Open the Settings app from the Start menu or use the Win+I keyboard shortcut on your PC. On the Settings app, click on Bluetooth & devices tab in the left side panel.
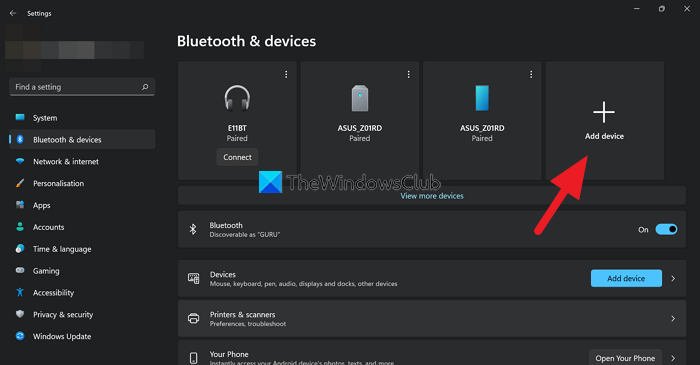
You will see the list of paired Bluetooth devices along with the button to add new devices under Bluetooth & devices. Click on Add device.
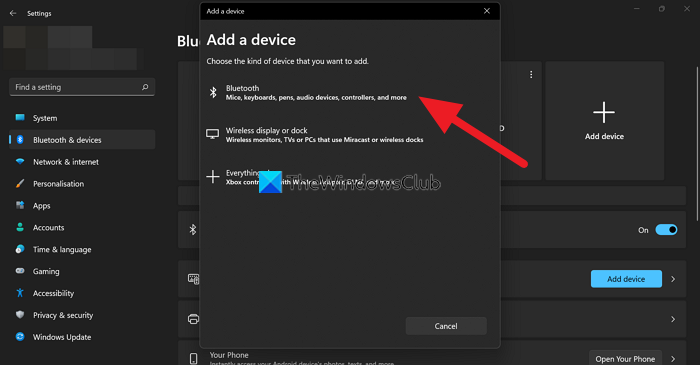
Then, a pop-up window to Add a device opens. Click on Bluetooth to add a Bluetooth device to your PC.
You will now see the list of available Bluetooth devices that can be connected to your PC. The list may also have the devices from your neighborhood. Turn on your device to make sure it is detected by your PC. Then only, you can see that device in the list of available devices. Once, your device is recognized, click on the device to start connecting it.
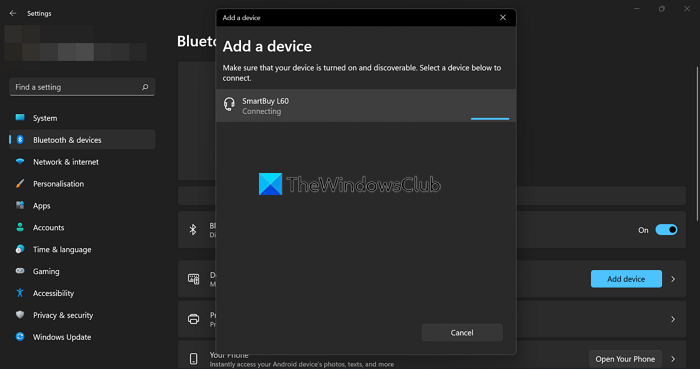
You will see a connected status once your Bluetooth headphones are connected to the PC. You can add multiple Bluetooth devices, but can only use one at a time.
How to connect Bluetooth headphones to Windows 10
Here are easy-to-follow steps that help you connect the Bluetooth headphones to your Windows PC.
You can begin by ensuring that you know how to put your headphones in the pairing mode.
Do this by pressing the power button for several seconds or until you observe the blinking of the status lights on your headphones.
In case you are not sure, you can check the user guide or website of your headphones for set-up instructions.
Now open Settings in Windows 10 and follow these steps:
1] Select Start to choose Settings from the menu. It is the gear-shaped icon on the Start menu. In case you are unable to find the Settings app, you can type “Settings” in the Start menu search box.
2] Go to “Devices”.
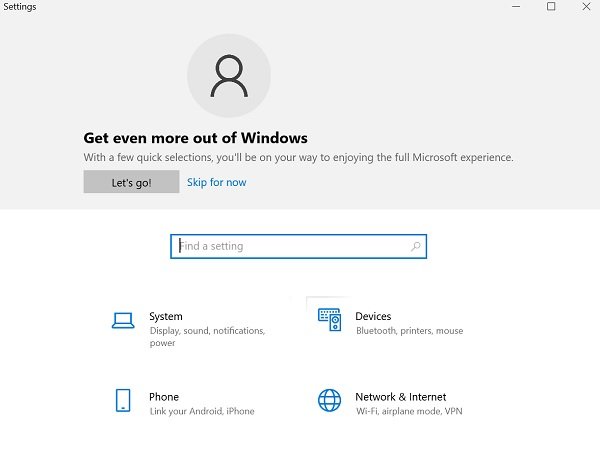
3] The Devices page opens to the. “Bluetooth and other devices” section. In case it does not, click “Bluetooth and other devices” in the pane on the left.
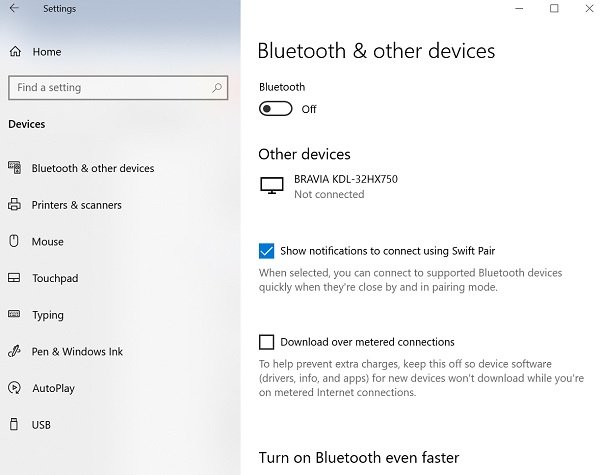
4] Ensure that the Bluetooth is turned on. In case it is not turned on, click on the button so that it turns blue.
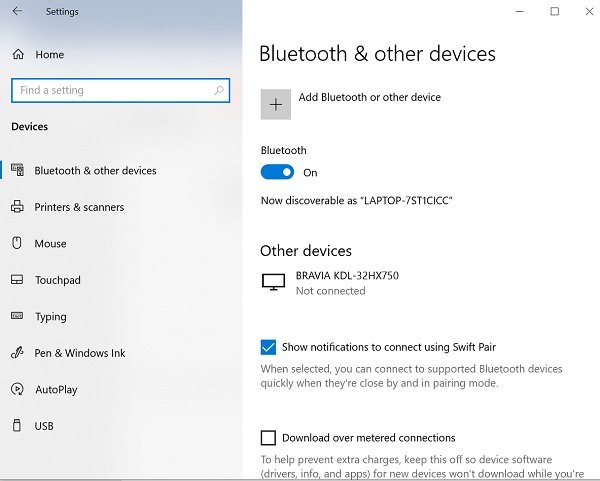
5] Click “Add Bluetooth or other device”, and then click on “Bluetooth” in the “Add a device” window.
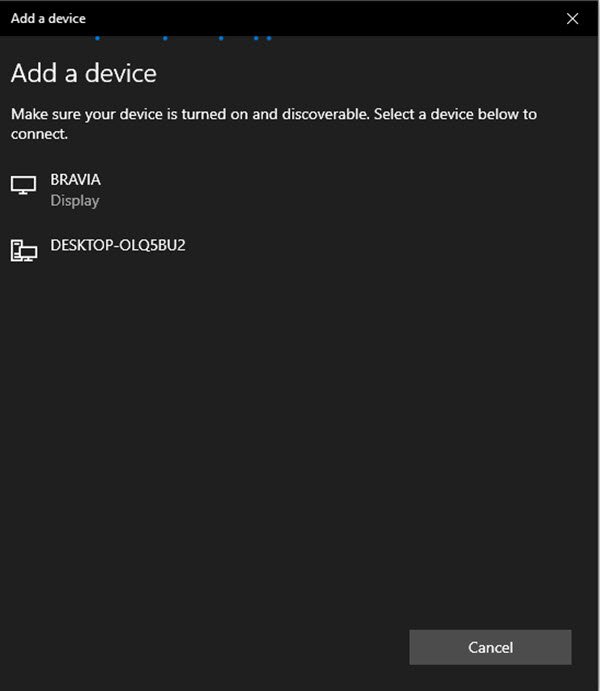
6] Place your Bluetooth headphones in the pairing mode.
7] After a few minutes, the headphones will appear in the list of devices. When you view it, click on it.
8] Depending on the headphones, they may connect right away, or you may need to enter a Bluetooth passcode. In case you see a passcode request, enter the code mentioned in the headphone’s user guide. Most of the time, the passcode used is just 0000 (four zeros).
9] After the pairing is complete, you will see a message on your PC, indicating that the headphones are connected to the same. You can click “Done” and close the Settings window.
Related read: How to set Audio device as default in Windows 11/10
How do I get Windows to recognize my Bluetooth headphones?
To get Windows to recognize your Bluetooth headphones, please make sure it is turned on and not connected to any other device like mobile at that time. When your device is ready to connect with the PC, the light on it blinks as an indication. Your PC will detect it automatically.
Troubleshoot Bluetooth-enabled headphones not pairing
Sometimes while pairing the Bluetooth devices, you may face one of the following problems:
- Bluetooth icon is missing or it cannot be turned on or off.
- Bluetooth devices not showing, pairing or connecting.
- Bluetooth does not work after a Windows 10 update is installed.
- Bluetooth Headphones not working
- It does not work after a software upgrade to Windows 10 from Windows 8.1 or Windows 7.
- Headphones not detected
- It does not appear in Device Manager, and no unknown devices are listed.
- Setup incomplete because of a metered connection
Here are some solutions to troubleshoot Bluetooth pairing issues.
1] Ensure that the headphones are within the range of your Windows PC.
2] Ensure that audio is playing through the Bluetooth device. Go to Start > Settings > System > Sound > Choose your output device, select the Bluetooth device.
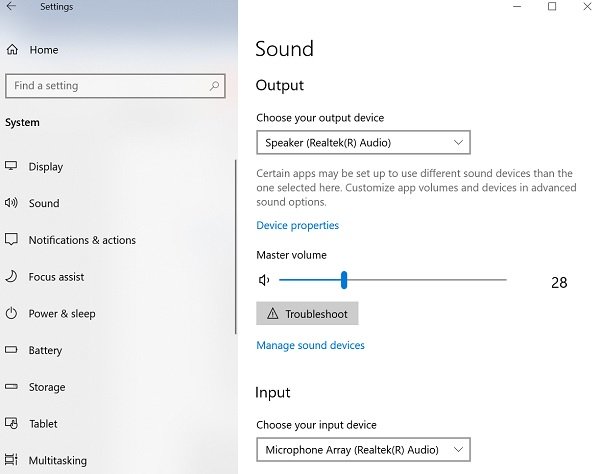
3] In case your headphones show Paired but you are unable to hear the audio, ensure that it is connected.
Go to Start > Settings > Devices > Bluetooth and other devices. Select the Device and then select Connect, in the Bluetooth section.
4] You can also try unpairing and repairing the headphones.
To unpair a device, go to Settings > Devices > Bluetooth and other devices. Select the Bluetooth-enabled headphones that are paired but are not working, then select Remove device > Yes. Pair the device again.
You can connect your Bluetooth headphones to multiple devices, like your smartphone and Windows PC. Depending on the model of the Bluetooth headphones, you may be able to connect them to one device at one time.
How to make Bluetooth headphones default in Windows 11?
Windows 11 automatically makes the connected audio device the default device. When you disconnect the audio device, Windows 11 automatically changes the default audio device from an external device to the built-in speaker (in the case of laptops). But if your headphone is not set as default, you can make it the default device by opening the sound settings. Open the Control Panel and go to “Hardware and Sound > Sound.” Under the Playback tab, right-click on your headphone and select Set as Default device.
I hope these instructions will guide you in the setup.
Leave a Reply