Photoshop is one of the top graphic software on the market. Photoshop has surprising capabilities that professionals and hobbyists enjoy. You can convert a low-resolution logo to a high-resolution vector graphic in Photoshop. Photoshop is supposed to be for raster color but here is another surprise, it can also do some amount of vector graphic. A raster graphic is made up of pixels and will these pixels will start to show if the image gets too big. A vector graphic is made up of lines, shapes, and mathematical calculations, this enables them to keep their quality regardless of how big or small they get.
Convert a low-resolution logo to a high-resolution vector graphic
Photoshop is full of surprises for graphic designers. Who would have thought that a raster graphic software could also do vector graphics? The problem of the low-resolution logo has been a challenge for graphic designers. A client may have only a low-resolution version of their logo and they need it to be enlarged. This was once a problem for designers, especially if they did not know how to use Illustrator. Now Photoshop can convert low-resolution logos to high-resolution vector graphics. This converted vector graphics can also be saved for use in Illustrator.
- Prepare the Low-Resolution Logo
- Change the Size and Resolution of the Logo
- Change to Gray Scale
- Change Background Color to White
- Apply Blur
- Apply Curves Layer
- Merge Layers
- Remove the Background
- Add Color
- Vectorize Logo
- Save
1] Prepare the Low-Resolution Logo
The first step to converting the low-resolution logo to a high-resolution vector graphic is to find and prepare the logo. The ideal logo to work with would have a transparent background, to begin with, even though a part of the process will require placing a white background on it.
If the logo has a large background, you should crop it to get rid of much of the background as possible. Crop the background as close as possible to the logo. This will allow the logo to be made bigger without a large background there. A large background will make the image take up more disk space and it will also overpower the logo. Cropping the background close to the logo will help t make the logo stand out. It will also be easier to have it fit into other projects such as business cards, product packages, stamps, etc.
Inspect the logo to see all the work that will need to be done. Zoom in and out and check for defects and pixelating. Press Ctrl + 0 to make the logo fit fully in the frame.
If your image has a white or colored background, you can remove the background by using the Magic Wand Tool to remove the background. Just click the background and delete the spots that are selected. If the background color is similar or almost similar to the color of the logo, you may have to use another method to cut it out, you may need to try using the Pen Tool.
To crop the background, go to the Rectangular Marquee Tool on the left Tools panel, click one edge of the background and draw diagonally over the logo.

When you see the outline around the logo and you are satisfied that it is ok go to Image then Crop. That will delete everything outside of the rectangular outline.
2] Change the Size and Resolution of the Logo
When you have removed the background, it is the best time to check the size and resolution of the logo. Photoshop would have calculated the size of the background as a part of the size of the logo. With the background trimmed down, you will get the correct size of the image.
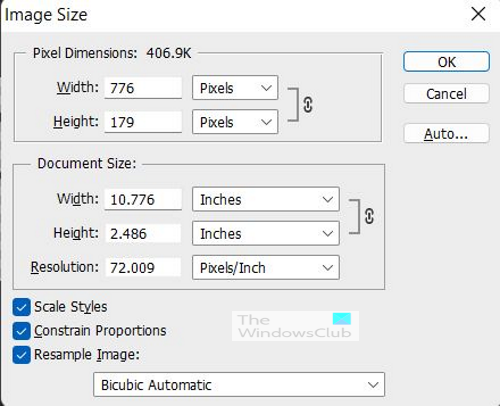
To see the image size and resolution and to also make changes to them, go to Image then Image Size or press the shortcut keys Alt + Ctrl + I. This will bring up the Image Size dialogue box and you will see the image size. The displayed image dimensions and resolutions are good for the screen, but from print, they are not enough so it is best to increase them.
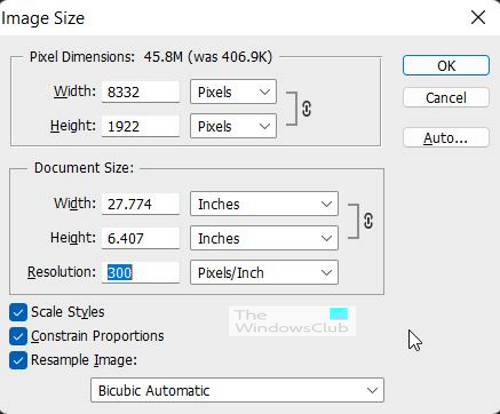
Increase the size of the Width (or the longest side) depending on the orientation of your image to about 2000 or 3000 Pixels. Make sure that the measurement is pixels and not inches. Make sure that Scale Style, Constrain Proportions and Resample Image are checked. Change the Resolution to 300 Pixel/Inch. Press Ok to keep the changes that have been made.
![]()
When you have confirmed the changes, you will notice that the image has gotten significantly bigger. You will notice that the edges are pixelated so these need to be taken care of. Press Ctrl + 0 to fit the image back into frame. When the image is back in frame the image might look ok but press Ctrl + + to increase the size and you will see the image gradually becoming pixelated.
3] Change to Gray Scale
The image needs to be changed to grayscale for the next step. If the image is in color when the next step is done, it could distort the color when the Curves Adjustment Layer is applied.
Before changing the color to grayscale, you need to save the original colors. To change the color, go to the left Tools panel and click the Eyedropper Tool. Click on the color you want to sample with the Eyedropper Tool and you will see the color come up on the color swatch on the left Tools panel. Click on the color swatch and a Color Picker will appear.
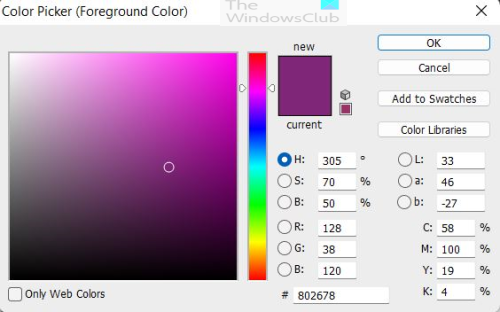
Click Add to Swatches and a box will appear for you to give the color a name. give it a descriptive name that will tell you where the color is to go. Then press ok. Depending on the version of Photoshop, it may give an option to Add to my current library, click that option then click Ok to save. Follow the same process for the other colors if you have multiple colors in your logo. You do not have to do it for black unless you have a special shade of black. When you are finished saving the colors you should see them in the color swatch on the right. Hover the mouse over the color and the name will appear.
To change the image to grayscale, go to Image then Adjustments then Desaturate, or press Ctrl + Shift + U. The colors in the image will become grayscale, and the black and white will remain the same.
4] Change Background Color to White
To get rid of the pixelated edges, you need to apply a blur. To apply the blur, it is best to have a white background.
To apply the white background, go to the Background and Foreground color swatch on the left tools panel and make sure the background color is set to white. When that is done go to Layer then New Layer then Background from Layer. The background of the image should now be white.
5] Apply Blur
Before applying the blur convert to a smart filter. To convert to smart filter go to the top Menu Bar and press Filter then Convert to Smart Filters.
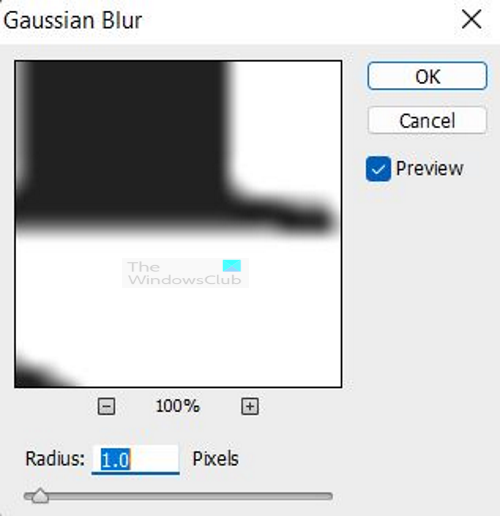
You then go to Filter, Blur then Gaussian Blur. The Gaussian Blur window will appear with a preview of the artwork. Move the Radius slider to 0 then slowly move it to the right and watch the pixelated edges change. When the edges start to look like a straight line you can stop and press OK to confirm. You can also click inside the Radius value box and use the up and down arrow to change the value. You can use the + or – under the preview window to zoom in or out.
6] Apply Curves Layer
Moving into adding the curves adjustment layers to make the logo look much better. Go to the Layers panel, go to the bottom, and click Create new fill or adjustment layer. A menu will pop up, click Curves.
A curves layer will appear above the original image layer, this is the layer where the curves will be applied.
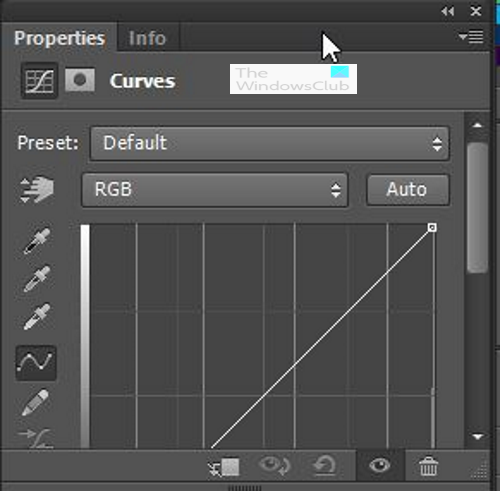
The curves adjustment window will show up and you can adjust the angles and watch the changes in the image. Hover over the top and bottom of the line until you see a cross, then click and drag to the left and right and watch the adjustments to the image. Move the points until the image starts looking sharp.
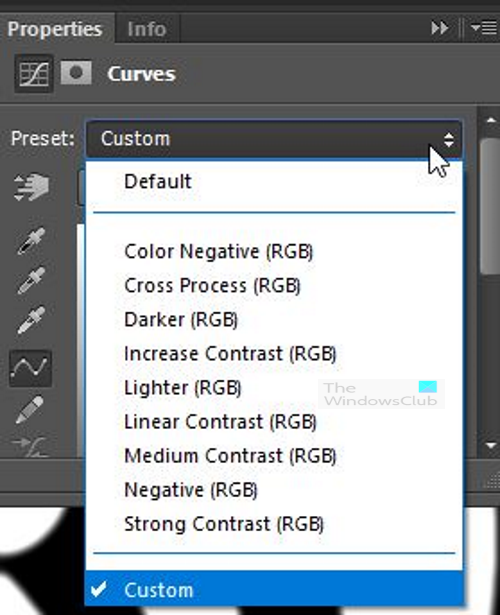
There are default curve adjustments that you can use, or you can stick to the custom and adjust to your satisfaction.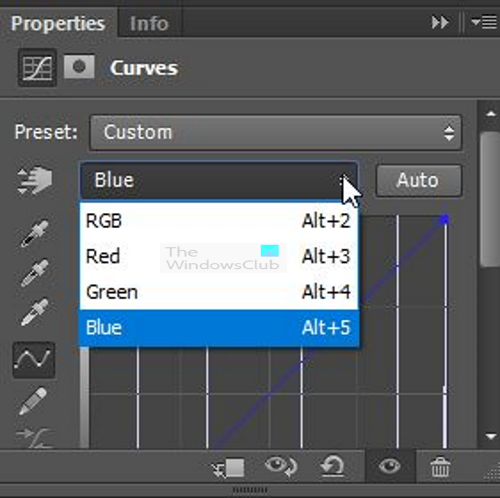
You can adjust the Red, Green, and Blue (RGB) colors together or you can choose to go into each color separately and adjust them.
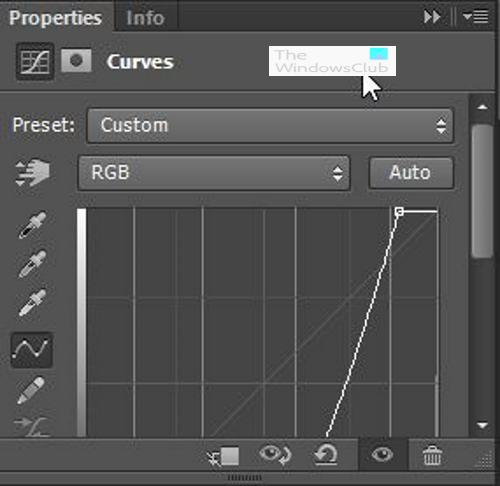
This is the adjustment that was made in the curves adjustment window. This moved out most of the gray sections at the edges and make the image sharper and ready for the next step. At this point the image layer and the curves adjustment layer are separate so if there are errors the curves layer can be edited or deleted and a new one created.
7] Merge Layers
Now the background will be removed and the colors added back to the image. Before removing the background, you need to merge the layers. To merge the layers select both by clicking one then pressing Shift and then clicking the other. Right-click then choose Merge Layers. This will make the logo layer and the curves adjustment layers become one.
8] Remove Background
When the merge is complete, remove the background. Go to the left tools panel and select the Magic Wand. Click on the white background and press delete, since the logo is black and the background is white, it should be easy to remove the background. If your logo had closed spaces like in the closed spaces of letters, numbers, or designs, be sure to delete the background from within those closed spaces.
9] Add Color
In this step, you will be adding the colors that were saved in the color swatch. There is also the option of adding different colors if you wish to use different colors. You may think that the logo needs to be given a new set of colors to make it look better. There may be changes in the organization and the colors have changed. This is the perfect time to add new colors to the logo. To add the original colors that were saved in the swatch, go to the swatch, and click on the color then go to the tools panel and click the Paint Bucket Tool. Go to the sections that would have that specific color and click. After you have applied the color with the paint bucket, zoom in and see what sections were missed. Usually, there is a section around the edges that may have been missed, use the paint bucket to get those sections. Follow those steps for each section until it is all completed.
Tip – While adding the color, if you need to change to a different color that is available somewhere else, you can sample it. You just need to hold the Alt key and then click on the color you want; the current color will be changed to the new color that was sampled.
10] Vectorize Logo
To turn the logo into a high-resolution vector image, go to the layers panel and hold the Ctrl key and press the layer thumbnail. You should see the whole image selected.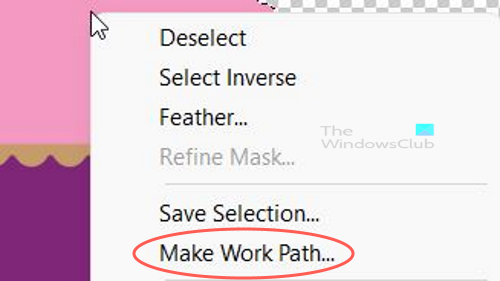
Go to the left tools menu and check the Marquee Tool then right-click on the image and choose Make Work Path.

The Make Work Path option will appear, set the Tolerance to 1.0 then press Ok to confirm and close the window.
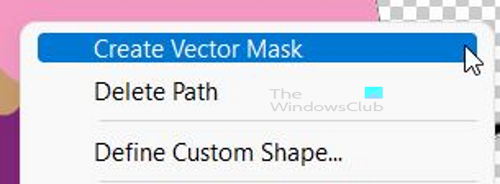
Go to the right tools panel and select the Direct Selection Tool, right-click on the logo, and select Create Vector Mask. The logo is now a vector and can be scaled without getting pixelated.
11] Save
If you want to save the image for Illustrator go to File then Export and choose Paths to Illustrator. In later versions of Photoshop, the option to export for Illustrator would be – File then Export then Export As. A Save As dialogue box will appear, choose SVG as the format.
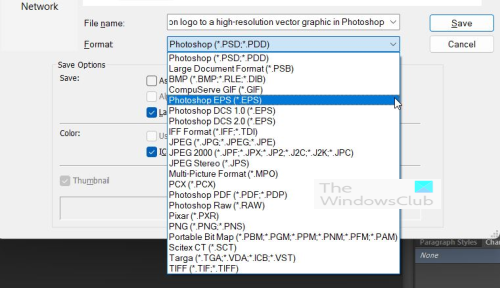
You can also choose to save another way to keep it as a vector. Go to File then Save As then choose Photoshop EPS.
Read: How to fix Blurry Pictures in Photoshop
How do I make a low res logo high res in Photoshop?
To make a low-resolution logo high resolution in Photoshop you need to increase the size and the resolution in the Image Size window. Go to Image then Image Size and the dialogue box will appear. make the size of the longest end between 3000 to 5000 ppi and the resolution 300 ppi. If the logo is still pixelated, turn it into a smart object then, apply a smart filter, apply a Gaussian blur and then use a curves layer to adjust the image until the pixelated sections are straight. Merge the layers and save as a vector.
How to make pixelated images in Photoshop?
- Open the image in Adobe Photoshop. If the picture that you want to depixelate is on its own Photoshop layer, make sure that you click to select that layer in the Layers window.
- Click View and then Actual Pixels so that you get a clear view of the extent of the pixelation.
- Go to Filter and then Noise on the main menu. Select Despeckle. This option helps to smooth out the pixels in your image.
- Press the CTRL and F keys two or three times to further despeckle the image. If you despeckle the image any more than four times, it will probably start to blur past recognition.
- Perform a Smart Blur on the image as an alternative to help get rid of pixelation. Go to the Filter menu and choose the Smart Blur option. Set the radius at about 1.5 pixels and the threshold at about 15 pixels, then hit OK. You can always go back and adjust these settings by pressing the CTRL + Z keys.
Hope the post helps you.