We all know how tricky it can be when we have to deal with a huge number of files in our day-to-day life. We come across a variety of files with different types of file extensions which means every file extension is different from another and serves a specific purpose. IMG is also one of the file extensions but it is also one of those which we don’t come across in our daily lives. In this article, we will learn how to convert these IMG files into ISO files without decreasing the quality of items present inside.

Convert IMG to ISO in Windows 11/10
Before we start with how to convert the file, let’s first understand what the purpose of an IMG file is. IMG files are almost the same as ISO files are, used for storing the complete image of a disc. The IMG format is mostly used for distributing programs like Operating Systems, heavy applications, games, etc. If you are a PC gamer, then you might have seen that most of the games come in the format of either IMG or ISO. It is considered one of the better ways to dump data or burn a CD/DVD in operating systems like Windows and Mac. Windows 11/10 allows you to access files inside an IMG file just like it opens an ISO file like a drive in the File Explorer but you may still face certain issues while burning any CD/DVD.
Now, there are multiple ways to convert a .img file into a .iso file. You can use applications like PowerISO or an online free tool like IMGtoISO, but both of these methods are not fully proof. PowerISO will simply change the extension from .img to .iso, and IMGtoISO will end up with a broken file with missing internal files. Another full-proof and working way of converting the file is using the free OSFMount application.
Download and install the OSFMount tool.
Start the application as an administrator.
Once the application is running, Click on Mount new.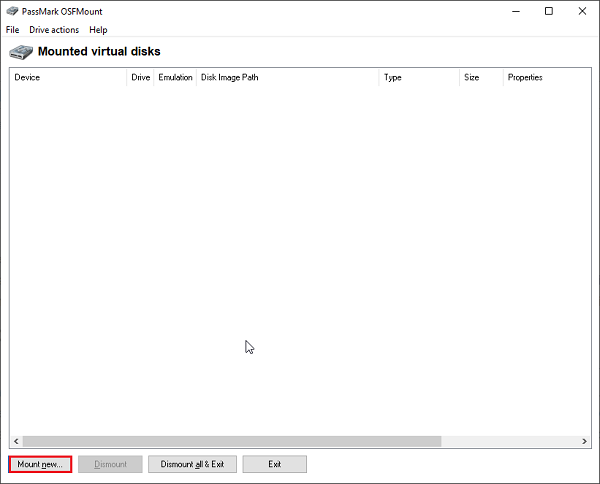
Select the option of Disk image file and choose the path of the .img file.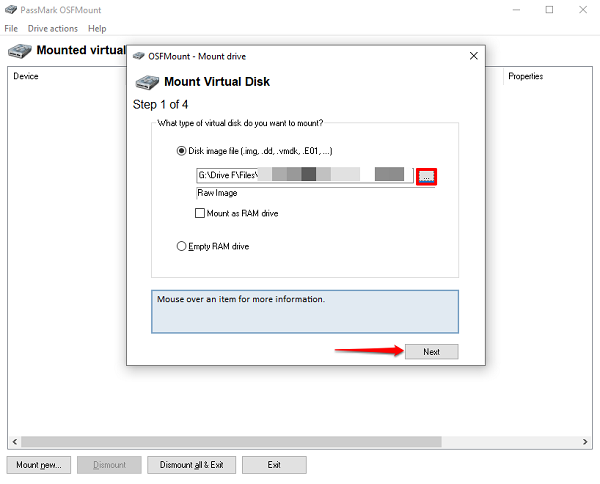
Now, if your .img file consists of multiple partitions like a system backup then choose the option of Mount partitions as virtual disks else choose Mount entire image as virtual disks.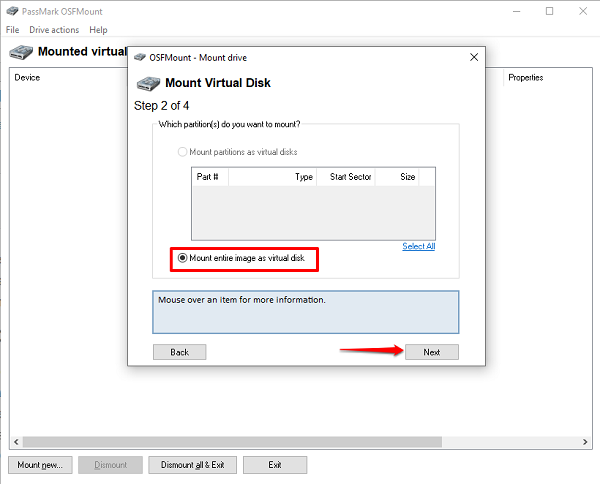
Let the application choose the type of Mount according to the contents of the .img file and then click on Mount.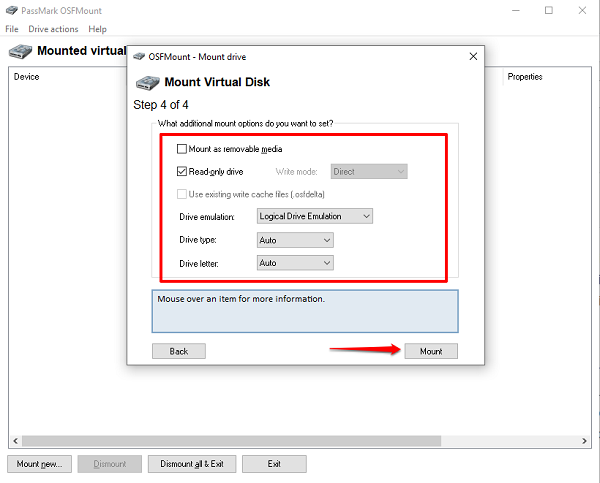
Once the file is mounted as a Virtual Disk, right-click on the disk and click on Save to image file.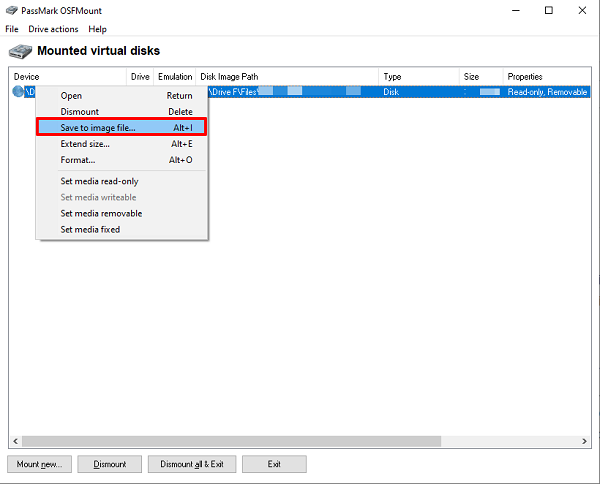
Choose the folder where you want to save the converted file and change the Save as type option to Raw CD Image (*.iso).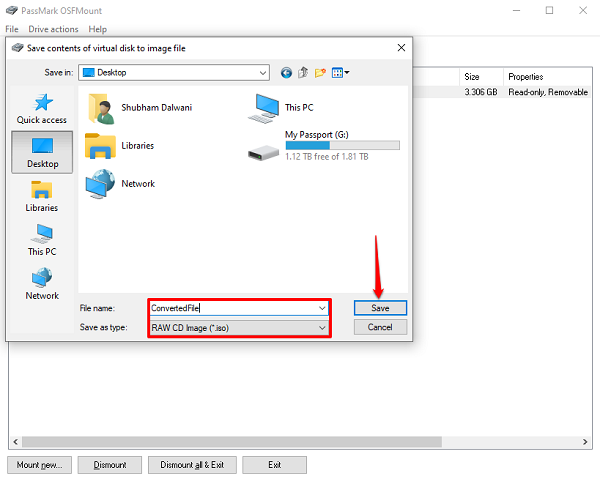
In a few minutes, you will have a fully converted file.
You can mount multiple files and convert them as you want. This process not only makes it easier for us to create the working ISO file but also ensures that files are not lost in the process.
When the conversion process is over, make sure to unmount the virtual disk to save disk space.
Read next: How to convert BIN to ISO.
Leave a Reply