Microsoft Hyper-V is a native hypervisor for Windows, allowing you to run virtual machines (VMs) with various guest operating systems. Unlike VMware’s hypervisor products, you can’t deploy a VM directly from an OVA format in Hyper-V because the OVA file format is not supported. So, in this post, we will learn how to convert OVA/OVF Files to Hyper-V VM on Windows 11.

How to convert OVA/OVF Files to Hyper-V VM on Windows 11?
An OVA file is a container used for distributing and deploying preconfigured virtual machines. When importing a VM from an OVA file, the hypervisor software extracts the contents and sets up the virtual machine without manual configuration.
To convert OVA/OVF files to Hyper-V VM, you need to follow the steps mentioned below.
- Extract the OVA template
- Convert the virtual disk from the VMDK format to the VHD or VHDX format
- Create a new virtual machine
Let us talk about them in detail.
1] Extract the OVA template

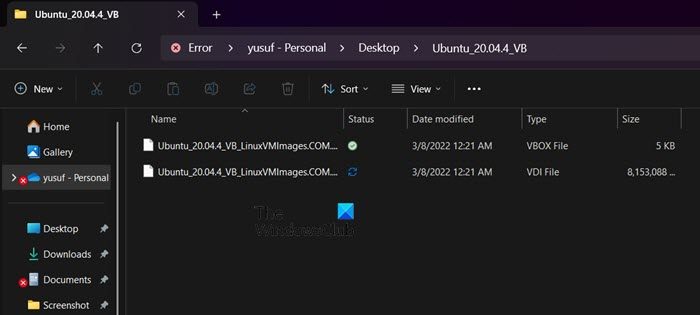
First of all, we need to extract the OVA template to get the content for your virtual machine, you can do that using an extracting tool. When you extract files from an OVA template, you create an OVF template along with its files, so, you are creating OVA to OVF. You don’t need to extract content from the OVF template, as it is usually provided in a separate directory with a virtual disk file and configuration file for the VM template.
2] Convert the virtual disk from the VMDK format to the VHD or VHDX format

Next up, we need to convert the virtual hard disk from the VMDK to VHD or VHDX as those formats are supported by Hyper-V. To do so, you can try some free third-party tools such as qemu-img, but in this tutorial, we will be using Microsoft Virtual Machine Converter and VirtualBox Manager. You don’t have to use both of them, you can use either of them to get the job done
First of all, let us see how to use Microsoft Virtual Machine Converted to get your VDK or VHDX hard drives. Follow the steps given below.
- Since it is an old tool, we recommend you download it from web.archive.net.
- Once downloaded, run the installer to get it installed on your computer.
- Now, open PowerShell as an administrator and run the following command to import the module that you get from the Converter.
Import-Module “C:\Program Files\Microsoft Virtual Machine Converter\MvmcCmdlet.psd1"
- Then run the command to convert your hard disk file to one supported by Hyper-V
ConvertTo-MvmcVirtualHardDisk -SourceLiteralPath "C:\filepath\filename.vmdk" -DestinationLiteralPath "C:\filepath\filename.vhd" -VhdType DynamicHardDisk -VhdFormat Vhdx
Make sure to replace the filepath and filename variables with the actual file name and path.
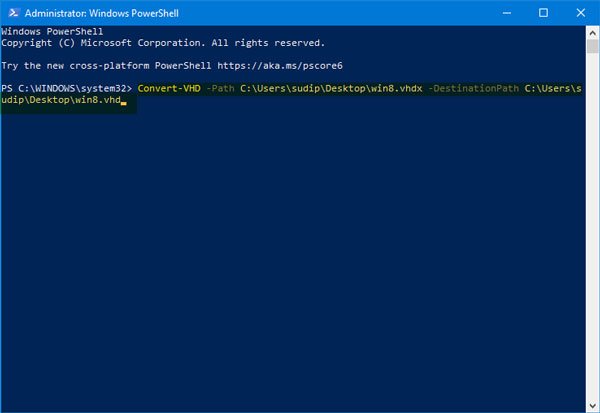
If you have a VHD file, you can convert it using PowerShell; run the following command.
Convert-VHD –Path C:\filepath\filename.vhdx –DestinationPath C:\filepath\filename.vhd
Alternatively, use the VirtualBox Manager command-line utility to do the conversion.
- First of all, open Command Prompt as an administrator and then run –
cd "C:\Program Files (x86)\Oracle\VirtualBox" - Then execute the command to convert a VMDK virtual disk to a VHD format for Hyper-V
VBoxManage.exe clonehd --format vhd "C:\filepath\filename.vmdk" "C:\filepath\filename.vhd"
Once the hard drive is converted, we will go ahead and create a new virtual machine using the converted VHD file.
Read: How to convert VHD to VHDX using Hyper-V Manager?
3] Create a new virtual machine

Now that we have our VHD file, we can proceed with the creation of a virtual machine as this file will be compatible with Hyper-V. To do so, follow the steps mentioned below.
- Open the Hyper-V Manager.
- Right-click on the host machine and select New > Virtual Machine.
- This will open the New Virtual Machine Wizard, where you have to click on Next to get started.
- Give it a name and then click on Next.
- Select a generation, and click on Next.
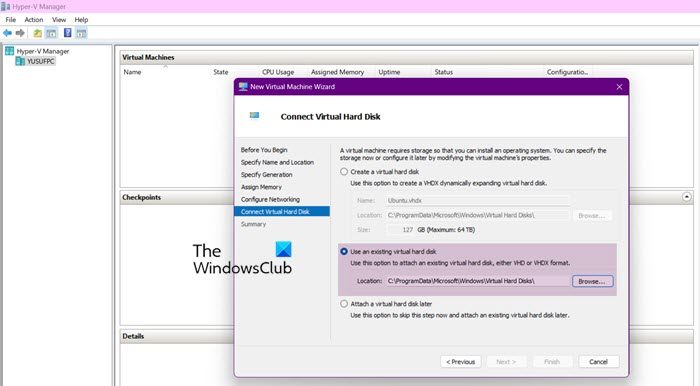
- In the next step, you need to allocate memory, select a virtual switch, and then proceed to Connect Virtual Hard Disk.
- Select Use an existing hard disk, click on the Browse icon, navigate to the location where you have stored the virtual hard disk, and then select it.
- Follow the on-screen instructions to complete the procedure.
Hopefully, you will be able to connect to the virtual hard disk.
Read: How to convert VHDX file to VHD using PowerShell
How to convert OVA file to Hyper-V?
You can convert OVA file to Hyper-V, using VirtualBox Manager or Virtual Machin Convert. Alternatively, can use qemu-img.exe to convert an OVA file to a VHDX file. For example, you can convert a Linux OVA appliance to a VHDX disk. Once you have the VHD or VHDX disk format, you can import it directly into Hyper-V.
Read: How to run Hyper-V, VirtualBox and VMware on same computer?
How to open OVA file in Windows 11?
You can not directly open the OVA file in Windows 11. Instead, you must create a virtual box using VirtualBox and then open it. Since Oracle VirtualBox supports OVA, you can directly import it and add it to your virtual machine. Open VirtualBox, click on File > Import Devices and select the OVA file.
Also Read: Convert VMware to Hyper-V and vice versa.
Leave a Reply