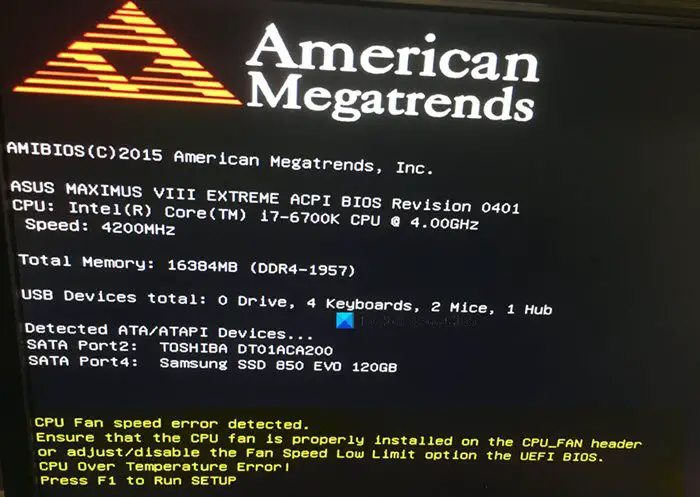
Hardware devices such as laptops can develop issues with a CPU fan. So, during the startup, users can see an error, bearing the following message – CPU Fan error: Press F1 to run setup. It is an error message that can be resolved by taking appropriate action.

CPU Fan Speed Error Detected
Ensure that the CPU fan is properly installed on the CPU Fan header or adjust/disable the Fan Speed Low Limit option in the UEFI/BIOS.
CPU Over Temperature Error 1
Press F1 to run setup.
Fix CPU Fan error: Press F1 to run setup
It has been seen. The warning is usually triggered when you turn on your PC. As such, the fan error occurs before Windows 11/10 OS boots and is probably caused by some hardware issue. It may not be due to overheating.
You can follow these tips to resolve the issue and get your CPU fan up and running:
- Press F1
- Place your PC in a cool place.
- Clean your CPU fans thoroughly.
- Install a good airflow solution.
- Keep your PC in a cool place.
- Check your CPU fan’s settings
- Change BIO settings
- Get it checked by a Hardware technician.
Find the more detailed description below!
1] Press F1
First, as recommended by them, press F1 to run the setup and follow the on-screen instructions.
Completing this task should help. But if it does not, proceed to the next suggestions.
2] Place your PC in a cool place
Heat is an inevitable byproduct of computer hardware operation, but too much heat can cause a slowdown across your system. So, the ambient temperature where you place your computer plays a key role in keeping your CPU fan cool. The idle temperatures under which your CPU fan can function optimally ranges somewhere between 32 – 40 Celsius degrees. If the temperature exceeds this range, it can likely warm up your PC. Even direct exposure to sunlight can raise the temperature. So, the best way to avoid the error events is to place your computer in a cool place and under some sort of shade or covering.
Fix: Processor Thermal Trip error on Windows
3] Clean your CPU fans thoroughly

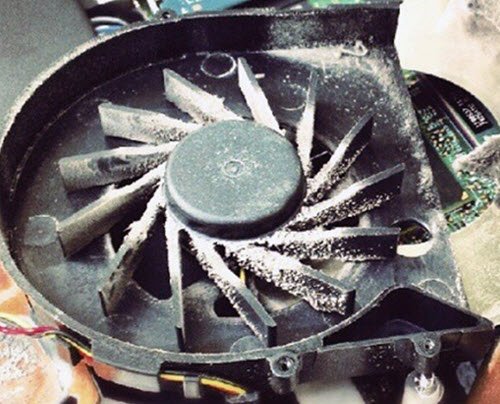
For a CPU fan covered with a thick coat of dirt and dust, you may use a cotton swab soaked in isopropyl alcohol. The alcohol removes any grime that has settled on the fan blades. You can also clean the interior and remove dust with an air gun or canned air. Avoid spraying or cleaning agents on any parts, as this may damage some of the components.
Alternatively, you can use external fans or heat dissipation devices to cool your computer. The commonly used small USB fans, household stand fans, or air conditioners make an ideal setup that can keep the components of your computer, including the CPU fan sufficiently cool and allows you to get the best performance from your system.
Read: Free Laptop Cooling Software for PC.
4] Install a good airflow solution

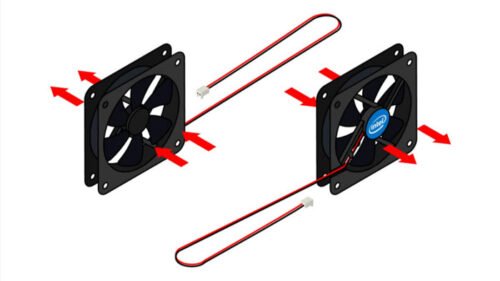
You can improve the amount of air that flows in, either by optimizing fan placement or by providing airflow options to the builder. PC fans come in varying sizes (from a common 120mm case fan to more specialized configurations), depths, noise levels, and aesthetic considerations. You can choose the one that optimizes airflow and keeps your PC cool.
Read: How to prevent or fix Overheating and Noisy Laptop Fan issues.
5] Check your CPU fan’s settings
If some software-related issue is causing this error, you can confirm it by check the CPU fan’s settings in BIOS. This method is occasionally used to troubleshoot tech issues.
Enter the BIOS system of your PC and go to Advanced Settings. You’ll need to use the left and right arrows to navigate your way to the Advanced Settings.
Switch to Hardware Monitor to access your CPU Fan settings. Here. Configure the status as follow:
- Active Heat Sink – Enabled
- Fan Duct with Fan – Enabled
- Passive Heat Sink – Disabled
- Fan Duct without Fan – Disabled
Once done, save your changes and exit BIOS setup.
Read: What to do when your CPU Fan runs at full speed always?
6] Change the BIOS setting
If you can see your CPU fan working properly and you’re sure your computer isn’t overheating or running too hot, follow this solution to bypass the CPU fan error message and get your device up and running properly. Note – It requires you to make changes to the BIOS setting. So, please proceed carefully!
- Open the BIOS setup of your computer and select Monitor.
- Move to Fan Speed Monitor entry, use arrow keys to go to navigate.
- Here, set the Fan Speed from N/A (Not Available) to IGNORE.
- Next, switch to Exit and save the changes you’ve just finished making.
- Following this, restart your computer and check if the problem persists.
The CPU Fan error message should no more appear during the Windows boot.
Related: 511-CPU Fan not detected error during Boot.
7] Get it checked by a Hardware technician
If nothing helps, you may need to get the CPU Fan and its connections checked by a Hardware technician
All the best.
How to fix CPU fan error on startup?
To fix a CPU fan error on startup, first ensure the fan is securely connected to the motherboard. Check for dust build-up or obstructions that might hinder fan movement. Restart the PC to check for error persistence. If unresolved, consider replacing the fan or updating the BIOS for improved compatibility with newer hardware.
How do I reset my CPU fan speed?
To reset your CPU fan speed, restart your computer and enter the BIOS by pressing the designated key during boot-up (such as F2, Delete, or Esc). Navigate to “Hardware Monitoring” or “Fan Control” settings. From there, you can reset fan speed modes to default settings or configure them based on your preference.
Leave a Reply