Have you ever thought about doing a hand-drawn shape in PowerPoint plus adding a chalk effect to it so it will look like a person has drawn with their hands using some chalk? Well, in this tutorial, we will explain the steps on how to do this procedure. Microsoft PowerPoint is known to many for creating presentations for individuals across the globe, but it has features that can enhance your pictures or make cool images as well.
How to create a hand-drawn Shape with Chalk effect in PowerPoint
Follow the method below on how to create a hand-drawn shape plus add chalk effect in PowerPoint.
Create a hand-drawn shape in PowerPoint
Launch PowerPoint.
Change the slide to a blank layout.
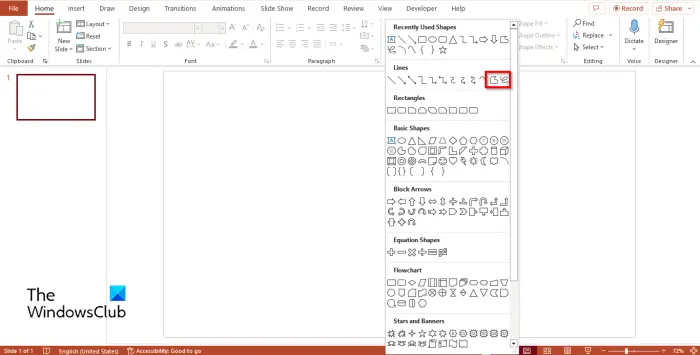
On the Home tab in the Drawing group, select the Freeform Shape or Freeform Scribble from the gallery.
Draw a shape on the slide.
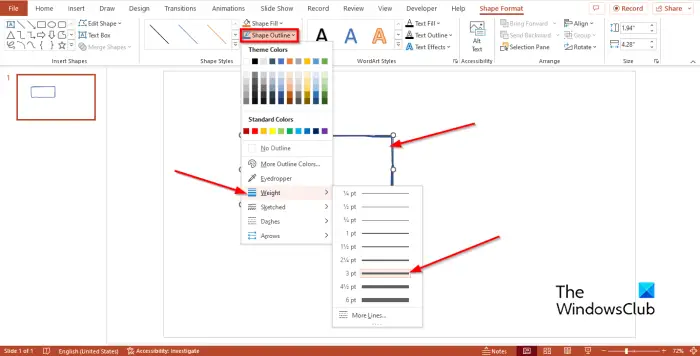
You can click the Shape Format tab and click Shape Outline and select a Weight from the menu to thicken the outline of the shape.
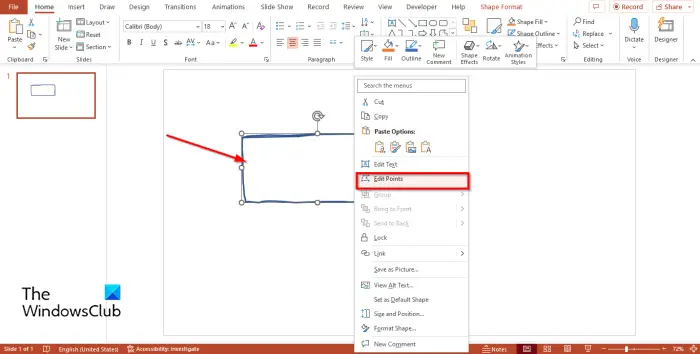
If the shape is not drawn properly, you can right-click the shape and select Edit points.
You will see some points around the shape; try to align the shape.
Now we are going to change the background to black.
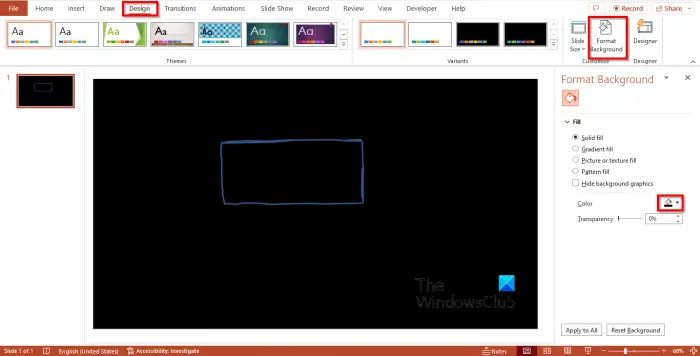
Go to the Design tab and click the Format Background tab in the Customize group.
A Format Background pane will open. Choose the color black.
The background of the slide will become black.
Now we are going to turn the shape outline white.
Click the Shape Format tab and click the Shape Outline button, then select the color white.
Add chalk effect to shape in PowerPoint
Now we are going to convert the shape to a picture.
Right-click the shape and select Cut from the menu.
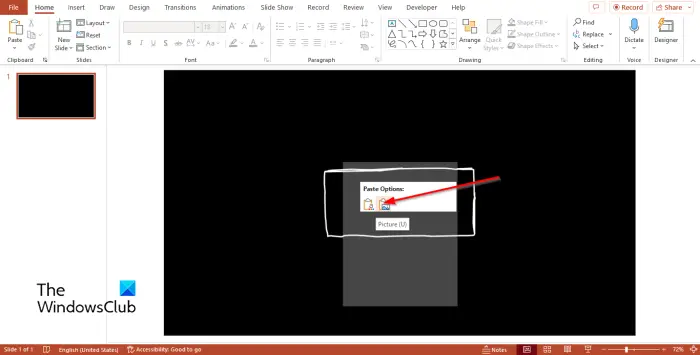
Then right-click the shape again and select Paste as a picture from the menu.
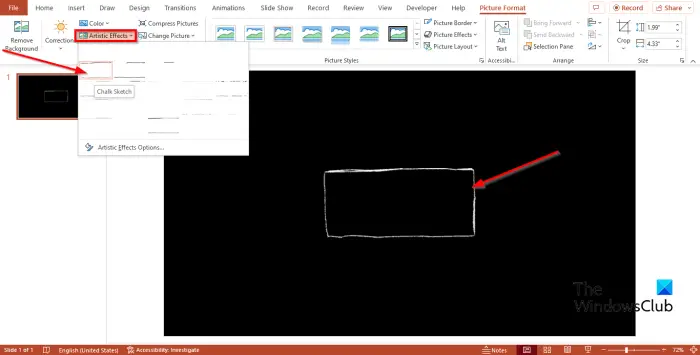
Go to the Picture Format tab and click the Artistic Effects button in the Adjust group.
Select Chalk Effect from the menu.
Now the shape looks like it has been drawn with some chalk.
Where do I find shape effects in PowerPoint?
If you want to add effects to your shapes in PowerPoint, you will need to use the Shape Format tab. The Shape Format tab consists of features that will allow users to add special effects or colors to their shapes.
READ: How to split a Shape into Parts in PowerPoint
How do you create a custom shape in PowerPoint?
If Microsoft PowerPoint users want to create custom shapes, they can use the Edit Points feature. The Edit Points feature assists users to convert the existing shape to a freeform shape. There are two ways you can access the Edit Points feature in PowerPoint.
- Right-click the shape and select Edits Points from the menu. You will see some points on the shape. Drag any of the points to form the shape you want.
- Select the shape, then click the Shape Format tab. Click the Edit Shape button in the Insert Shapes group and select Edit Points from the menu. Drag any of the points to form the shape you desire.
READ: How to make a background with Chalk or Marker effect in PowerPoint
We hope you understand how to create a hand-drawn shape plus add chalk effect in PowerPoint.