In Windows 11 and Windows 10, users, specifically, no longer have the option to create a local account during the out-of-box experience (OOBE) setup. In this post, we will prescribe a workaround that can allow you to continue without using the Microsoft Account during setup. It’s imperative to point out that the reasoning behind this approach is that Microsoft wants Windows users to use the cloud-based account system to take advantage of its additional benefits.
Create a Local Account during or after installation in Windows 11/10 Home
Windows 11/10 Home users who prefer the simplicity, privacy, and security of a local account, which was one of the reasons the option was available during the setup process – the next time that you reset or set up a new device or perform a clean installation, you can use either of the workaround illustrated below if you want to create a local account.
Create a local account during Windows installation

In Windows Setup, you no longer see a Local Account option. To create a local account within the out-of-box experience for Windows Home, while in the account setup stage, do the following:
1. Disconnect the computer from the network.
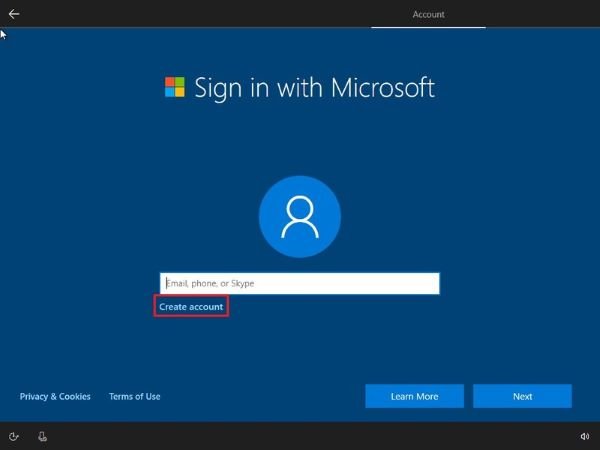
2. In the Sign in with Microsoft page, click the Next button without specifying an account name.
3. Click the Create account option.
4. Click the Skip button.
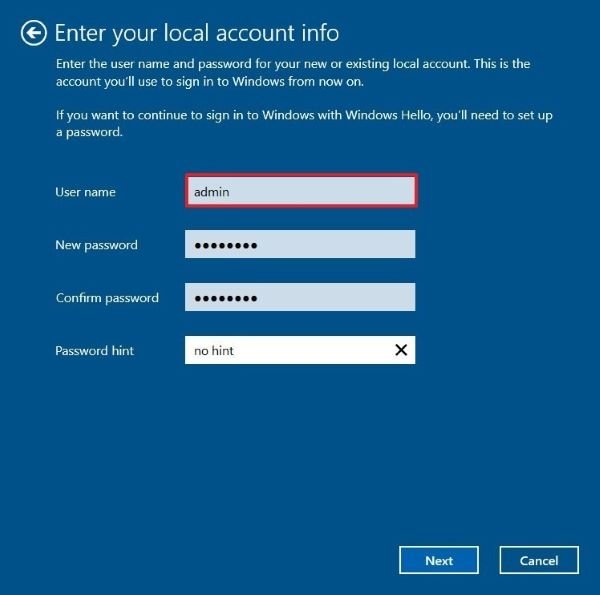
5. Specify a name for your local account.
6. Click Next.
7. Create a password for the local account.
8. Click Next.
9. Confirm the password.
10. Click Next.
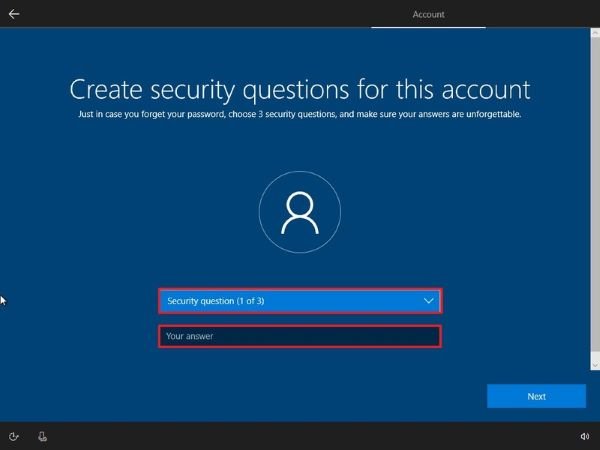
11. Select your first security question using the drop-down menu.
12. Confirm your first answer.
13. Click Next.

14. Repeat steps 11-13 two more times to complete setting up the local account security.
15. Continue with the on-screen prompts.
Once you complete the OOBE steps, you’ll be back on the desktop. You can now reconnect the device to the network, and continue using Windows 11/10 with a local account.
Create a local account after Windows 11/10 installation
To create a local account after you have completed installation and OOBE using a Microsoft account, do the following:
1. Press Windows key + I to launch the Settings app.
2. Click Accounts sub-category.
3. Click Your info.
4. Click the Sign in with a local account instead option.
5. Click Next.
6. Specify your account information, such as username, password, and password hint.

7. Click Next.
8. Click the Sign out and finish button.
After completing the steps, you can sign back into the account to continue your Windows experience using the newly created local account.
Alternatively, you can follow the instructions outlined in this guide to create a Local account.
Or you can create a new local account via the Computer Management snap-in console.
Here’s how:
- Right-click Start and select Computer Management.
- In the window, click the chevron on Local Users and Groups to collapse the section. Click Users.
- Now, right-click on the middle column and select New User.
- Follow the onscreen prompts to provide the new user details.
- When done, restart your PC.
You’ll now have the option to sign in to Windows 11/10 Home using either the Microsoft Account or Local Account.
That’s it, folks!
PS: This workaround will also apply to Windows 11/10 Pro – if, in the foreseeable future, Microsoft decides to adopt this setup approach for this edition of Windows.
Leave a Reply