This guide shows you the different methods and steps to create a mind map in Microsoft PowerPoint. A mind map is an effective diagram used to brainstorm your ideas, tasks, and concepts. You can create mind maps and later analyze and recall your ideas and sub-ideas from the mind map. It is a handy technique that helps you memorize your concepts and information, organize ideas better, perform a case study, simplify complex ideas, use them in project management, make plans, and more.
Now, if you want to add mind maps to your PowerPoint presentations, how to do that? Simple, just go through this guide. Here, I am going to discuss two different methods to create a mind map in PowerPoint. Without much ado, let’s have a look at these methods now!
How to Make a Mind Map in PowerPoint
You can create a Mind Map in PowerPoint using a Pre-designed Template or use the Shapes tool to create a Mind Map from scratch in PowerPoint. Let us discuss these methods in detail!
1] Create a Mind Map in PowerPoint using a Pre-designed Template
A pre-designed template is the easiest way to create a particular type of diagram. PowerPoint and other Office apps offer some great templates to design Gantt charts, roadmaps, calendars, and more graphics. Thankfully, PowerPoint provides a mind map template to select and customize. You can search for a mind map template in its online template library and then edit it as per your requirement. Let’s have a look at the main steps create a mind map in PowerPoint presentations using an existing template:
- Launch the Microsoft PowerPoint app.
- Go to the File > New option.
- In the search box, type mind map and press Enter button.
- Select a desired mind map template from the results.
- Edit the mind map template as per your requirements.
- Save the presentation with the mind map.
Now, let’s elaborate on these steps!
Firstly, launch the PowerPoint app and then click on the File > New option. Now, enter mind map in the search box and you will see few related templates.
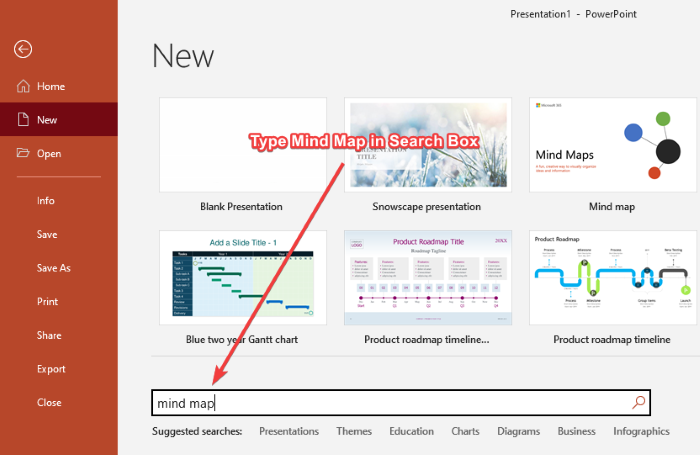
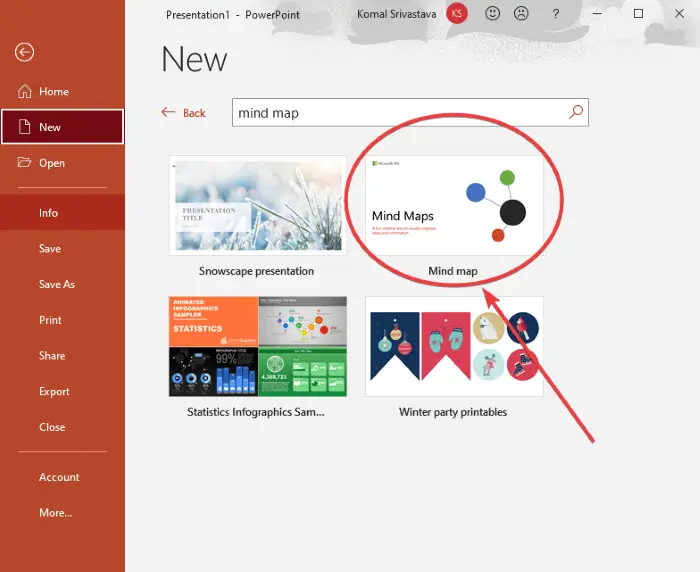
Simply, click on the template named Mind Map and then click on the Create button. It contains slides with multiple mind maps that you can easily edit.
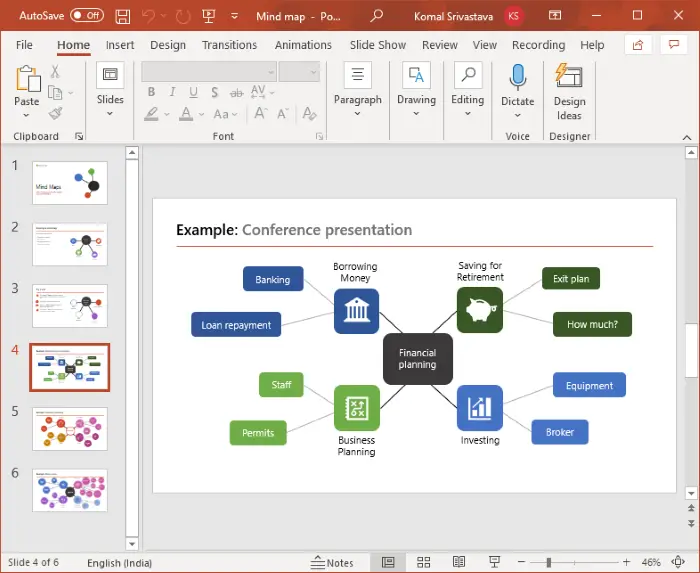
Next, you will see multiple slides with different sets of mind maps. You can select a slide and then customize the mind map according to your requirement. You can edit tasks, ideas, and concepts in the existing mind map, add new nodes and child nodes using the Insert > Illustrations > Shapes tool, customize the theme as per your preference, change shape format, edit graphics format, customize text font, and do a lot more.
Also see: Freeplane is a free mind mapping software for Windows 11/10
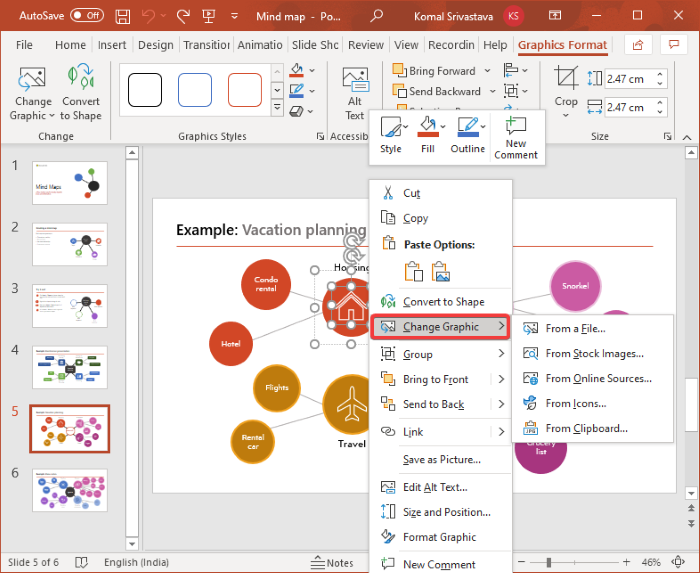
You can change the icon of nodes in the mind map template. Simply select and right-click on the icon and from the context menu, go to the Change Graphic option, and select a source to import the icon image. You can import icons from the inbuilt icon library, existing image files, online search, stock images, etc.
When you are done customizing the mind map, you save the presentation in PPT, PPTX, or publish the mind maps in PDF format. Or, you can choose any other supported format to save the presentation.
Read: How to create an animated picture frame in PowerPoint.
2] Use the Shapes tool to create a Mind Map from scratch in PowerPoint
You can also create a completely new mind map from scratch in PowerPoint with the help of the Shapes tool. Shapes tool lets you create different kinds of diagrams in PowerPoint presentations including mind maps. You can simply insert multiple shapes, add text, graphics, icons, etc., customize overall appearance, and create your mind map diagram.
Before you start making a mind map, plan the central ideas and sub-ideas that you want to represent and make a rough draft of them in a text editor or on hard paper. This will make creating a mind map in PowerPoint all the more easy.
Here are the basic steps for making a mind map in PowerPoint using the Shapes tool:
- Open PowerPoint.
- Create a blank presentation or import an existing one.
- Now, add a shape to insert a central idea or main task.
- Next, add another shape representing sub-idea or sub-task.
- Connect the central idea and sub-idea nodes with the line shape.
- Repeat step (4) to insert multiple child nodes.
- Repeat step (5) to connect ideas and sub-ideas.
- Add text to the added shapes.
- Insert icons to shape if preferred.
- Customize theme and overall appearance.
- Save the presentation with a created mind map.
Let us discuss these steps in detail!
Open PowerPoint and create a blank presentation or import an existing presentation in which you want to add a mind map. Then, add a blank slide to the presentation.
Now, you need to add a central idea and for that, go to the Insert tab and from the Illustrations section, click on the Shapes drop-down option and select the rectangle tool. I have used a rectangle shape to represent the central idea, you can choose a circle or oval or any other shape that can represent the main idea.
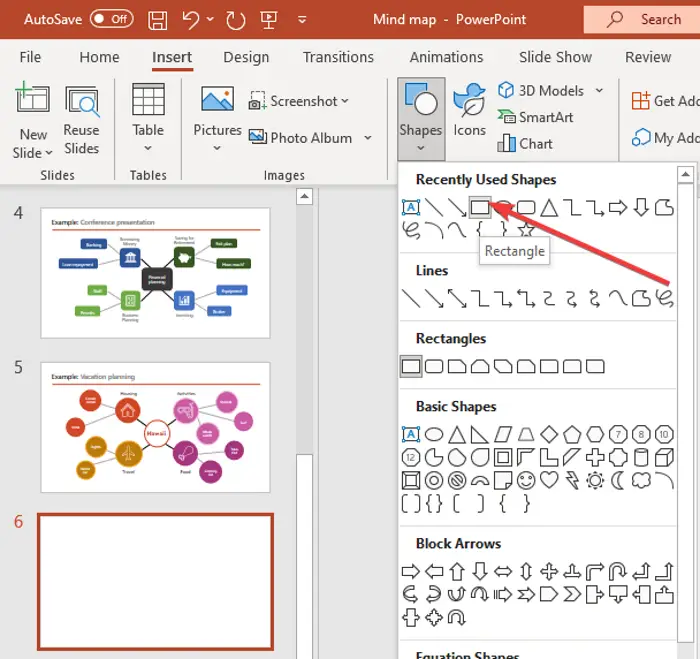
Create a rectangle in the slide and place it in the middle. Right-click on the shape and tap on the Edit Text option and type the main idea.

Now, again go to the Insert > Illustrations > Shapes tool and select and insert an oval shape. This shape is added to represent a sub-idea. Simply use the Edit Text option by right-clicking on the sub-idea node and then enter the sub-idea.
Repeat the above step to add multiple child nodes for representing your ideas and insert text to them.
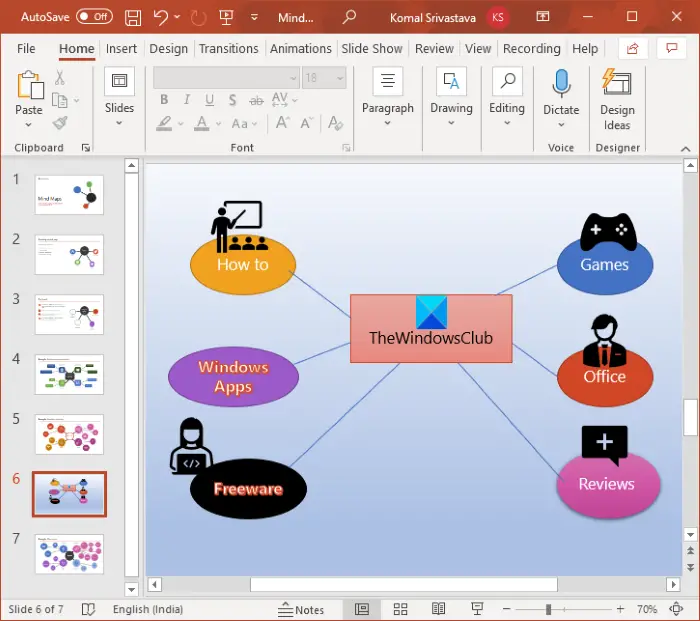
Next, you have to connect the main idea node with the nodes representing related tasks or ideas. For that, you can use a straight line shape from the Insert > Illustrations > Shapes menu. Your mind map will look something like the below screenshot.
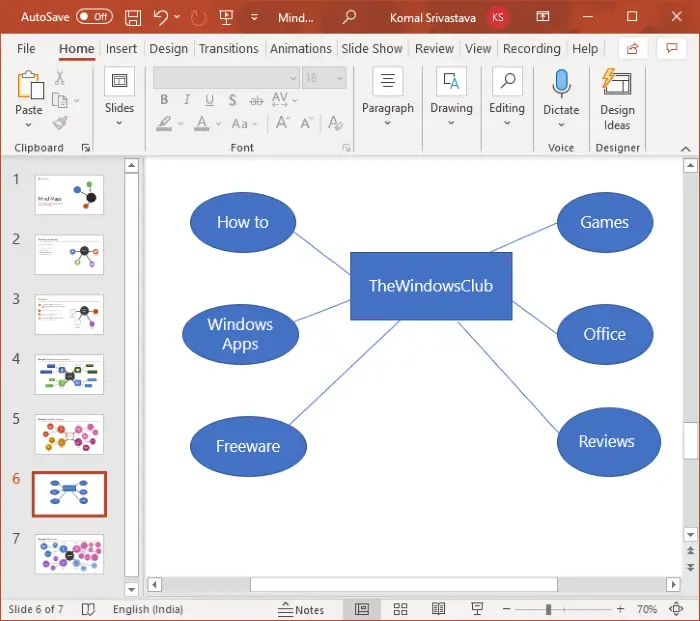
If you want to create a complex mind map with points for sub-ideas or more central ideas, you can repeat the above steps accordingly.
After that, you can insert graphics and icons to elaborate your ideas and mind map further. To do so, go to the Insert menu and click on the Icons option in the Illustrations section. Now, you can search and add the icons your want.
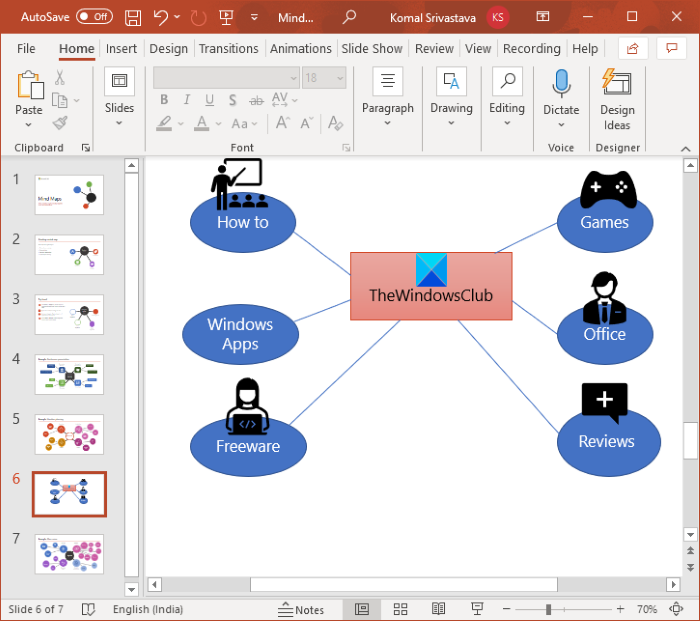
Furthermore, customize the shapes that you have used in the mind map to make a more impactful and attractive mind map. You can change the shape style, add effects to the added text, arrange shape placement, and customize shape size.
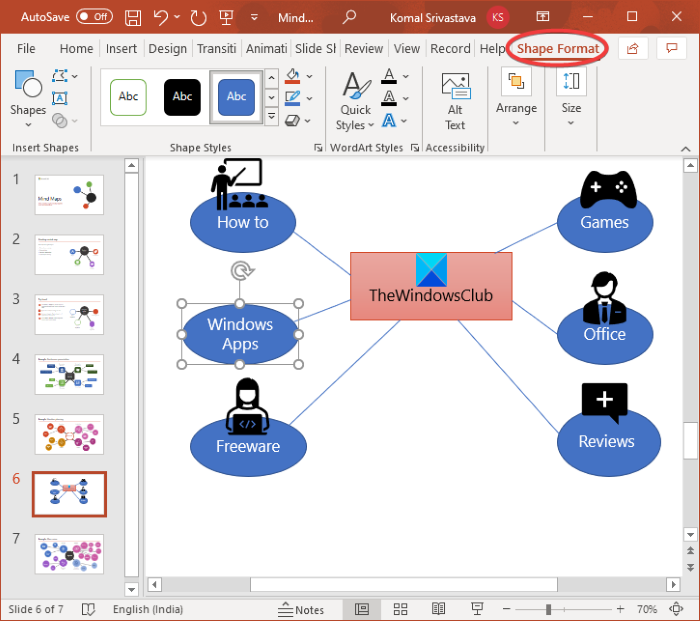
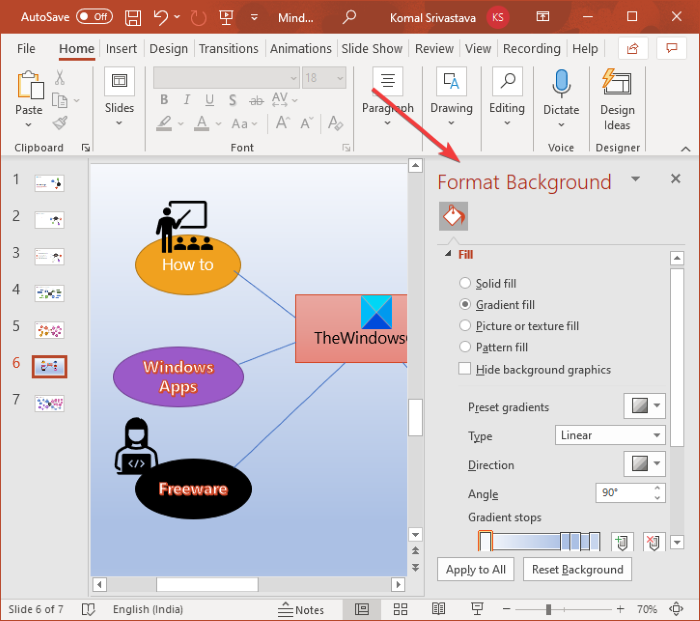
Also, you can right-click on the slide and click on the Format Background option to customize the mind map background. You can select a solid color, gradient, custom image, pattern fill, or texture fill.
The screenshot below is an example of a simple mind map. Using the procedure discussed, you can create more complex mind maps in PowerPoint.
See: Freemind: Free mind mapping software to organize ideas & chart out plans
You can now save the presentation in one of the supported formats.
I hope this article helps you create mind maps in Microsoft PowerPoint. Cheers!
Now read: