A Network Bridge is a hardware or software that connects two or more networks – maybe one a wired one and the other a wireless one – so that they can communicate with each other. If you have two (or more) networks running, one using a cable and the other, say, a Wi-Fi network, then computers using a wired or wireless network will be able to communicate with only those computers running the same type of network. To make all Windows 11/10/8/7 computers communicate with each other, you will have to create a Network Bridge.
Create a Network Bridge in Windows 11/10
The Windows operating system allows you to create a network Bridge easily, and natively. On any given computer, you can create only one Network Bridge on a computer, but this bridge will be able to handle many connections.
To start, type ncpa.cpl in Run box and hit Enter to open Network Connections. Alternatively, you can via Control Panel open Network and Sharing center and from the left panel select Change Adapter settings.

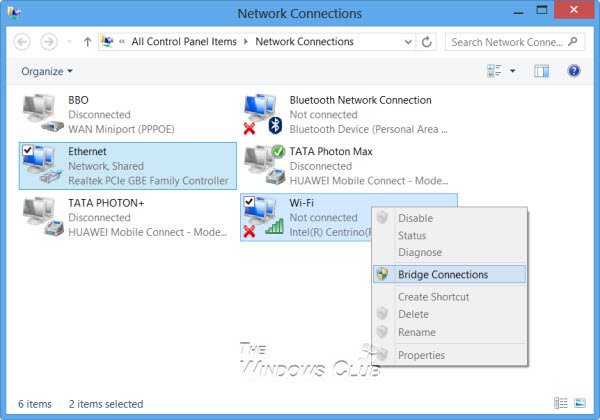
To create a Network Bridge in Windows, you must select at least two LAN or High-Speed Internet connections that are not being used by Internet Connection Sharing. Select two or more network connections you want to add to the bridge. As an example, I have randomly selected any two in the image above.
Right-click on any one of the selected network connections and select Bridge Connections.
You will see a message:
Please wait while Windows bridges the connection.
Once done, the Network Bridge will be created.
Creating a Network bridge connection can help in sharing an internet connection between multiple devices.
You should never create a bridge between an Internet connection and a network connection because it creates an unprotected link between your network and the Internet. This can make your network accessible to anyone on the Internet, which is not good from a security point of view.
I hope this helps!
Read next: How to set up an ad hoc network in Windows.