If you’re a long-time Gmail user, chances are there might be a time when your inbox becomes too vast. The question is, what can be done about this? Well, one should not lose sleep over this problem because Google has added a key feature in Gmail to solve it.
Create a new Folder or Label in Gmail
Creating new folders is one of the best ways to better maintain your email account where Gmail is concerned. The feature in question is called Labels because the popular email client doesn’t support folders. Still, in most cases, labels will work the same as folders.
Using the Labels feature is critical if you want to download your Gmail email data as an MBOX file.
We are going to focus primarily on the desktop version of Gmail and then discuss the smartphone app version later.
To create a Label or Folder in Gmail:
- Open Gmail.com
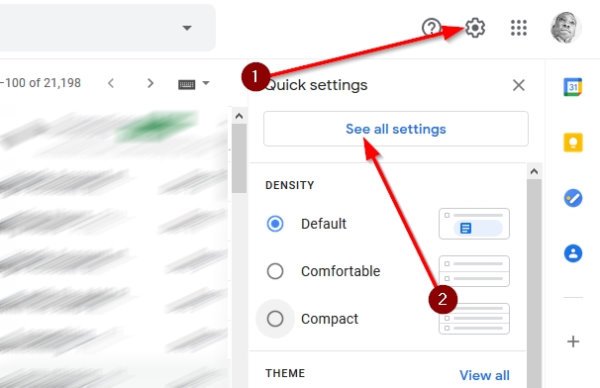
- Click on the Gear icon to open Settings
- Select See all settings
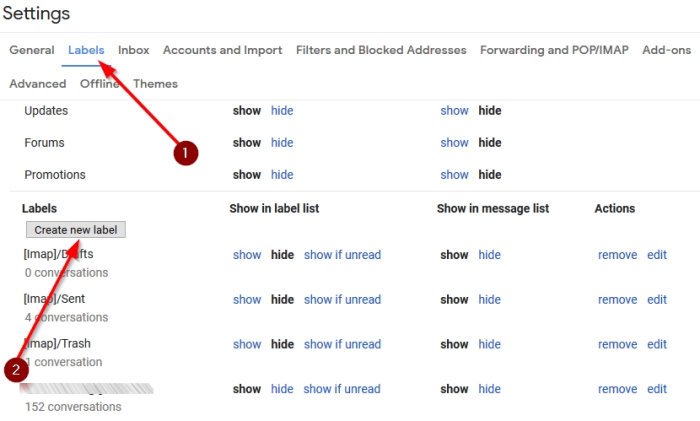
- Select the Labels tab
- Click on Create a new label.
Let us discuss this in more detail.
Click on the Gear icon to open Gmail Settings

Before you begin, please open the Gmail website from your favorite web browser. We are using Firefox, but it should work in any modern web browser without issues.
After loading the page, look to the screen’s top right and click on the Gear icon. From there, select See all settings from the dropdown menu.
Create a new label in Gmail

To create a new label, you only need to perform a few actions, and these are quite simple.
After visiting the Settings area, look for the tab called Labels and be sure to select it. From there, scroll down until you come across the Create New Label button. Click on it right away to bring up the section designed to add the name of your label.
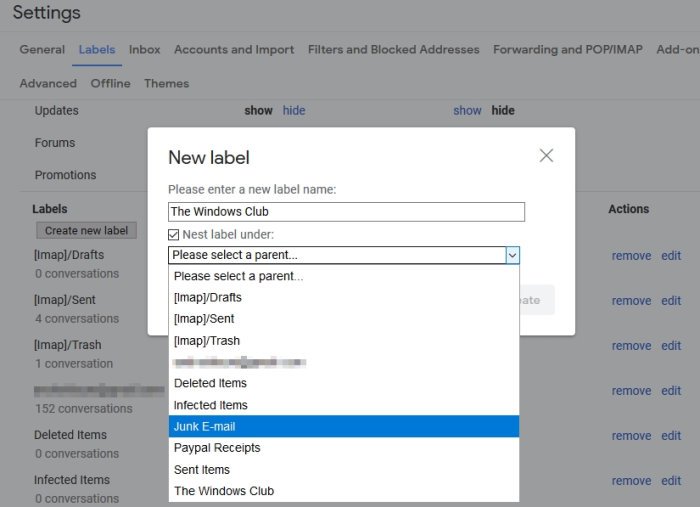
From here, add the label’s name in the given field, then hit the blue button that reads, Create.
How to create a Nested Label in Gmail

You may be wondering what this is. Well, it is basically the ability to add sub-level labels that fall under a primary label. This option is perfect for everyone who receives a large number of emails on a regular basis that are linked to a category and a sub-category.
Labels and nested labels are generally the way to go to ensure that things are more organized and easy to find.
When it comes down to creating a nested label, follow the above guide to navigate to the section where you are asked to name your label. Once there, add the name for your label, then tick the box that says Nest Label Under.
You should now see a list of already created labels. Select the one you want the nested label to fall under, then complete the task by hitting Create.
That’s it!
Leave a Reply