In this post, we will see how to set up, add, configure and create a new User Account in Windows 11 and Windows 10. You can create a user account with a Microsoft Account login or you can create a Local Account by following this tutorial.
The Windows OS lets multiple users share the same computer under their accounts. This allows several people easily share a single computer and have their own location on the computer where they can store their personal documents, pictures, videos, saved games, and other personal data. You can have more than one user account per PC.
Each individual can have a separate user account with unique settings and preferences, such as a desktop background or screensaver. Each User Account controls which files and programs the corresponding user can access and what types of changes he/she can make to the computer.
Create a new User Account in Windows 11/10
You can create two types of user accounts in Windows 11/10:
- Create a Microsoft Account
- Create a Local Account
When you sign in to your PC with a Microsoft account, you connect your PC to the people, files, and devices you care about. As such Microsoft advises to create and use your Microsoft Account to sign into Windows.
Create a New User with Microsoft Account sign-in in Windows 11
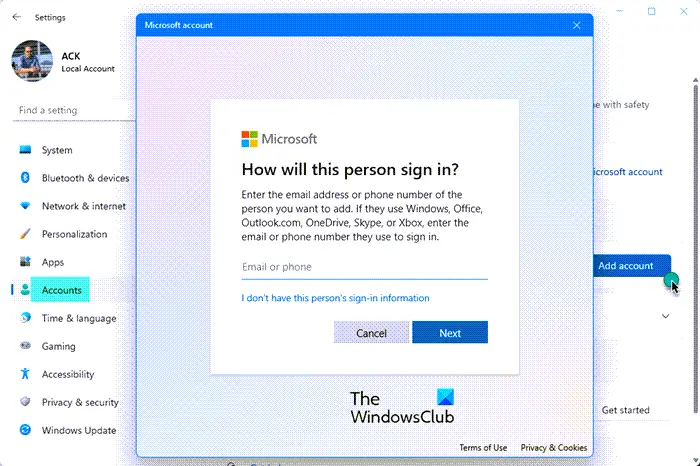
- Press Win+I to open Windows Settings
- On the left, select Accounts
- Now on the right, select Family & other users
- Next, against Add another sure, press the Add Account button
- In the popup that opens, enter your email address and password when asked.
- Complete the process to create your account on Windows 11.
Create Local Account in Windows 11
If you observe, Microsoft added some new security features for accounts. The feature though good and recommended, leaves little scope for personal choice. They force you to create a Microsoft Account first, giving it more preference over the local account. There appears no apparent way to move past the Microsoft Account screen, especially when you are interested in creating just a local account.
Microsoft warns – If you create a local account, you’ll need a separate account for each PC you use. None of your settings will be synced between the Windows PCs you use, and you won’t get the benefits of connecting your PC to your files, settings, apps, and services online in the cloud and accessible from anywhere.
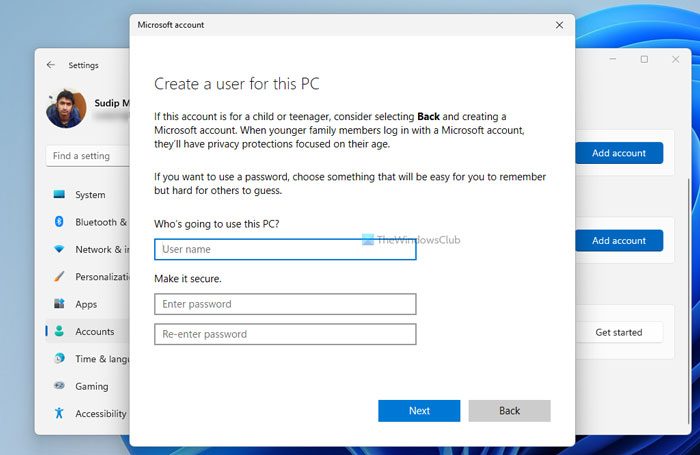
To create a new Local Account in Windows 11 using Windows Settings, follow these steps:
- Press Win+I to open Windows Settings.
- Switch to the Accounts tab.
- Click on the Family & other users.
- Click the Add account button under Other users.
- Click the I don’t have this person’s sign-in information option.
- Select the Add a user without a Microsoft account.
- Enter username, password and click the Next button.
Read: Complete Guide to Manage User Accounts in Windows 11/10.
Create a New User with Microsoft Account sign-in in Windows 10
In Windows 10, you can create a new user with a Microsoft account login as follows. From the WinX Menu, open Settings and then click on Accounts.
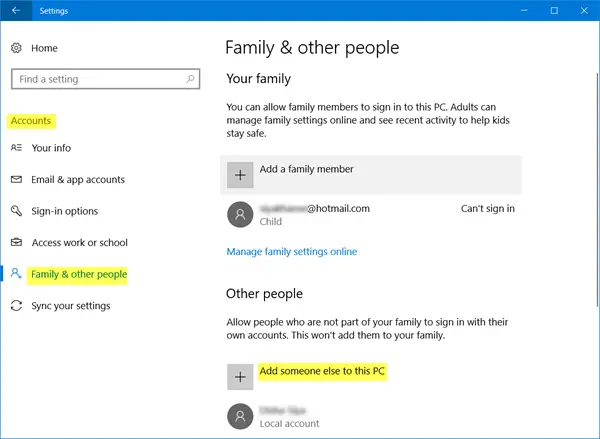
Next, in the left menu, click on Family & other people.
Now under Other people, click on Add someone else to this PC.
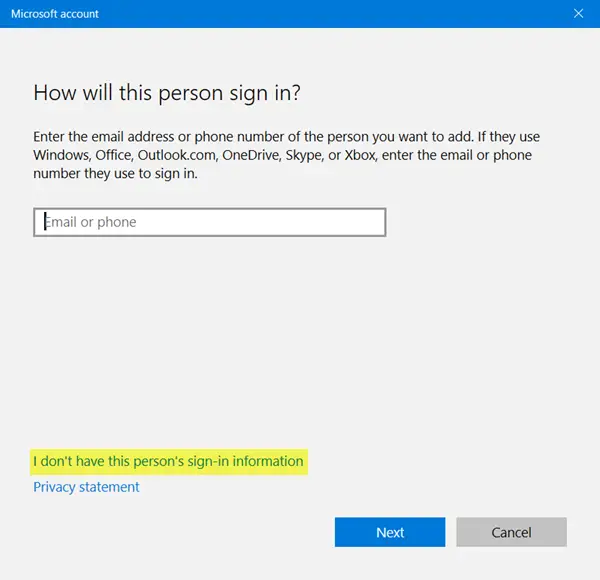
A Microsoft account window will pop up. If you wish to use a Microsoft account to log in, enter the person’s email ID and click on Next to proceed and finish the formalities.
Read: Local Account vs Microsoft Account compared.
Create Local Account in Windows 10
To create a Local Account in Windows 10, after you have clicked on Add someone else to this PC as mentioned above, and the Microsoft account window has popped up, you have to click on the I don’t have this person’s sign-in information link to open the following:
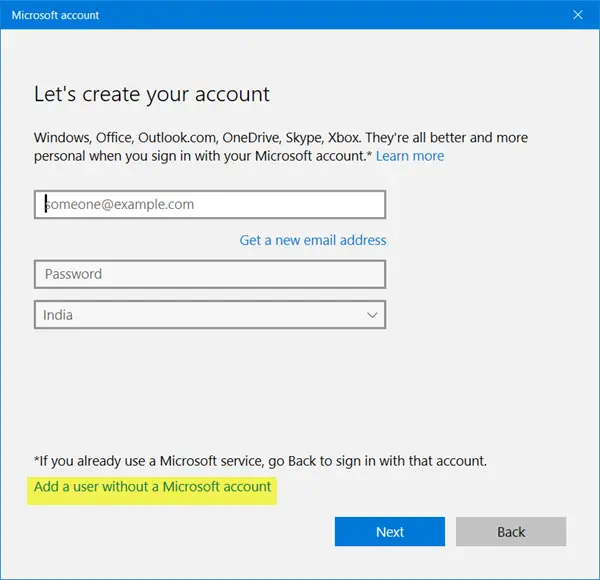
Next, click on Add a user without a Microsoft account link to open the following window:
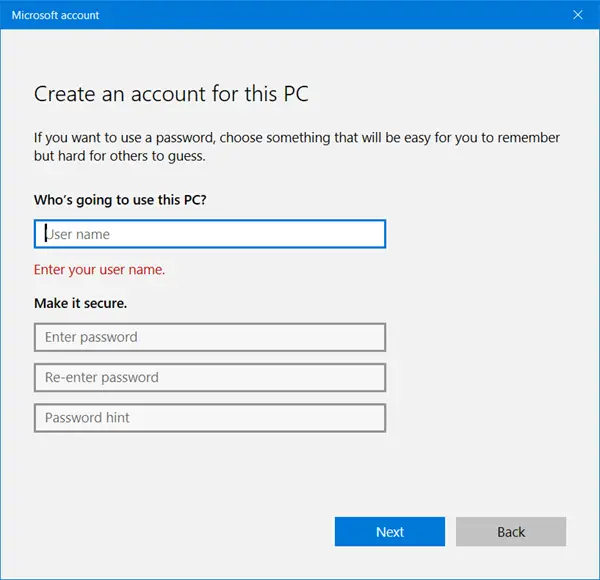
Enter the username and password and click Next to complete the local account creation process.
Related: How to create a Local User account in Windows 11.
Create a New User with Microsoft Account sign-in in Windows 8.1
In Windows 8.1, to create a Microsoft account, move the cursor to the lower right-hand corner of your computer screen, click ‘Settings’ and then ‘Change PC Settings’. Next, click Accounts, and then choose ‘Other accounts’. Click Add an account.
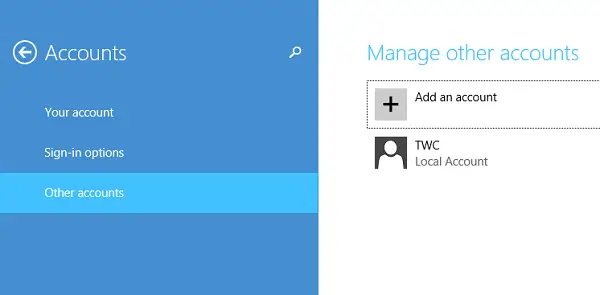
Enter the account info for this person to sign into Windows. If the person you’re adding already has a Microsoft account, enter it. If the person you’re adding doesn’t have a Microsoft account, click Sign up for a new email address.
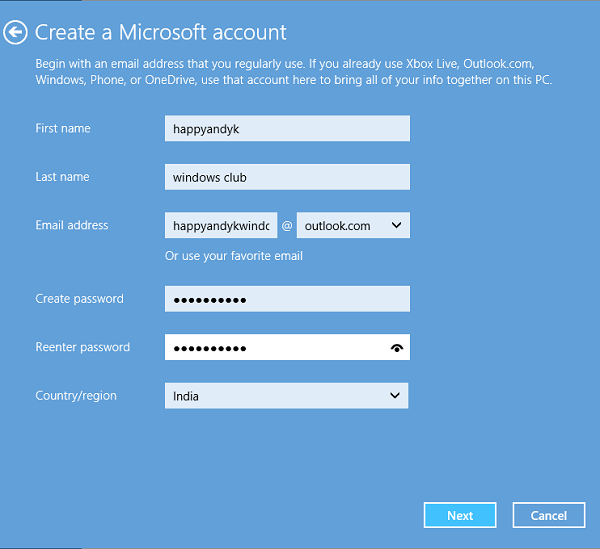
Follow the instructions to finish setting up the account.
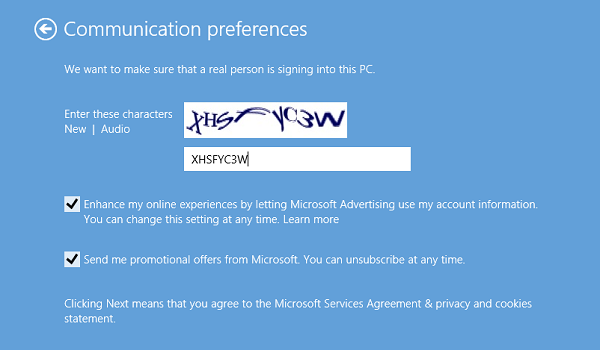
In the end, you should see a screen like the one shown below. It indicates the process of signing up has been completed successfully.
Create a Local Account in Windows 8.1
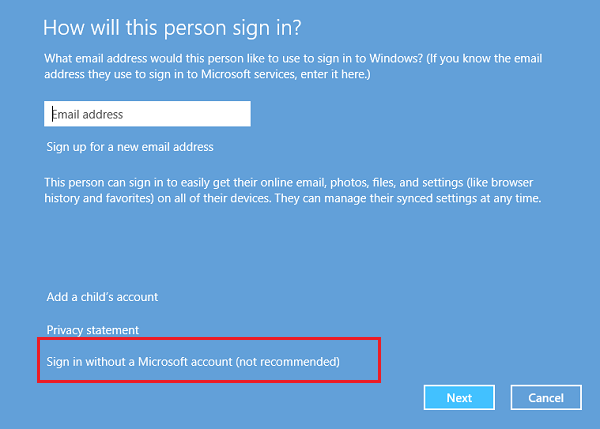
In Windows 8.1, assuming you are on the ‘How this Person will Sign Up’ Screen, look for the link “Sign in without a Microsoft account.”
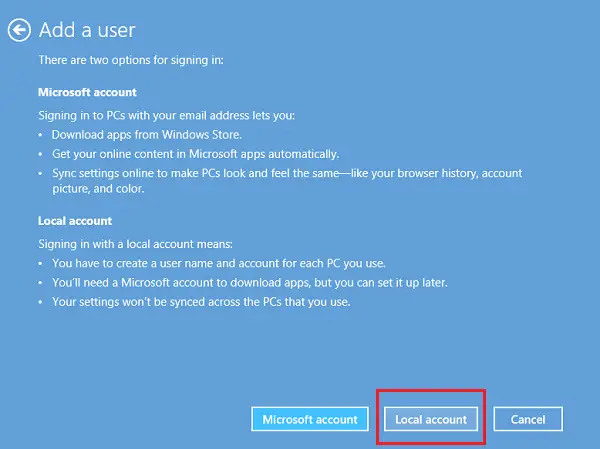
On being directed to a new screen, hit ‘Local Account’ tab.
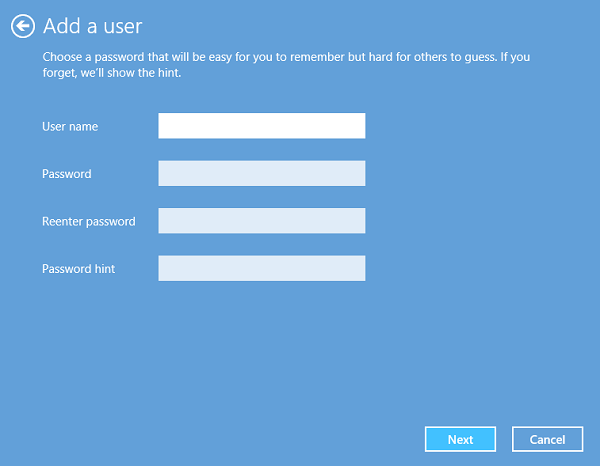
Now, with the procedure to create your Microsoft Account skipped, you can go ahead and create a local account, similar to the one you created in previous Windows version. Enter your local account credentials, and you should be done in seconds. You will have created a new Local account that you can log into instead of your Microsoft account.
Users not quite familiar with Windows might get caught by this changed login process and despite reservations and end up creating a Microsoft account.
Now read: How to Create Local Administrator Account in Windows.
Hope this clarifies things.
Incidentally, Quick User Manager is a freeware that lets you quickly manage users in Windows.
TIP: See this post if you cannot create a new User Account in Windows.
Related reads: