This post will show you how to create a No-Reply Email Address in Exchange Server/Microsoft 365. A No-Reply email address is useful when sending automated emails where a response isn’t required.
Create a No-Reply Email Address in Exchange Server/Microsoft 365
Follow these steps to create a no-reply email address in Exchange Server/Microsoft 365:
Log into the Microsoft 365 Admin Center with your administrator account.
Click on the navigation menu and select Exchange under Admin centers.
The Exchange Admin Center will now open; here, expand the Recipients section, select Mailboxes and click on Add a shared mailbox.

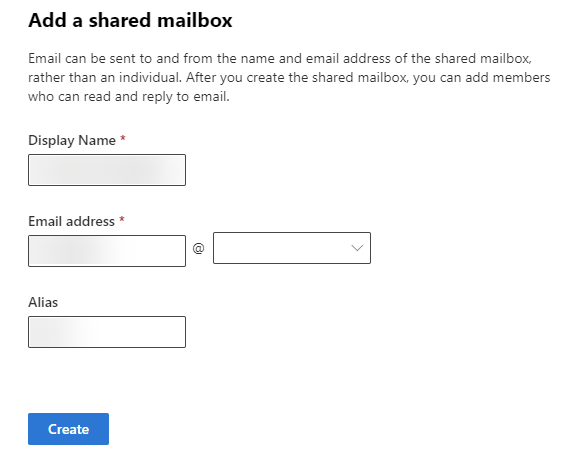
Now, the Add a Shared Mailbox tab will open; fill out all the details and click on Create.
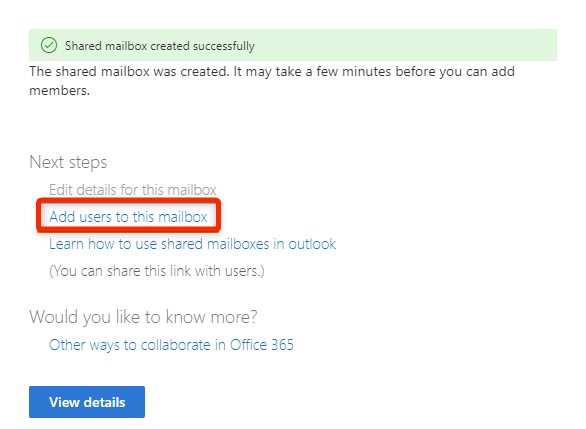
The shared mailbox is now created successfully. Now, click on Add users to this mailbox under Next Steps.
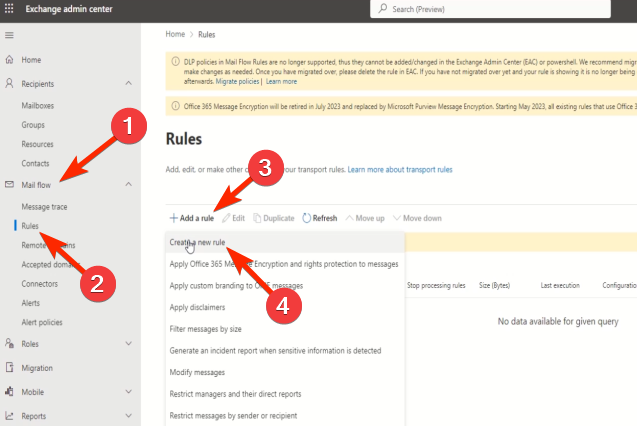
Again, expand the Mail flow option in the navigation menu, click on Rules and select Create a new rule in the drop-down.
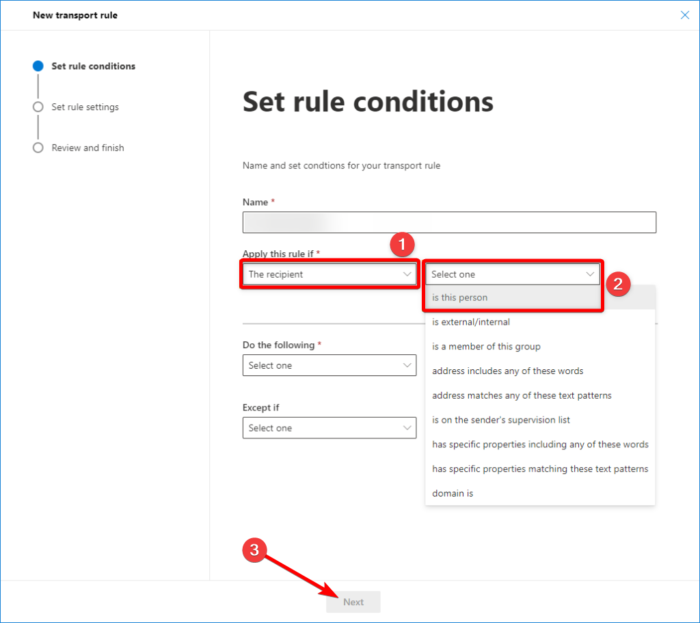
The Set rule conditions tab will now open; here, name the new rule and in the Apply this rule if section, select The recipient and is this person.
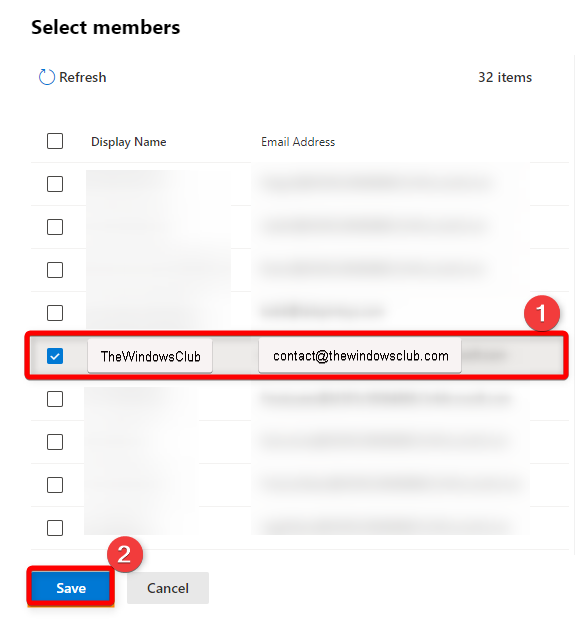
In the Select members pane, select the previously created shared mailbox and click on Save.
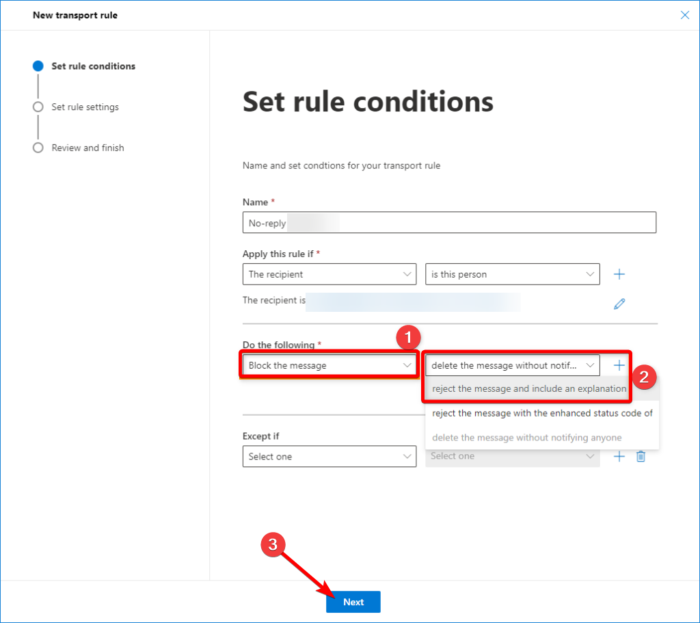
Again, in the Set rule conditions tab, select Block the message and reject the message and include an explanation under Do the following and click Next. This will consist of a message saying, “This is a no-reply mailbox.”
The Set rule settings tab will now open; leave it to default settings and click Next.
Next, review all in the Review and finish and click on Finish.
Lastly, enable the created rule from the rules list by toggling the switch to on.
Read: How to set up Automatic Replies or Vacation Reply in Outlook
I hope these steps help you.
What is the Microsoft no reply email address?
A No-Reply email address prevents recipients from replying to the messages sent from that address. These help for one-way communication, where the sender doesn’t expect any response from the recipient.
How do I set a default email address in Exchange Admin Center?
Log into the Exchange Admin Center and navigate to the Users > Active Users page. Select the user name, and then on the Account tab, select Manage email aliases. Here, choose Set as Primary for the email address that you want to set as default.
Read: How to get real-time Currency Exchange Rates in Excel sheet
Leave a Reply