If you want to manually create a System Restore point using Command Prompt, PowerShell, or Terminal in Windows 11/10, here is how you can do that. It is possible to use WMIC to create a System Restore point in Windows 11 or Windows 10 computer.
A great time to create a restore point is immediately after you have installed Windows 11/10 on your computer or device. Only then should you install your apps and drivers, change your settings, and so on. When you are done, if everything works correctly, you should make another restore point to use later if you encounter problems.
Another good time to create manual restore points is before installing apps from untrusted sources (which you shouldn’t be doing anyway), which might cause issues.
To create a Restore Point using Command Prompt & PowerShell in Windows 11/10, see the sections below as they relate to each method.
Create a Restore Point using Command Prompt

To create a Restore Point using Command Prompt, do the following:
- Press Windows key + R to invoke the Run dialog.
- In the Run dialog box, type cmd and then press CTRL + SHIFT + ENTER to open Command Prompt in admin/elevated mode.
- In the command prompt window, type or copy and paste the command below and press Enter.
- Replace the <RestorePointName> placeholder with any name you like.
wmic.exe /Namespace:\\root\default Path SystemRestore Call CreateRestorePoint "<RestorePointName>", 100, 7
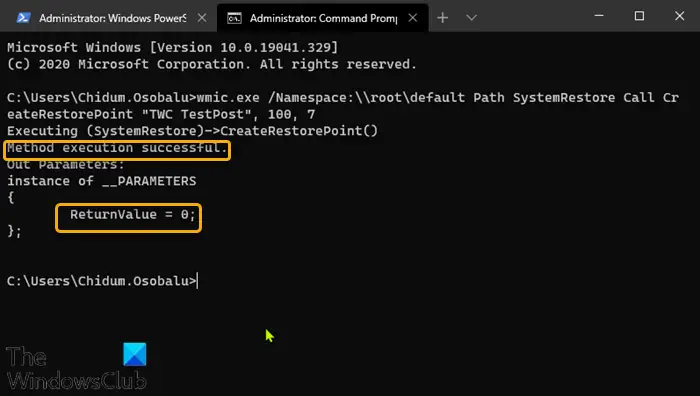
If the output you get tells you Method execution successful and ReturnValue = 0, it means that the system restore point was created successfully.
Read: What happens if you interrupt System Restore?
Create a Restore Point using PowerShell

To create a Restore Point using PowerShell, do the following:
- Press Windows key + X to open Power User Menu.
- Press A on the keyboard to launch PowerShell in admin/elevated mode.
- In the PowerShell console, type or copy and paste the command below and hit Enter.
- Replace the <RestorePointName> placeholder with any name you like.
powershell.exe -ExecutionPolicy Bypass -NoExit -Command "Checkpoint-Computer -Description '<RestorePointName>' -RestorePointType 'MODIFY_SETTINGS'"
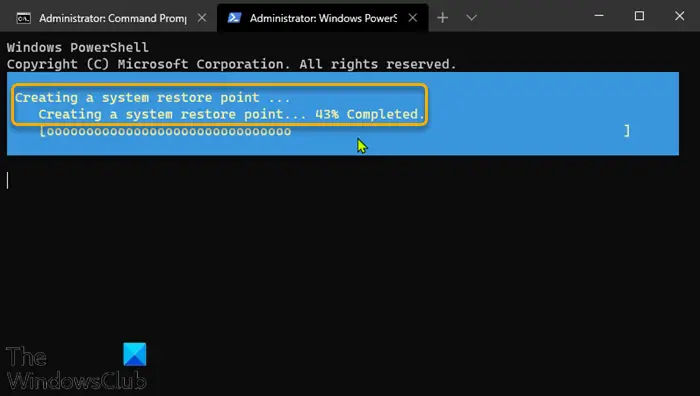
PowerShell shows a text-based progress bar that indicates how the restore point creation process goes. When it’s done, you can close PowerShell.
In some situations, Windows 11/10 might prompt you that you cannot create new restore points manually. That’s because the operating system allows the creation of only one system restore point every 24 hours by default.
However, you can change this setting and allow as many restore points creations as you want by creating a special key in the Windows Registry, using the SystemRestorePointCreationFrequency key.
That’s all there is to create a Restore Point using Command Prompt & PowerShell in Windows 11/10!
Read: How to automatically create System Restore Point at startup
How do I manually create a Restore point in Windows 11?
To manually create a System Restore point in Windows 11, you need to use the Command Prompt or PowerShell, or Terminal. Open Command Prompt with administrator privilege and enter this command: wmic.exe /Namespace:\\root\default Path SystemRestore Call CreateRestorePoint "<RestorePointName>", 100, 7. Alternatively, open the PowerShell with admin permission, and enter this command: powershell.exe -ExecutionPolicy Bypass -NoExit -Command "Checkpoint-Computer -Description '<RestorePointName>' -RestorePointType 'MODIFY_SETTINGS'".
How to create a Restore point using PowerShell?
To create a System Restore point using PowerShell or PowerShell instance of Terminal, you need to open the app with administrator permission first. Then, you can use the following command to get the job done: powershell.exe -ExecutionPolicy Bypass -NoExit -Command "Checkpoint-Computer -Description '<RestorePointName>' -RestorePointType 'MODIFY_SETTINGS'". Don’t forget to replace the RestorePointName with an original name you like.
Read: Error 0x80070005, System Restore did not complete successfully.