A Timeline is a graphical representation used to mark important events over a period of time. The graphical representations like Timeline, Gantt Chart, Roadmap, etc., play an important role in project management. You can use these illustrations to plan different stages of your project. In this article, we will show you how to create a Timeline in PowerPoint for the Web.
How do I make a Timeline on my computer?
You can create a Timeline on your computer by using Microsoft PowerPoint desktop application. If you do not have Microsoft Office installed on your system, you can create a Timeline online by using PowerPoint for the Web app. The process to create a Timeline in PowerPoint for the Web app is explained below.
How to create a Timeline in PowerPoint for the Web
The steps to create a Timeline in PowerPoint for the Web are listed below:
- Launch your web browser and open PowerPoint for the Web by signing into your Microsoft account.
- Create a new presentation or open the existing one.
- Insert a SmartArt into your slide.
- Select the Timeline from the available templates.
- Enter the dates and write descriptions for different phases on the Timeline.
- Your Timeline graph is ready.
Let’s see these steps in detail.
1] Open PowerPoint for the Web in your web browser and create a new presentation or open the existing one.
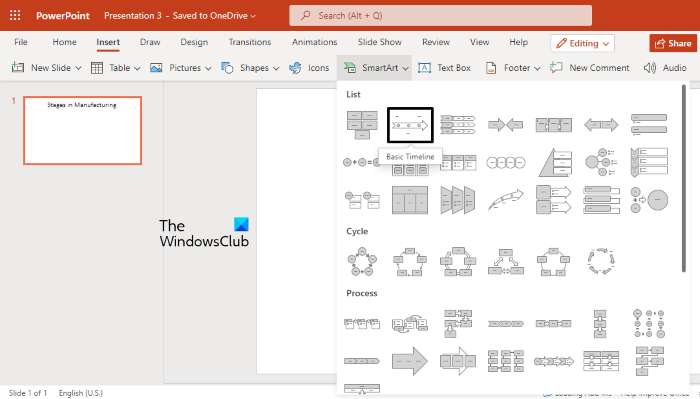
2] Click on the Insert tab and then click on the SmartArt drop-down menu. Select the Basic Timeline from the list.
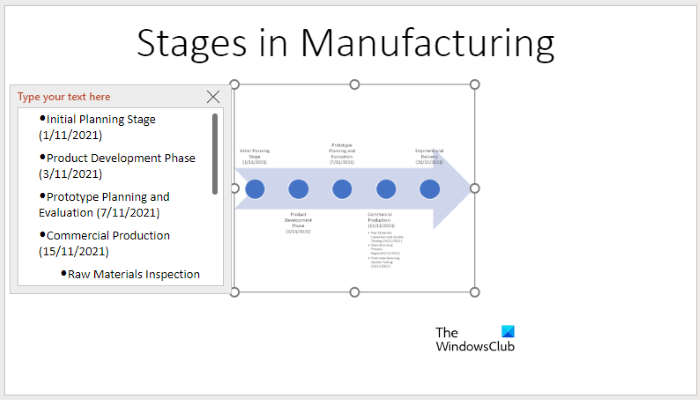
3] After inserting the Timeline SmartArt, you will see a Text Editor on the left side of the Timeline. You have to write the elements or stages of your Timeline inside this Text Editor box in bullets. If any stage on your Timeline has subphases, you can add them by pressing the Tab key.
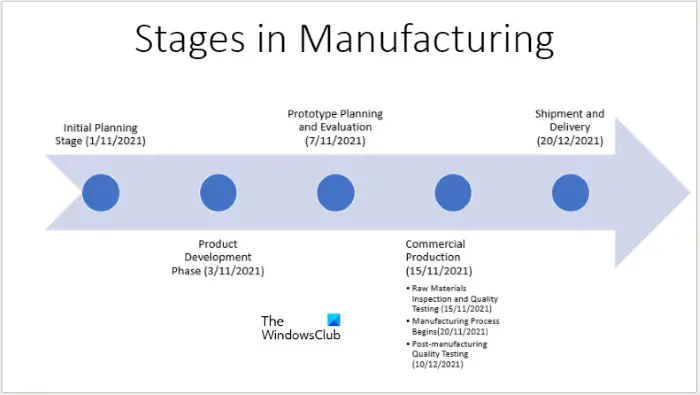
4] When you are done, close the Text Editor and your Timeline will be ready. By default, the size of the Timeline graph is small. Therefore, you have to resize it. To resize your Timeline graph, first, select it and then place your mouse cursor on any of the dots displayed on its edges. After placing your cursor there, you will see a double-sided arrow icon. Now, click and hold the left mouse button and then drag the Timeline graph to resize it.
How to select different styles for a Timeline
You can select different styles for your Timeline. The following instructions will help you with that:
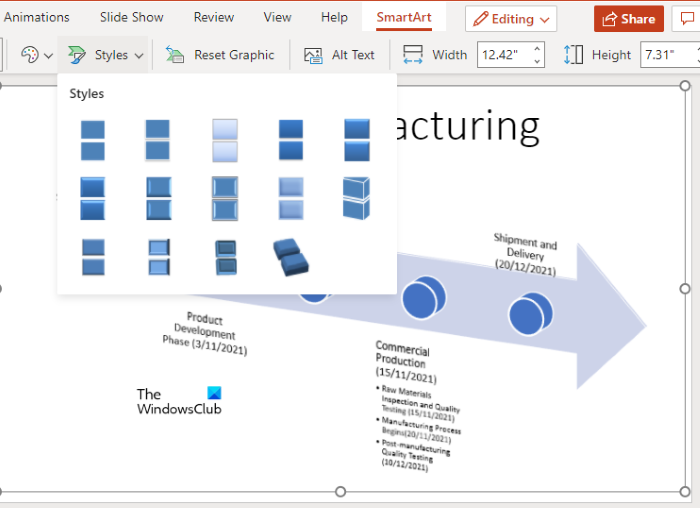
- First, select the Timeline on your PowerPoint slide.
- Click on the SmartArt tab.
- Now, click on the Styles drop-down menu and select the style for your Timeline as per your choice.
To reset your Timeline style, simply click on the Reset Graphic tab.
How to change the color of a Timeline
You can also change the color of your Timeline. We have explained the process to do so below:
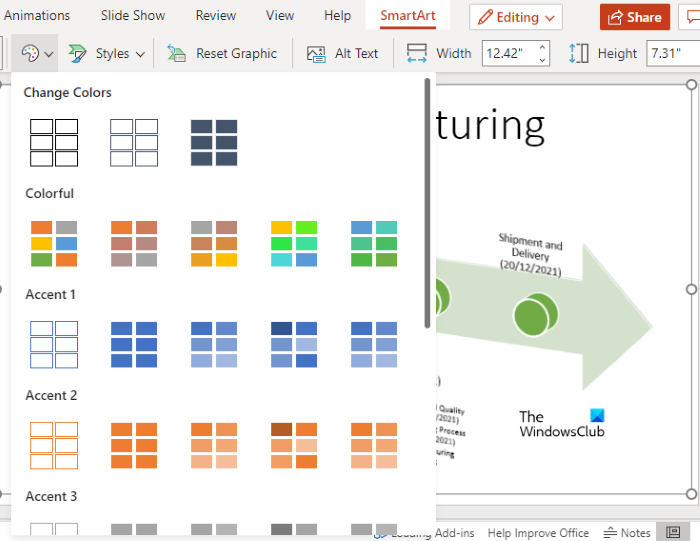
- Select the Timeline graph on your PowerPoint slide.
- Click on the SmartArt tab.
- Click on the Change Colors tab.
- Select your favorite color from the list.
To reset the color of your Timeline, click on the Reset Graphic tab.
Which program can I use to create a Timeline?
If you search on the internet, you will find a number of free online tools and software that let you create a Timeline graph. PowerPoint for the Web is among these free online tools. If you have installed Microsoft Office on your system, you can use the PowerPoint desktop application to create a Timeline.
How can I create a timeline for my website?
There are many ways to create a timeline for your website. You can use Microsoft PowerPoint, which is one of the best options. However, you can also use the Canva app to get the job done. In case you do not want to use a third-party app, you can opt for the coding method. No matter which language you use to create your website, you can use simple HTML and CSS to create a timeline.
That’s it.
Read next: 10 useful free Project Management Templates for Excel.
Leave a Reply