Usually, when individuals are creating a list in Word or PowerPoint, they would use bullets to set the related items to the topic. Bullets are usually displayed as a large circle, but Word and PowerPoint offer several other styles of bullets that users can use.
How to use Pictures as Bullets in Microsoft Word and PowerPoint
People can customize their bullets by changing the bullets to other symbols or using a picture as a bullet. Users can also change the size and color of the bullet. In PowerPoint and Microsoft Word, users can change the alignment of the bullet, and there is a section where you can see the preview of the bulleted list.
Follow the methods below on how to create and insert custom bullets in PowerPoint or Word and how to add sub-bullets in Both Word and PowerPoint:
How to create and insert custom bullets in Word
Launch Microsoft Word.
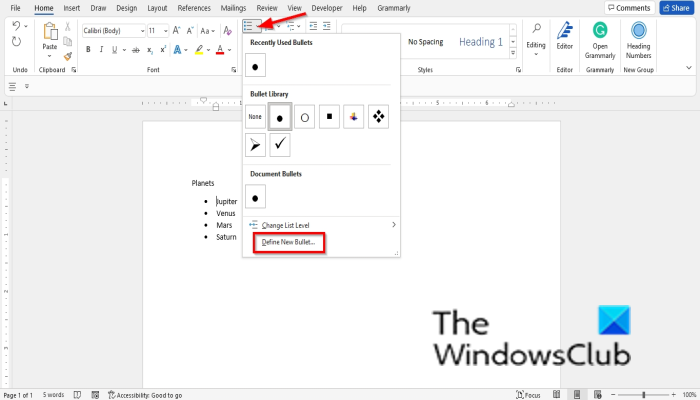
On the Home tab, click Bullets in the Paragraph group.
You can select a default bullet from the menu or create custom bullets.
To create a custom bullet, click Define New Bullet from the menu.
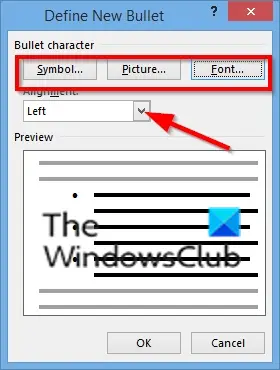
On the Define New Bullet dialog box, you can choose to create a custom bullet from a symbol, picture, or font.
If you choose to insert a symbol as a custom bullet into the document, click the Symbol button.
A Symbol dialog box will open; choose a symbol from the dialog box and click OK for both the boxes.
The symbol bullet appears in your document.
You can also use Pictures as bullets in Microsoft Word (See the link below on how to add pictures as bullets in Word.)
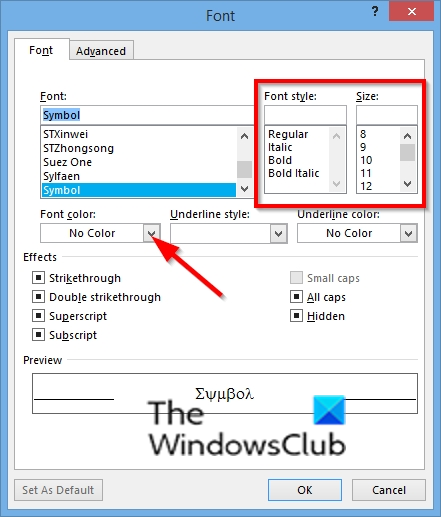
If you select the Font button, a Font dialog box will open.
In the dialog box, you can change the Font Style, Size, and Color of the bullet.
Then click Ok for both boxes.
In the Define New Bullet dialog box, you can align the bullets in your document.
Click the Alignment list box and choose an option and click OK.
The bullets will align according to the option you have selected.
Read: How to use Pictures as Bullets in Microsoft Word
How to add sub-bullets in Word
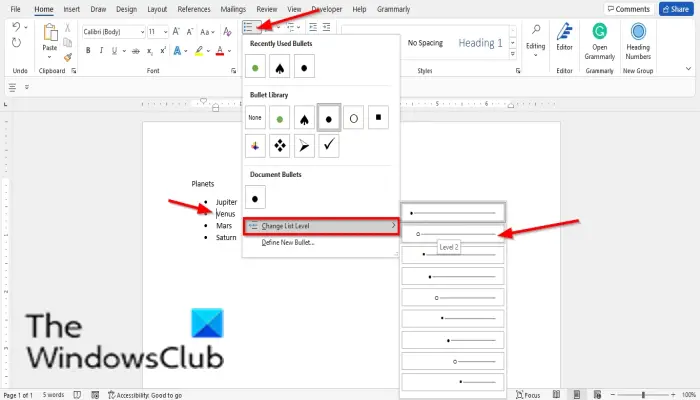
To add sub-bullets in a Word document; follow the steps below:
On the Home tab, click Bullets in the Paragraph group.
Choose a bullet from the list.
Press enter to see another bullet.
Then click the Bullet button again, hover the cursor over the Change list level from the menu, and select Level 2 from the list.
Do the same for the others by levels (level 3, level 4, level 5, etc.)
You will notice that the bullets for each level are different. If you want the bullets to be the same, click the Bullet button and change the style of each bullet to the same.
If you want to return the bullets to the normal arrangement, place the cursor next to the word beside the bullet and click the Decrease Indent button on the Home tab in the Paragraph group.
How to create and insert custom bullets in PowerPoint
Launch PowerPoint.
Insert a Table of Content layout and enter some points in it; you do not have to insert a bullet in the Table of Content layout; it is automatically inserted into the layout.
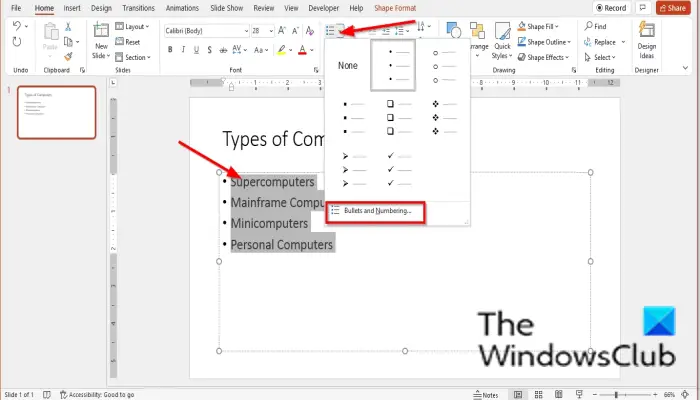
Highlight the list; then click Bullets on the Home tab in the Paragraph group.
In the drop-down menu, click Bullets and Numbering.
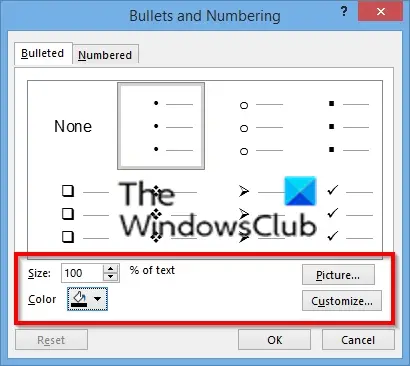
A Bullet and Numbering dialog box will open.
If you want to add pictures as bullets in PowerPoint, do the following:
Click the Picture button.
In the Insert Picture dialog box, you can choose where you want to get the picture from (From File, Stock Images, Online Pictures, and From Icons.)
We choose to get the pictures from Icons; type the icon you are looking for, then select an option from the menu and click Insert.
The bullets will turn into pictures.
If you select the Customize button, a Symbol dialog box will open.
Choose a symbol from the list and click Ok for both boxes.
In the Bullets and Numbering dialog box, you can select a default bullet and change the size and color of the bullet; to do this, follow the steps below.
Select a default bullet from the list and choose a size from the Size list box.
Click the Color list box and choose a color from the list.
Then click Ok.
Read: How to indent and align Bullet Points in PowerPoint
How to add sub-bullets in PowerPoint
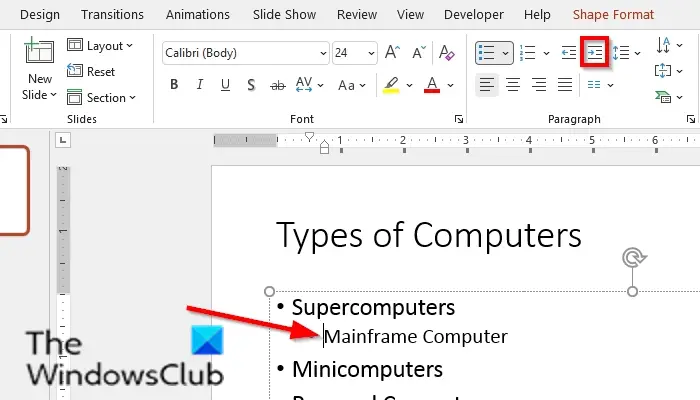
Place the cursor between the second bullet and the text, then click the Increase List Level button on the Home tab in the Paragraph group; do the same procedure for the others in the group.
What is the difference between bullets and numbering?
In Microsoft Word and PowerPoint, the bullet feature uses dots to create a list, and if the bullets are customized, it will allow users to insert pictures and symbols into their document or slide, while the Numbering feature is used to create a numbered list; it offers options to format your bullets in numbers, alphabetical letters, and roman numeral numbers.
How do I insert automatic bullets in PowerPoint?
In Microsoft PowerPoint or Word, you can turn on and off automatic bullets and numbering; follow the steps below on how to turn on and off automatic bullets and numbering:
- Launch PowerPoint
- Select File > File > Option > Proof Reading.
- Under the Section AutoCorrect Options, click the AutoCorrect Options button.
- Select the AutoFormat as you type tab.
- Check or clear the check box for the Automatic Bulleted or Numbered lists.
- Then click OK.
We hope this tutorial helps you understand how to create and add custom bullets and sub-bullets in Word and PowerPoint; if you have questions about the tutorial, let us know in the comments.
Leave a Reply