If you want to create a personal website, use Google Sites to do that within five minutes. We have mentioned the process of creating a new website, applying templates, and making the site live. Google Sites is a free solution that allows you to start a website free. It is something like the Blogger.com platform, but with fewer options.

How to create and start a website using Google Sites
To create and start a website using Google Sites, follow these steps-
- Open the official Google Sites page.
- Sign in to your Google account.
- Click on Blank to create a blank website.
- Enter title and customize the webpage.
- Click the Publish button.
- Enter an available web address for your site.
- Click the Publish button.
Open the official Google Sites website sites.google.com and sign in to your Google account. You will have to use the account to manage all your sites published through Google Sites. After that, click the Blank button to create a blank webpage.
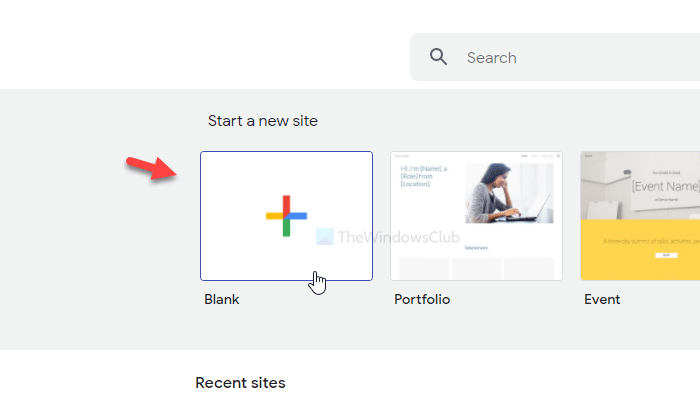
In case you want to use a preset template, find out your desired template and click on it. Either way, you will have to follow the same steps as mentioned here. The only difference will be that a template comes with already included blocks, whereas a blank page doesn’t have them.
Once the page is created with a blank template, it is mandatory to write down the page’s title and site name.
To write the site name, click on the Enter site name button, and start typing the name. Similarly, click on the title section, and enter your desired title.
Now, here are some of the best Google Sites tips and tricks that you can follow before hitting the Publish button.
1] Add a new text box/image:
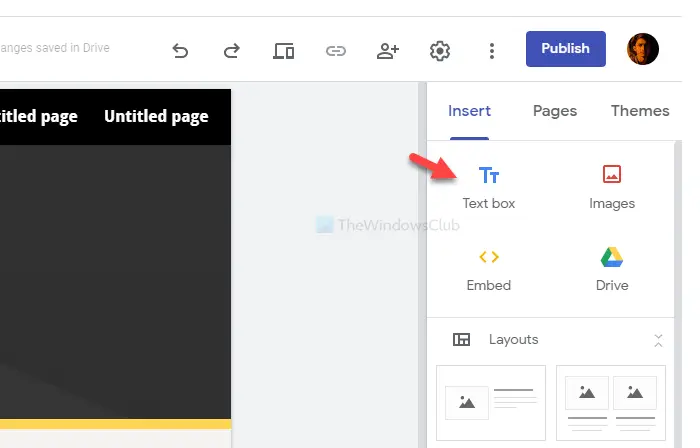
To customize a webpage, it is required to add some text and image. For that, make sure you are in the Insert tab on the right-hand side and click the Text box or Images button.
It is possible to select an image from Google Drive, or you can upload it from your computer as well. On the other hand, the text editing panel allows you to add a heading, paragraph, make text bold, italic, insert a link, bullet point, numbered list, etc.
2] Layouts:
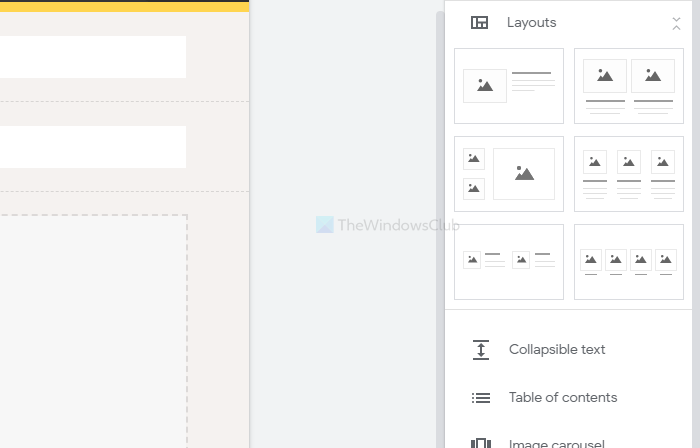
It offers six different blocks for the page body. You can insert them when you would like to shows images, text, etc. other than the page title. Apart from that, it is possible to add collapsible text, table of contents, image carousel, button, divider, placeholder, YouTube video, Google Maps location, Docs, Sheets, Slides, etc.
3] Add a new page:
By default, it creates the homepage only. If you want to add more pages, switch to the Pages section on the right-hand side, and hover your mouse over the Plus (+) sign. Following that, choose the New page option, and give it a name such as About us, Contact Us, etc.
4] Themes:
Like other content management systems, Google Sites also lets you change the theme. Although the options are limited, it is possible to change the color, font, page style, etc. For that, go to the Themes section, and choose the style as per your requirement.
5] Change navigation background color and position:
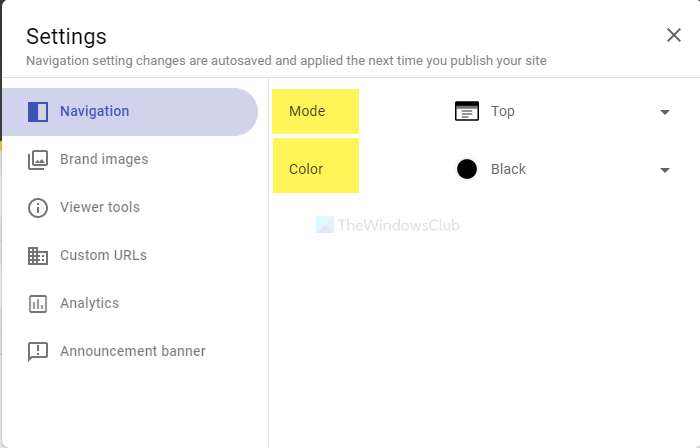
By default, it shows the navigation on the top of the page with a transparent background. If you want to change it, hover your mouse over the site title, and click the settings gear button. Then, expand the Mode and Color drop-down lists, and choose something accordingly from the Navigation tab.
6] Change Header type:
By default, it shows the page title as a Banner. However, it is possible to show it as a Cover photo, Large banner, and Title only. To choose any of them, hover your mouse over the title, and click the Header type button. Then, you can choose a different style for your header.
7] Change section background:
If you added some sections, you might have noticed that it uses a transparent background. If you want to change the background color, hover your mouse over the section, and click the Section background option. Following that, choose a different background type or color. It is also possible to set an image as background.
If you are done with everything, click the Publish button to make it live.
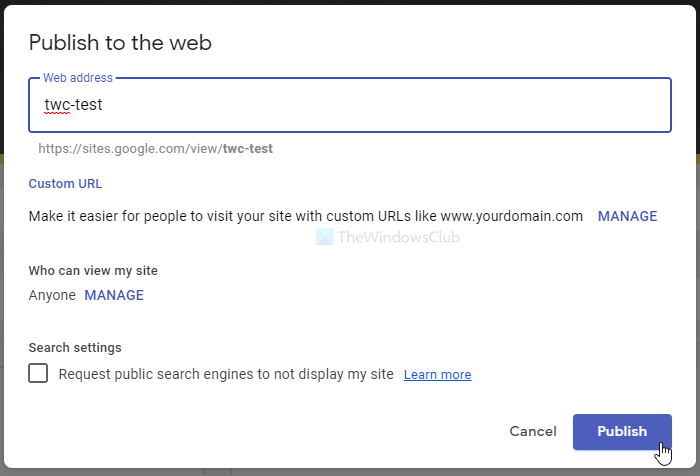
After you click this button, it asks you to enter a Web address. If you choose abcd, the whole address of your website will be this-
https://sites.google.com/view/abcd
Therefore, choose the web address carefully, and click the Publish button.
That’s all! From now onward, you can share the URL and start getting visitors to your website.
Leave a Reply