Do you wish to create custom Snap Layouts on your Windows 11 device? The good news is, that you can fulfill the wish using the FancyZones tool by PowerToys. Snap Layout is a fun yet useful feature by Windows that allows you to snap and arrange your windows into different positions, thus, making it easy to switch tasks.

However, the default options by Windows are limited to 4 different styles and it does not allow you to edit or customize the snap layouts. But, with the help of PowerToys, you can now create new layouts, and even edit them with ease. Read on to learn more about how to create custom Snap layouts on your Windows 11 device.
How do I enable Snap layouts in Windows 11?
To enable Snap Layouts on Windows, open the Settings app (Win + I) > System > Multitasking > select Show snap layouts when I hover over a window’s maximize button.
But if you want to disable Snap Layouts in Windows 11, you can do so by unchecking the same option or using the registry editor.
Create custom Snap Layouts on Windows 11 using PowerToys
That said, with Snap Layouts in Windows, you can place two windows next to each other, or three/four of them next to each other. But the downside is that you cannot add or edit more layouts. At this point, PowerToys comes to your rescue, so, make sure you install PowerToys first. Let’s understand how:
- How to create a custom Snap Layout using the PowerToys templates
- How to create a new Snap Layout using PowerToys
- Modify FancyZones settings for the Snap Layout
1] How to create a custom Snap Layout using the PowerToys templates

- Navigate to the Windows search bar, type PowerToys in the search bar, and click on the result to launch the app.
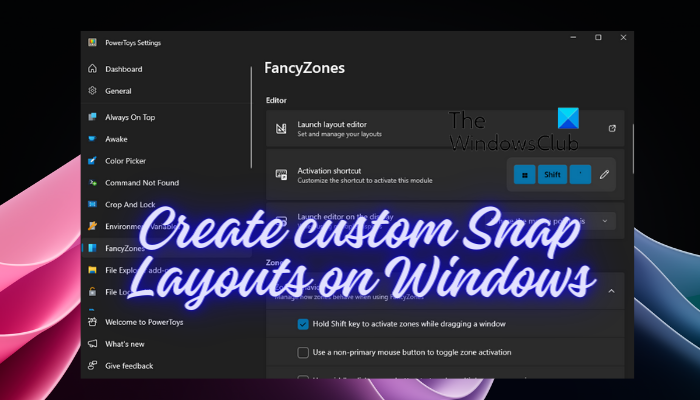
- In the PowerToys Settings window, click on FancyZones on the left sidebar.
- Now, on the right, under Editor, click on Launch Layout Editor.
- In the FancyZones Editor window, select the layout from the Templates and click on the pencil icon to edit.
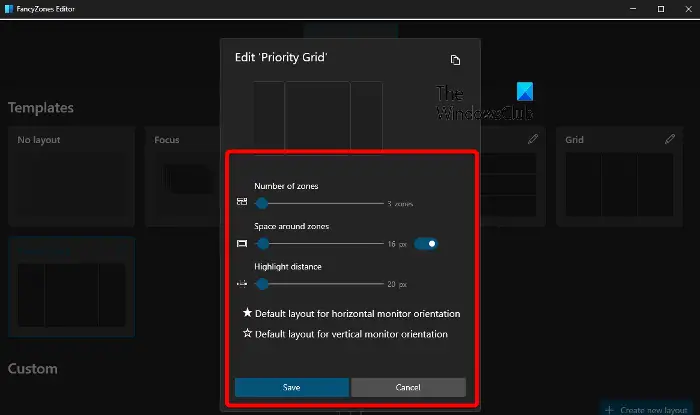
- Now, in the Edit ‘Priority Grid’ window, adjust the Number of Zones, Space around zones, or the Highlight distance options by moving the slide to the left or the right.
- Next, select or deselect the options, Default layout for horizontal monitor orientation, or Default layout for vertical monitor orientation based on your requirement.
- Hit Save to apply the changes.
- You can also right-click on the select grid and select Edit or Create Custom Layout.
Read: How to use Environment Variable Editor in PowerToys?
2] How to create a new Snap Layout using PowerToys

- Alternatively, you can click on Create New Layout at the bottom right to create a new Snap Layout on Windows 11.
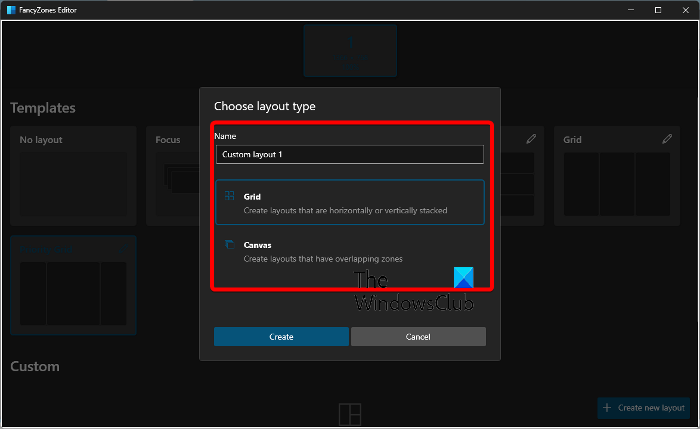
- Create a Name for your custom layout in the Choose layout type window.
- When you select Grid, it will allow you to create two different layouts, vertical or horizontal. Hit Create.
- Press Save in the prompt to save the selection.
- But when you select Canvas, it will allow you to create snap layouts as per your desire.
- Press the Create button and then click on the + icon to add more windows.
- Press the Save button to finish and save the changes.
Read: How to use Snap Bar in Windows 11
3] Modify FancyZones settings for the Snap Layout

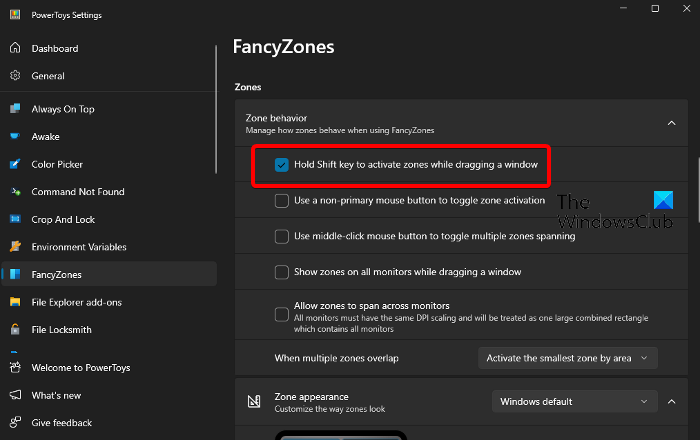
Now, back in the FancyZones settings window, go to the Zones section, and check the box next to the Hold Shift key to activate zones while dragging a window option.
This will allow you to drag and drop the selected windows into the Snap Layout you just created.
Now, scroll down to the Windows section, and check the boxes next to the below options:
- Keep windows in their zones when the screen resolution or work area changes.
- During zone layout changes, windows assigned to a zone will match new size/positions.
- Move newly created windows to their last known zone.
Next, scroll down further to Override Windows Snap, and turn it on. This will override the default Windows shortcut (Win + arrow) and help you to move between zones.
Also, select the option that says, Move windows between zones across all monitors.
Finally, go to the Excluded Apps section and add any app that you want you do not want to be snapped to zones except through Windows Snap.
Read Next: How to Turn off Snap Layouts in Windows 11 when you drag window to the top
Can you customize snap layouts in Windows 11?
Yes, you can customize snap layouts in Windows 11 for a personalized experience. For this, open Settings, click on System, select Multitasking, and then Snap Windows. Here, you’ll find different options that help you make changes to the snap behaviors as per your requirements.
How do you create a screen layout in Windows 11?
To create a screen layout in Windows 11, press the Win + Z shortcut key to open the Snap layouts feature. Then, click on the desired layout to select it. The open window will snap into the selected layout position, thus, streamlining your multi-tasking experience on Windows 11.
Leave a Reply