Analysis of time-based series data can help us understand the prevailing trend in the market. One-click Forecast in Excel does this pretty well. As such, it can help you understand the current as well as future trends. Let us, in this post, dig into some of the capabilities that come with new features available in Microsoft Office. This feature is also available in Office 365.
How to forecast in Excel based on historical data
It’s simple if you have historical time-based data ready with you, you can make use of it to create a forecast. Before proceeding further, it is, however, essential to cover certain points. For instance, when you create a forecast, Excel creates a new worksheet that includes both a table of the historical and predicted values. You also see a chart that expresses this data. Such a representation proves handy in understanding and predicting certain outcomes like future sales or consumer trends.
So, to create a forecast, open an Excel worksheet and enter two data series that correspond to each other. A series with date or time entries for the timeline and a series with corresponding values (something similar to the representation made on a piece of paper representing data value on the X-axis and Y-axis). These values will be predicted for future dates.
Please note that the timeline requires consistent intervals between its data points. like, monthly intervals with values on the 1st of every month. Why is this essential? Because summarizing data before you create the forecast will help you produce more accurate forecast results.
Select both data series. Even if you select a cell in one of your series, Excel is programmed in such a way that the application itself automatically selects the rest of the data.
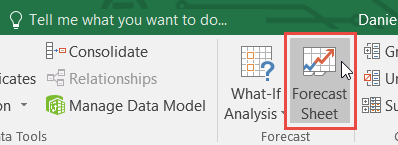
Once done, on the Data tab, in the Forecast group, click the Forecast Sheet option. See the screenshot below.

Then, from the Create Forecast Worksheet box (visible in the upper right-hand corner of your screen), pick the desired representation (a line chart or a column chart) for the visual representation of the forecast.

Then, look for the Forecast End box, pick an end date, and then click Create.
Sit back and relax while Excel creates a new worksheet containing a table of the historical and predicted values and a chart expressing precisely this data.

All done; you should find a new worksheet to the left (“in front of”) the sheet where you entered the data series. Now, if required, you can customize your Forecast.
Is there a list of Forecasting functions?
- FORECAST.ETS function
- FORECAST.ETS.SEASONALITY function
- FORECAST and FORECAST.LINEAR functions
- FORECAST.ETS.CONFINT function
- FORECAST.ETS.STAT function
You can also download the sample file to learn forecasting features from here
What it does basically is to put the previous equation nearby as the forecast. Forecasting is way too complicated in itself.