Windows is a lot more intelligent than you think. Color Management is one such feature that makes it so. If you use multiple monitors or different kinds of printers, then your computer might not be able to give you the best color display on all your devices. To overcome this problem, Windows 11/10 offers Color Profile management system.

What is Windows color profile?
In a color management system, color profiles are used to create color transforms, which programs use to convert color from one device’s color space to another. A color profile is a file that describes the color characteristics of a specific device while it’s in a particular state. A profile can also contain additional information defining viewing conditions or gamut-mapping methods.
When a new device is added to your computer, a color profile for that device might be installed automatically. This works perfectly most of the time, but it’s not necessary that automatically created profiles will work perfectly each time.
Windows continues to support two main types of color profiles: Windows Color System (WCS) and International Color Consortium (ICC) color profiles. This provides the greatest variety of choices for customizing color management options and color workflows.
WCS is an advanced color management system found in recent versions of Windows. While supporting ICC profile–based color management, WCS provides advanced capabilities that are not found in existing ICC color management systems.
How to add a Color Profile using Settings app in Windows 11

Starting with Windows 11 24H2 update, we can use the Settings app of Windows 11 to add a color profile (*.icm and *.icc). Earlier, we have to open and use the legacy Color Management in Windows 11 to add or install a color profile, remove a profile, etc. Now this can be done directly from the Settings app also.
Using the Settings app, you can set a profile as system default, and remove a profile whenever needed. So, update your Windows PC and check if you have received this feature. The steps to install or add a color profile using the Settings app in Windows 11 are as follows:
- Right-click on the Start button and select the Settings option
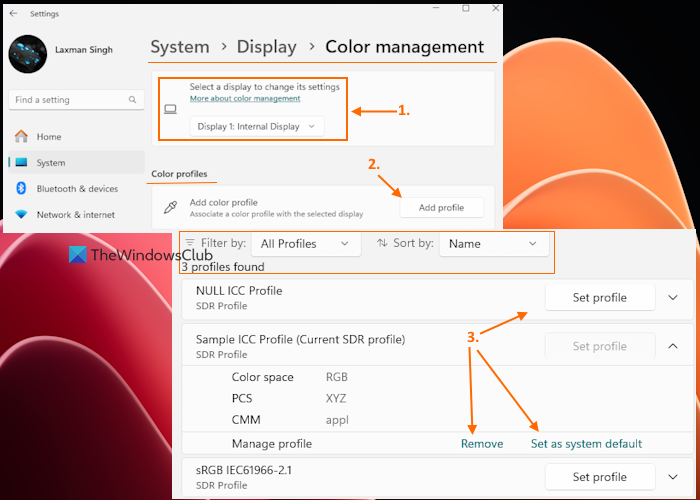
- After opening the Settings app, go to System > Display > Color profile. This will open the new Color management page in the Settings app
- Select a display to set the color profile if there are multiple displays available
- Under the Color profiles section, press the Add profile button
- An Open box will pop up. Using that box, you can access and import an ICC format or ICM format file. You can add as many color profiles as you want
- A list of color profiles will visible in the Profiles found section along with the profile name. If you have added a color profile using the legacy Color Management feature, that color profile is automatically visible in the Settings app and vice-versa
- The option to filter profiles by All profiles, SDR profiles, and HDR profiles is also there. Moreover, you can sort profiles by Publisher, Name, HDR profiles, etc. These options are handy when you have installed a lot of color profiles
- Click on a color profile to expand it
- Expanding a color profile will help you check the color profile details like Color space, Device model, Class, Publisher, File name, date created, etc. Additionally, you can also use options such as set the profile as the system default, and remove the profile. The option to Manage profile is also there, but it is greyed out. Maybe this option has yet to come in the Settings app.
So, this is all about the new Color profiles feature in the Settings app of Windows 11. Hope this helps.
Now read: How to associate Color Profiles with a device in Windows PC.
Add or manage Color Profiles in Windows 11/10
You may use the Color Management tool to add or manage Color Profiles in versions before Windows 11 24H2.
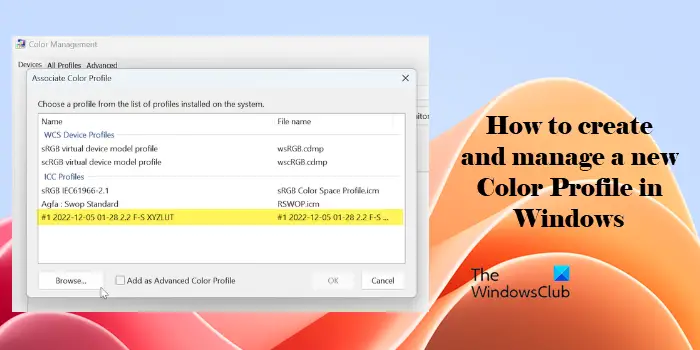
Add a new Color Profile
Color profiles are usually added automatically when new color devices are installed. Color profiles might also be added by the Color Management tool. If you need to install a new color profile, follow these steps:
- Click Start, open Control Panel
- Search for Color Management.
- Click the All Profiles tab, and then click Add.
- Locate and select the new color profile, and then click Add.
- Click Close.
Manage Color Profiles
Managing color profiles for different devices using the Color Management tool on your Windows 11/10 PC allows for precise control over how colors are displayed on various screens and printers.

- In the Color Management window, you can view all the profiles associated with the selected device under the Devices tab.
- You can set a specific color profile as the default for each device (monitor, printer, scanner), ensuring consistent color representation.
- To delete the association between the color profile and the device, select the profile and click the Remove button. You cannot remove the default profile.
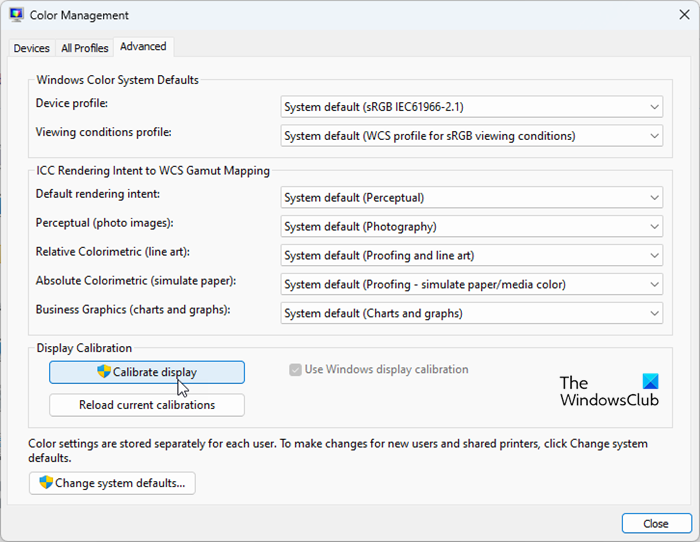
- To change the system defaults for color management and have greater control over how colors are handled by your system, go to the Advanced tab. Click the Calibrate display button under the tab to launch the Display Color Calibration tool. The tool will guide you through adjusting your display settings to create a new color profile.
That’s all about it! In my next article, I will write about how to associate multiple color profiles with one device and how to do other useful things with the color profiles.
How to change color profile in Windows 11?
You may use the built-in Color Management tool to install and assign a custom color profile on your Windows 11/10 PC. Press Win+R, type ‘colorcpl’ in the Run dialogue and press Enter. In the Color Management window, go to the All Profiles tab and click Add. Browse for a custom ICC profile, then click Add. After adding the profile to the list, go to the Devices tab and use the Device dropdown to select the display device for which you want to change the color profile. Check the ‘Use my settings for this device’ box. Click the Add button, select the profile, and click OK. Click ‘Set as Default Profile’ if you wish to use the profile as the default profile for the selected device
How do you change the color scheme in Windows 11?
To change the color scheme of your Windows 11/10 PC, open the Settings app and click on Personalization in the left panel. Click Colors in the right panel. Specify the scheme type (Light/Dark/Custom) using the Choose your mode dropdown. For a Custom color scheme, you may choose ‘Light’ or ‘Dark’ for system elements, apps, and settings windows. For transparent UI elements, use the toggle button next to Transparency effects. Use Accent colors to highlight UI elements like the Start menu, taskbar, title bars, and window borders.
Read Next: Color Management not working in Windows.

Still, NOTHING about how to CREATE a color “profile”.
This is the most useless article I ever came across regarding color management. And you were a Microsoft MVP? That is so bad. I don’t even think you can call this an article. It is completely misleading making people think they can do anything with that.
I’ve been searching for 10 minutes on google so far…
How do I make it keep my “calibrate display” settings?