Creating new folders on your Windows 11/10 PC is actually very easy, you just have to right-click > New > Select Folder. But creating many folders manually like this could be a little time-taking. Thankfully there are options where you can create multiple folders in one go. In this post, we will learn about how to create multiple folders on your Windows PC using Command Prompt and PowerShell.
How to Create Multiple Folders using Command Prompt
To open Command Prompt, just click on the Windows icon on your keyboard and type cmd in the search box.
Choose Command Prompt from the results and this will open the Command Prompt box for you.
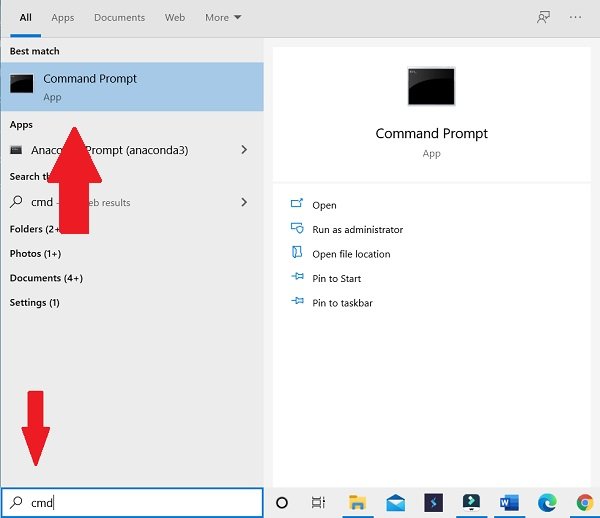
The directory here by default is set to User folder but you can change the directory in cmd you want to create those folders in.
Type cd followed by a space, type the destination, and then press Enter. For example, here I want to create the folders in my Documents directory, so I will type ‘cd documents’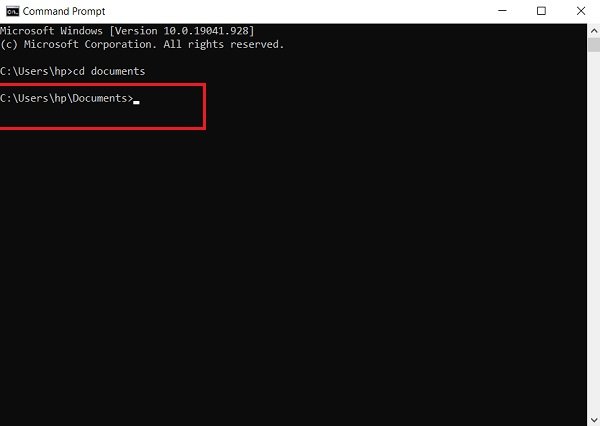
Now when the directory is set, I can create as many folders as I want just by typing in the command here.
Type the following and press Enter:
md 11 22 33 44 55 66 77
That’s it. 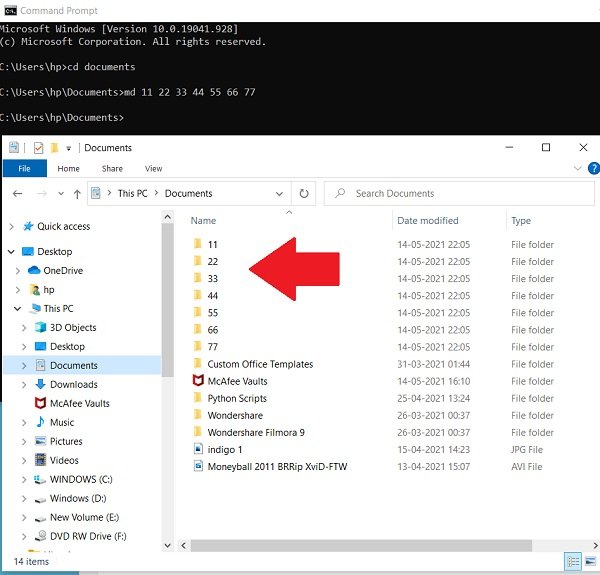
Go and check your Documents, you will see all these folders created.
Related: How to create multiple folders at once in Windows.
How to create multiple folders using PowerShell
The same way we did for Command Prompt, we will click on the Windows icon on the keyboard and type PowerShell in the search box. Then, we will click on Windows PowerShell and open it.
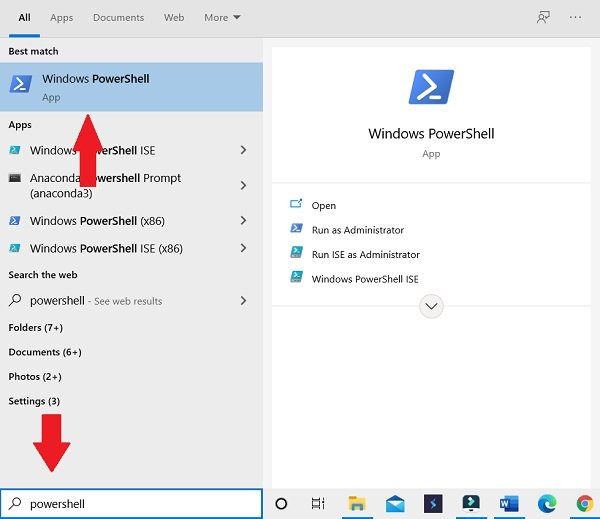
Same as CMD, PowerShell also will open with you in the user folder by default, but yes, you can change the directory here too.
Change the Directory to Documents or whatever directory you want to choose. Type the following and hit Enter:
cd Documents
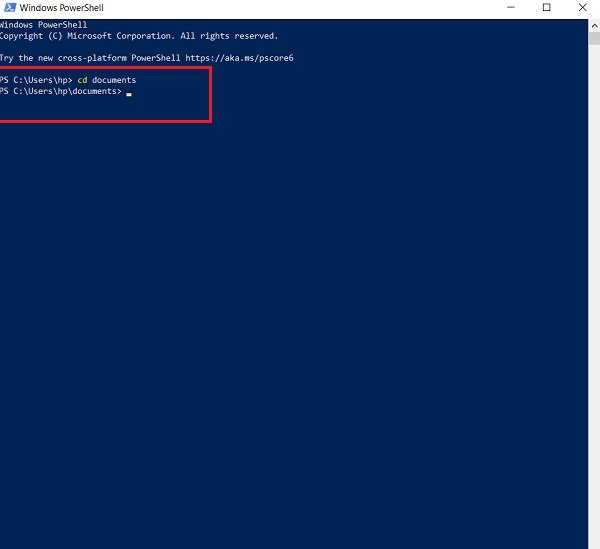
Type in the command, and press Enter:
"alpha", "beta", "gamma", "delta" | %{New-Item -Name "$_" -ItemType "Directory"}
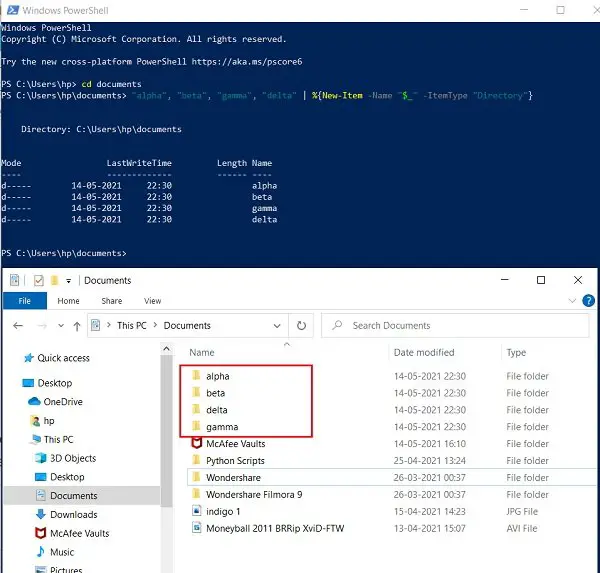
You will see the newly created folders!
TIP: You can also create multiple folders at once using Excel and save your time.