A Template is a pre-formatted document. The purpose of creating a template is to save time when it comes to using some particular documents again and again. You can create templates for any type of document like forms, letters, envelopes, etc. In this article, we will describe how to create a Calendar template in OneNote. Once you create a calendar template, you can use it in any of your OneNote notebooks so that you can save your time in formatting.
Is there a Calendar template in OneNote?
OneNote does not have any built-in calendar template. You can make your own calendar templates by following the process described in this article. If you want, you can also set your calendar template as default.
How to create a OneNote Calendar template
To create a calendar template in OneNote, you have to insert a table and then format it. The below steps will guide you on how to do that. All these steps are applicable for Microsoft OneNote 2016. The interface may vary for other OneNote versions, however, the process will remain the same.
- Launch Microsoft OneNote desktop application.
- Select the notebook to create a calendar template. Or you can create a new notebook for the same.
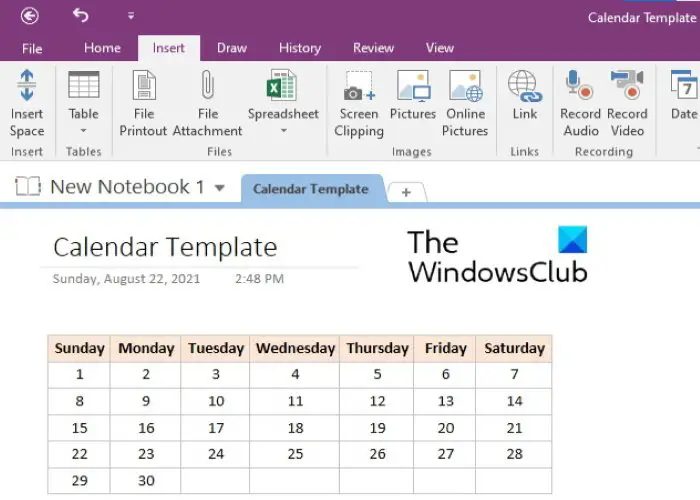
- Now, go to “Insert > Table” and select the required number of rows and columns. Usually, a calendar template requires 5 rows and 7 columns. But you can also create a table with 7 rows and 5 columns in case you want to mention the days’ names vertically.
- After creating a table, the next step is to fill it with the dates and days. You can also add or delete the rows and columns in a table. For this, right-click on a cell, then click Table, and then select the desired option. If you want to change the width of a row, place your mouse cursor over the cell boundary in such a way that the cursor is turned into a double-headed arrow. Now, press and hold the left click of your mouse and drag it to adjust the row width.
- If you want, you can format the table. Here, we will make the days’ names bold and set a background color for the same. You can format your calendar as per your choice. Select the entire row or column in which you have written the days’ names and press Ctrl + B. To set the background color, select the row or column again and go to “Layout > Shading” and select the color of your choice. If you want to change the alignment of the text in the table, select it and then click Layout. Now, select the appropriate alignment option in the Alignment section.

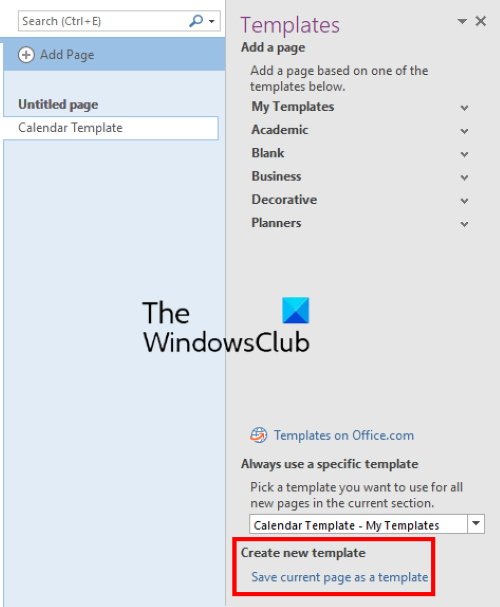
Your calendar is ready. To save it as a template, select the entire table and then go to “Insert > Page Templates” and select the Save current page as a template option. You will find it on the bottom right side. After that, name your template and click Save. Your saved template will be available in the My Templates section.
To insert the calendar template into your notebook, go to “Insert > Page Templates” and expand the My Templates section on the right side.
Do note that currently, this feature is available only in the OneNote desktop app.
Read: How to create Outlook tasks in OneNote.
How to import a template into OneNote?
You can import any template into OneNote by following the steps below:
- Launch the OneNote desktop app.
- Go to “File > Open.”
- Scroll down and click on the Browse button.
- Now, go to the location where you have downloaded the template.
- Select the template and click on the Open button.
That’s it.
Related post: How to hide the Borders of Tables in OneNote.

Leave a Reply