My Windows 7 looks messy at times. Wouldn’t it be great if one could just create a Windows XP type of a toolbar that could be used in Windows 7 too? Mind well; I am not necessarily favoring any old version of Windows. I am aware change is the universal law of nature. As such, we should welcome change rather than resisting it. But, It’s all about providing our users with different options that they deem fit to use. In this post, I will show how you can create a Windows XP style toolbar in Windows 7 natively.

Coming to the point, one of my first and favorite steps for Windows XP to create a toolbar can also be used in Windows 7 with a minor modification. It can help you to clear up your desktop clutter too. Here’s how to go about it.
Windows XP style Toolbar for Windows 7
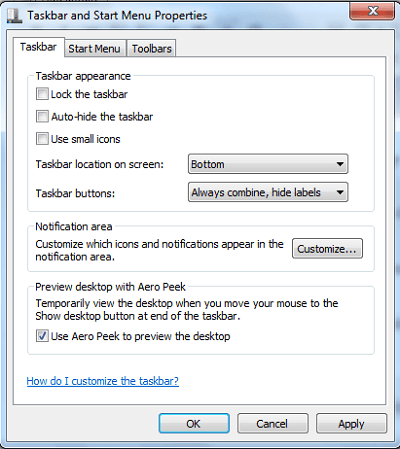
Unlock the taskbar. To do so, right-click the ‘Start Menu,’ choose Properties and select the ‘Taskbar’ tab. Next, uncheck Lock the Taskbar’ option.

- Right-click on your Desktop and create a new folder. Name it, say, MyToolbar.
- Put all the shortcuts you’d like to appear in this folder.
- Now drag it to any extreme side of your screen.
- Say, drag it to the top of your screen, it will take the form of a thin horizontal strip.
- You may drag your desktop items onto it, now too.
- Right-click on it, and select how you want it to behave.
You may want to check on ‘Show Large Icons’ and ‘Autohide’ and Uncheck ‘Show title’ & ‘Show text.’ That’s it!
Windows XP style toolbar is incredibly useful when you open a set of applications often. As you add more shortcuts, you can unlock the taskbar, and then expand the toolbar area. Make sure to lock it once again to avoid the accidental movement of icons and area.
I hope the post was easy to follow, and you were able to create Windows XP style Toolbar for Windows 7. If this does not work for you, check out Coolbarz.