Microsoft PowerToys is one of the best tools to customize Windows. It brings a set of interesting and important utilities such as Always On Top to keep a window always on top of other windows, Image Resizer, Keyboard Manager to remap keys, Hosts File Editor, etc. Crop And Lock is one such interesting utility. And, in this post, we will show you how to use Crop And Lock utility in PowerToys in Windows 11/10 that helps to crop an app into a smaller interactive window. So you can focus only on that part of the application. You won’t get distracted by the rest of the area.
The best part is you won’t lose the original window and its content, as you can restore the original window after closing the cropped window. Before proceeding further, do note that this feature works for the active window or foreground window only (in resized mode or fullscreen mode). It doesn’t cover the entire desktop, taskbar, or background windows.
How to use Crop And Lock in PowerToys to crop an app into smaller interactive window
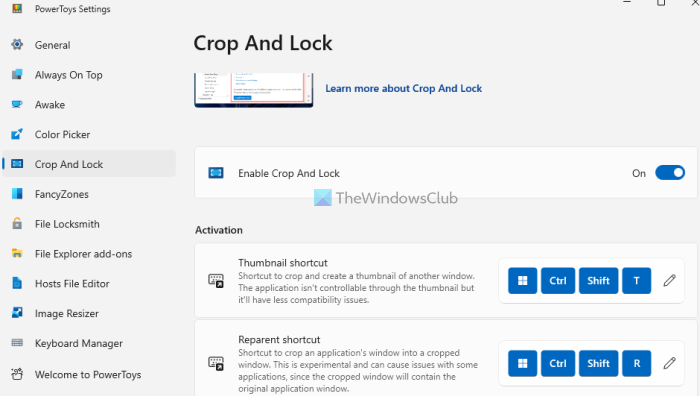
To use the Crop And Lock utility in PowerToys, download and install PowerToys on your Windows 11/10 and enable this feature. For this, open the PowerToys Settings > select Crop And Lock > and turn on the Enable Crop And Lock button in that section.

Once the utility is activated, you can use the available features with default hotkeys that you can change anytime. The features are:
- Thumbnail shortcut
- Reparent shortcut.
Let’s check both features.
1] Thumbnail shortcut

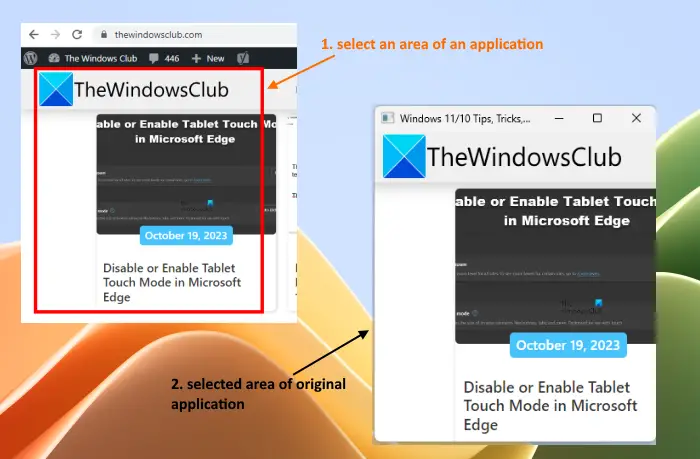
The Thumbnail shortcut feature lets you select a specific part of an application as a still image. This is similar to taking a screenshot of a particular area of an application. You can activate this feature using the default hotkey Win+Ctrl+Shift+T and use the left mouse button to select an area of the active window.
Once the area is selected, the original window is replaced with the new non-interactive window that shows only that particular part. You can resize that window to carefully check the captured part. Once you close the window, the original window is restored automatically.
Related: How to use Windows Key Shortcut Guide PowerToys in Windows
2] Reparent shortcut

The Reparent shortcut is the most important feature of the Crop And Lock utility in PowerToys as it lets you crop an application into smaller interactive window. You can use Win+Ctrl+Shift+R hotkey to activate it.
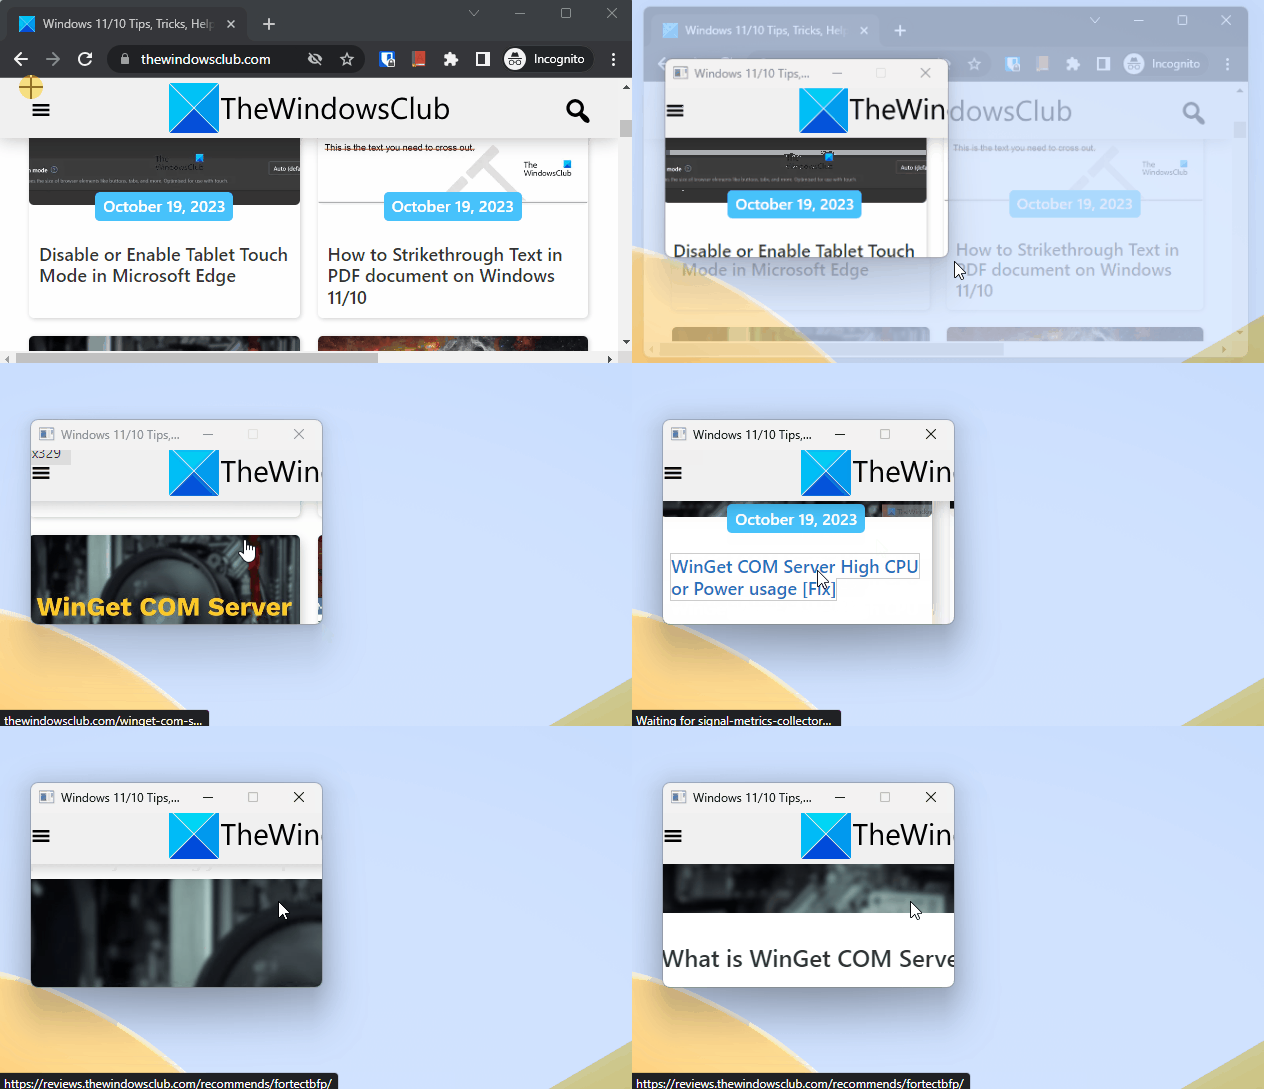
After that, select a part of the foreground window or application and release the mouse button. The application will be cropped to use only that particular part of the entire application. Now the cropped window will be interactive.
You can scroll up and down to access the content available within the cropped area, click on links present in that part, etc., just like it is visible in the recording above. So, the focus will remain on that particular part only. As soon as you close the cropped window, you will get back the original window or application.
The utility is pretty useful, but it has some known issues. For example, it doesn’t work well with maximized applications while using the Reparent shortcut mode. So, it is good to restore or resize the application or window before using it. In addition, you won’t get a good response with Reparent shortcut mode while using it with some UWP apps like Notepad and applications with tabbed interfaces, say File Explorer, OneNote, etc. I hope these issues will be fixed.
That’s all.
Now read: Image Resizer, Window Walker, Markdown, SVG Preview PowerToys in Windows PC
How do you use FancyZones in PowerToys?
To use FancyZones in PowerToys, first enable it from PowerToys Settings. Click on the FancyZones option from the left section and turn on the Enable FancyZones button available in the right section. Now press and hold the Shift key while dragging a window to activate the default zone and drop the window there. You can also use the FancyZones section in the PowerToys Settings to open the layout editor, select a layout, create a custom layout, etc. You can also set the Zone behavior, Zone appearance, Window behavior, and more.
How do you resize PowerToys run?
In PowerToys Settings, access the Image Resizer section. Now use the Enable Image Resizer button to turn on this utility. Within the same section, you will see predefined image sizes that you can modify, add new sizes, set the Fallback encoder, etc. Once done, select the images > right-click > and click on the Resize pictures option. This will open the Image Resizer window of PowerToys. Select the output size, use other available options in that window, and press the Resize button. The selected images will be resized accordingly and automatically.
Read next: How to Backup and Restore PowerToys Settings.
Leave a Reply