Some Windows users reported that their Windows Defender Firewall is using settings that make the device unsafe. They noticed this in their computer’s Windows Security > Firewall & network protection page. This raises many questions, and users want to know how they can resolve this issue. In this post, we are going to talk about ways you can remedy this issue.
Following are the error messages users see.
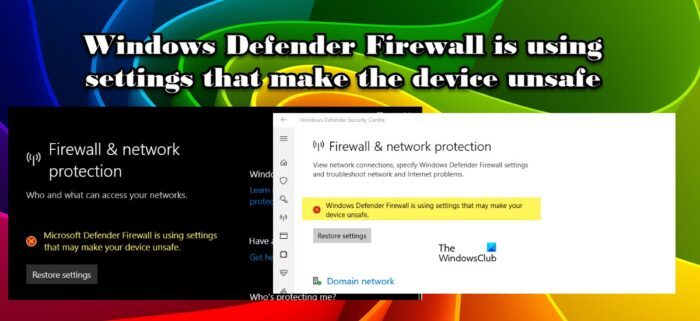
Windows Defender Firewall is using settings that may make the device unsafe.
OR
Microsoft Defender Firewall is using settings that may make the device unsafe
Windows Defender Firewall is using settings that make the device unsafe
If Windows Defender Firewall is using settings that make the device unsafe, execute the following solutions to resolve the issue.
- Restore Firewall Settings
- Restart the Windows Defender Firewall
- Edit Registry
- Reset Windows Firewall
- Uninstall the latest Security Updates
- Run Antivirus
Let us talk about them in detail.
1] Restore Firewall Settings
The first thing you should do is click on the Restore Settings placed right below the error message and see if the issue is resolved. Sometimes, Windows revert back the misconfigured setting to what it should have been in the first place just by clicking on that very button. You should do the same. In case the issue persists, move to the next solution.
2] Restart the Windows Defender Firewall

Sometimes, the issue can be nothing but a glitch that can be resolved just by restarting the Windows Defender Firewall. This is something you can do when dealing with any issue related to Windows Defender Firewall, follow the prescribed steps to do the same.
- Open Control Panel from the Start Menu.
- Set View by to Large icons.
- Click on Windows Defender Firewall.
- Select Windows Defender Firewall on or off.
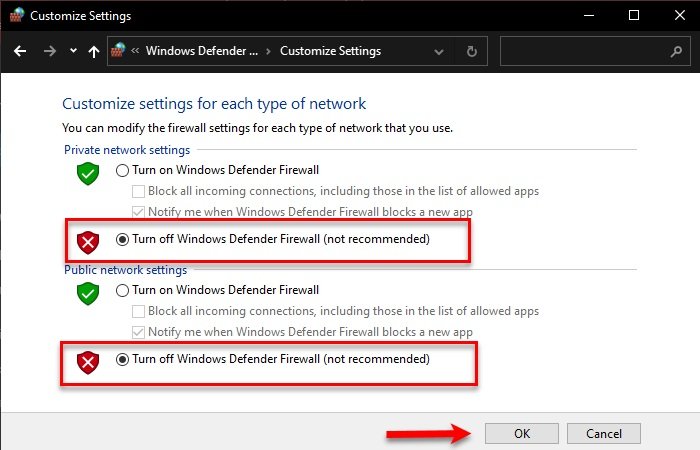
- Select Turn off Windows Defender Firewall. (select for both Private and Public networks)
Hopefully, this will do the job for you.
3] Edit Registry

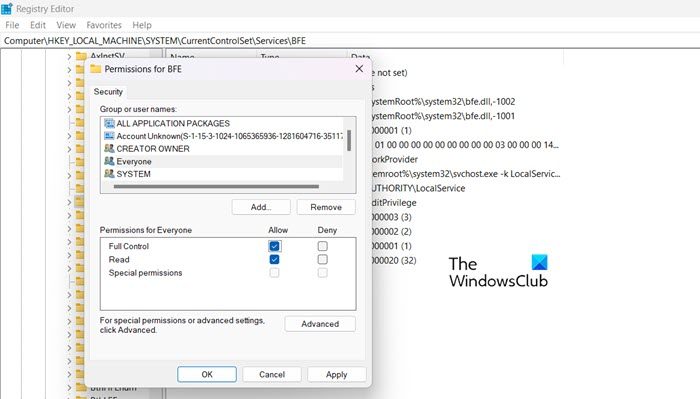
Next up, we need to configure some registries to change the permission to everyone. Registry Editor is a built-in app that allows you to configure your Windows Operating System. To change the permission, open Registry Editor and navigate to the following location.
Computer\HKEY_LOCAL_MACHINE\SYSTEM\CurrentControlSet\Services\BFE
Right-click on BFE and select Permission. Click on Add, type “Everyone” and click on Check Names. Select Everyone from the Groups or user name, click on Full Control, and click Apply > Ok. Close Registry Editor and open Windows Security. Hopefully, this will do the trick for you.
4] Reset Windows Firewall

Since we don’t know what is causing this issue or which settings are misconfigured, one of the things you can do is reset Windows Firewall. There are various ways to do the same, we see two different methods, so, you can pick the one you like.
To reset Windows Firewall using Control Panel, follow the prescribed steps.
- Open Control Panel.
- Change the View by to Large icons.
- Then, select Windows Defender Firewall.
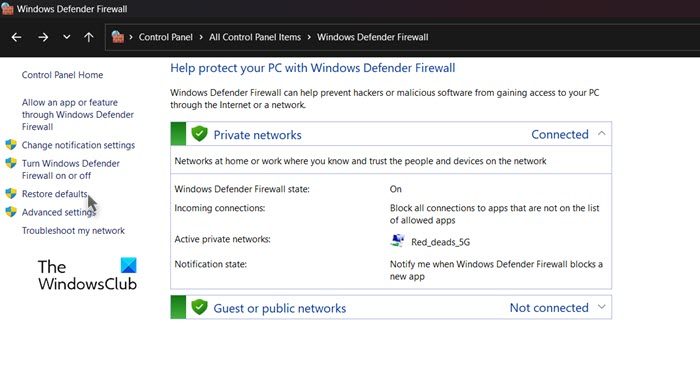
- Click on Restore defaults from the right section and then click on the Restore defaults button.
Alternatively, you can use a command to have the same effect. To do the same, open Command Prompt as an administrator and then run the following command.
netsh firewall set opmode mode=ENABLE exceptions=enable
Hopefully, this will do the trick for you.
5] Uninstall the latest Security Updates
In case, you have installed a security update recently and the problem starts afterward, there is a high chance that the update you installed is buggy. In that case, we can just easily uninstall the latest update, revert back to the previous version, and then wait for the next update. To do the same, follow the prescribed steps to do the same.
- Hit Win + R to open Run, type “Control” and click Ok.
- Paste the following location in the address field and hit Enter.
Control Panel\All Control Panel Items\Programs and Features
- Click on View Installed updates and then uninstall the latest security update.
Hopefully, this will do the job for you.
6] Run Antivirus
A virus or malware can stop Windows Defender from performing its tasks. If you have a third-party antivirus, go ahead and run it, but even if you don’t have an external tool, the built-in Windows Antivirus is capable enough to scan and delete malicious files.
Follow the prescribed steps to run the Windows Defender Antivirus.
- Open the Windows Security application.
- Go to Virus & threat protection > Scan options.
- Select Microsoft Defender Antivirus (offline scan) and then click on Scan now.
Note: Microsoft Defender Antivirus (offline scan) was called Microsoft Defender Offline Scan.
Wait for the antivirus to identify and remove malware – if found.
Read: How to configure Windows Firewall
Should I allow Windows Defender Firewall?
Yes, you should allow Windows Defender Firewall to run on your computer all the time. You should not disable the Windows Firewall. Windows Defender Firewall is a great way to keep your device secure and if you are afraid of viruses, malware, or any security threat (which you should be), then you must keep the feature on. However, if you have some other security app or third-party antivirus, then you can disable the feature. But if you don’t have any security program or the one you have doesn’t have a built-in Firewall, disabling the Windows Defender Firewall will make your device vulnerable to threats. Long story short, you need a firewall to safeguard your computer, but it doesn’t have to be Windows Defender.
Read: Windows Defender error 0x800700aa, The Service couldn’t be started
How do I fix Windows Defender Firewall?
If you can’t turn on Windows Defender Firewall, then maybe there is some kind of security program on your computer that stops you from taking the action. If that’s not the case, then maybe some of your computer’s files got corrupted. In that case, you need to repair the files and you will be good to go. We recommend you check our guide to know what to do if Windows Defender Firewall is not opening.
Also Read: Windows Firewall with Advanced Security – Deploying IPsec Policies.

Leave a Reply