Windows 11/10 feature updates always ship with some real changes made to the operating system. Windows now gives users more control over Windows Updates. This was one of the most requested features in the upcoming edition of Windows and Microsoft finally obliged by offering a setting that lets users can delay or defer Windows Updates for up to 365 days on Windows 11/10 Pro, Windows Enterprise, and Windows Education. You can even Pause Windows 11/10 Updates for up to 35 days now.
Defer Feature Updates in Windows 11/10
Earlier, when an update was available, a notification would appear, prompting you to either,
- Install the updates immediately
- Schedule an update for a specific time
- Put it off by clicking Snooze.
The last option – Snooze allowed delaying the install of the update for three days. Following that, you were given another notification about the update, and you could click the Snooze button again. This way, one of the ways of delaying the install of the update.
Windows 11/10 offers a simple solution for the same. Here’s how to delay or defer feature updates up to 365 days in Windows 11/10. To postpone Feature updates on Windows 11/10, do the following:
Open Windows 11/10 Settings and choose ‘Update & Security’ section. Find ‘Advanced Options’ entry under ‘Update Settings’ and click on it.
Scroll down a bit, and you will see a section that allows you to choose a Branch readiness level to determine when feature updates are installed and be informed about the capabilities and improvements in feature updates.
You will see two options under Branch Readiness:
- Current Branch
- Current Branch for Business.
This section is of our interest as it will allow deferring the updates. Feature updates can be deferred by 0 to 365 days. You can choose any number between 1 and 365 from the drop-down box.
The last option is for Quality Updates. Quality updates, including security improvements, can be deferred by 0 to 30 days.
TIP: See this post if the Pause updates option is grayed out.
Pause Windows 11 Updates
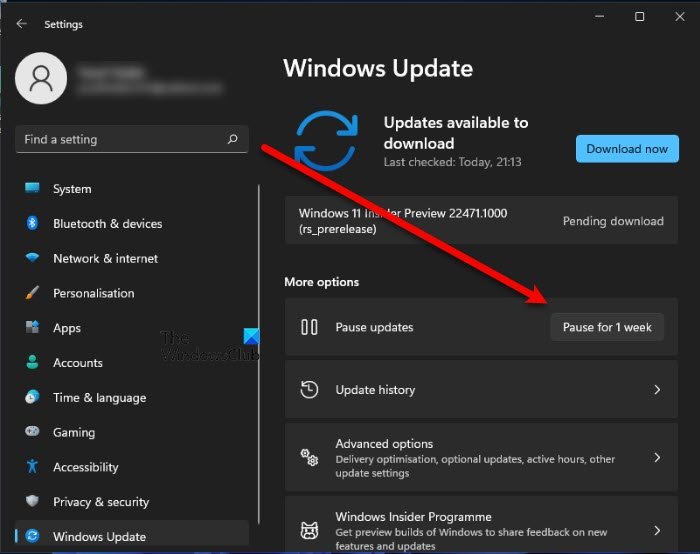
To pause automatic Windows Updates in Windows 11:
- Open Settings
- From the left side, select Windows Update
- Now on the right side click on the Pause for 1 week button.
The procedure in Windows 10 is as follows:
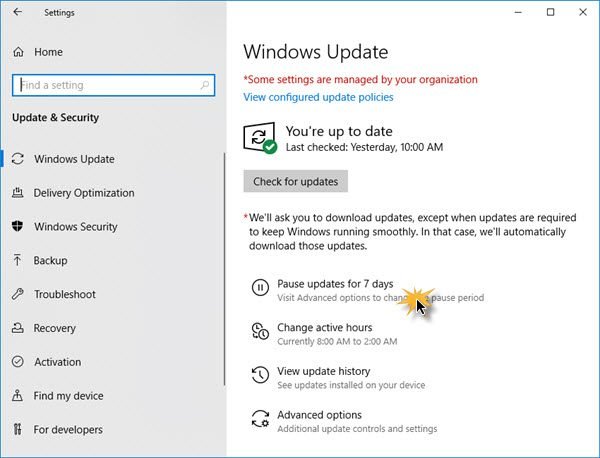
Windows Update Settings in Windows 10 now offer an easy 1-click link to Pause updates for 7 days. It is available in Windows 10 Home edition too.
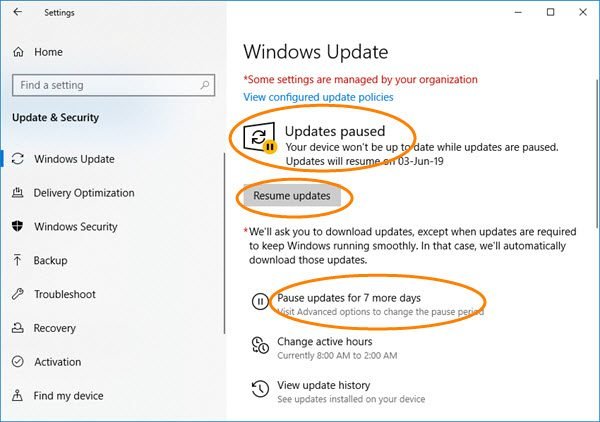
Once paused, the icon changes. The button text too changes – and it now allows you to pause for 7 more days.
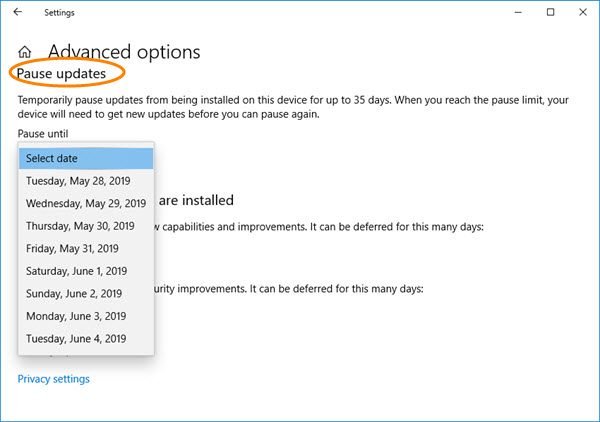
If you click on Advanced Options you can choose the data and pause Windows Updates.
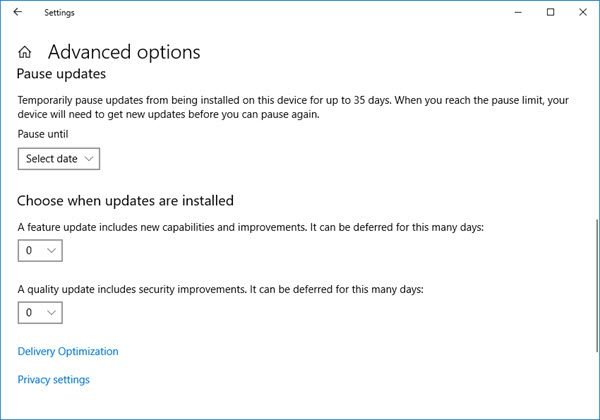
- Feature updates can be deferred by 0 to 365 days. You can choose any number between 1 and 365 from the drop-down box.
- Quality Updates, including security improvements, can be deferred by 0 to 30 days.
NOTE: Microsoft has removed the Defer Updates option from Settings in Windows 10 v2004 and later. Now you have to set the period to Defer Upgrades & Updates using GPEDIT and REGEDIT.
Once you have configured all the desired options, your PC will continue to receive WindowsDefender antivirus updates, but the Feature or Quality updates will be delayed or deferred – or pause – for a definite period of time.
How to unpause Windows Updates Windows 11

To unpause automatic Windows Updates in Windows 11, open Settings and from the left side, select Windows Update. Now click on the blue Resume updates button that you see on the top.
Read: How to set the period to Defer Upgrades & Updates using GPEDIT or REGEDIT.
Can’t unpause Updates in Windows 11
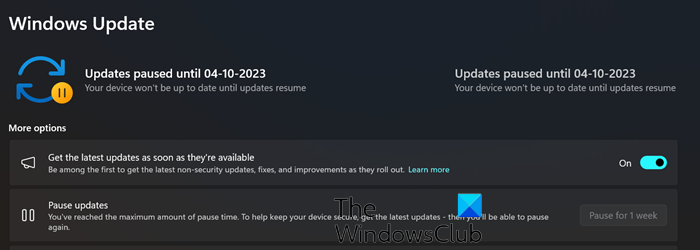
If you cannot resume or unpause Windows Updates, try this workaround: In Windows Updates settings, go to Advanced options, turn OFF all the toggles, and restart the PC. On restart, again go to Advanced options, turn On all the toggles, restart the PC and see. It should show the option to Resume update downloads.
If this does not help, back up your registry and then edit it. If you’ve reached the limit for Pause updates & you find that you now can’t resume updates in Windows 11, open REGEDIT and make these changes:
Go to the following registry key:
HKEY_LOCAL_MACHINE\SOFTWARE\Microsoft\WindowsUpdate\UpdatePolicy\Settings
On the right side, locate and double-click on the PausedFeatureDate registry string and empty its Value data. Repeat this for PausedQualityDate too.
Now go to:
HKEY_LOCAL_MACHINE\SOFTWARE\Microsoft\WindowsUpdate\UX\Settings
Delete the following registry strings one after the other:
- PauseFeatureUpdatesEndTime
- PauseFeatureUpdatesStartTime
- PauseQualityUpdatesEndTime
- PauseQualityUpdatesStartTime
- PauseUpdatesExpiryTime
Restart your computer and see.
Read: Pause updates option is grayed out in Windows
Please note that the options to configure these settings are only available on Windows 11/10 Pro, Enterprise, and Education. Windows 10 Home v1903 and later however allow users to pause Windows Updates up to 35 days as mentioned above.