With the Windows 11/10 feature called Storage Spaces, PC users can group two or more drives together in a storage pool and then use the increased capacity from that pool to create virtual drives called storage spaces, which can be accessed in File Explorer and can be used like any other drive on the computer. In this post, we will show you how to delete a Storage Pool for Storage Spaces in Windows 11/10.
Delete a Storage Pool for Storage Spaces
You must be signed in as an administrator to delete a storage pool. Keep in mind, that you must delete all storage spaces from a storage pool before you will be able to delete the storage pool – and when you delete a storage pool, all added physical disks in the pool will be removed, and the disks will be shown as unallocated in Disk Management tool.
Delete a Storage Space
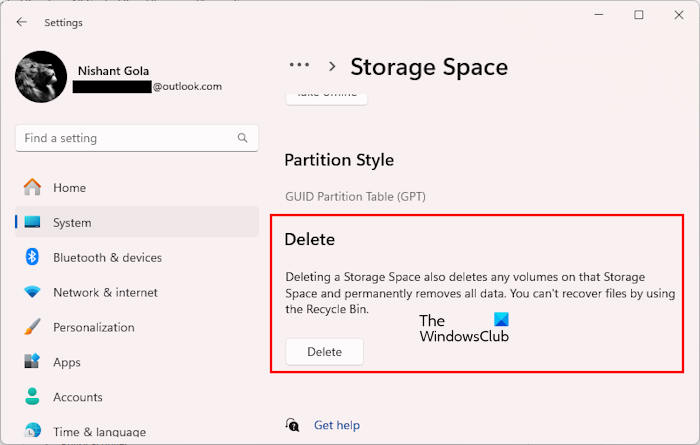
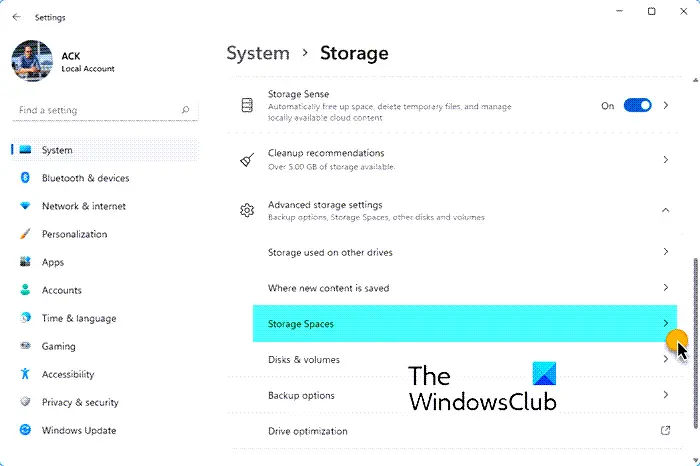
As stated above, before deleting a Storage Pool you should delete all the Storage Spaces added to it. You can do so via Windows 11/10 Settings or the Control panel. Open the Settings app and go to “System > Storage > Storage Spaces.” Now, select the Storage Pool that you want to delete. Open the Properties of the Storage Spaces added to that Storage Pool and click Delete.
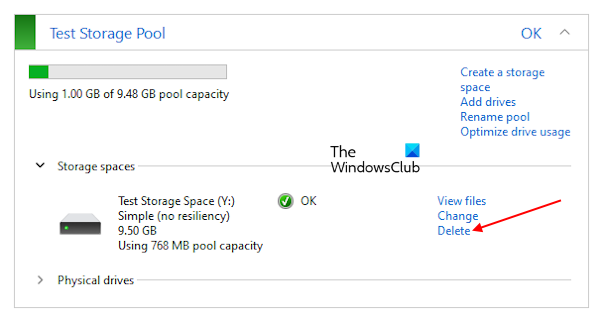
You can also delete a Storage Space through the Control panel. Open the Control Panel and switch the View by mode to Large icons. Select Storage Spaces and then click on the Change Settings button. Click Yes in the UAC Prompt. Ex[pand the Storage Spaces section and click on the Delete link. Delete all the Storage Spaces one by one.
Delete a Storage Pool for Storage Spaces on WIndows 11/10
Let’s see how to delete a Storage Pool for Storage Spaces on Windows 11/10. In Windows 11/10, the option to delete th Storage Pool is not available in Settings. Therefore, we will show you the following two methods to perform this action.
- Through the Control Panel
- Via Windows PowerShell
Let’s start.
1] Delete a Storage Pool through the Control panel
After deleting all the Storage Spaces from a particular Storage Pool, the option to delete that Storage Pool will be available in the Control panel.
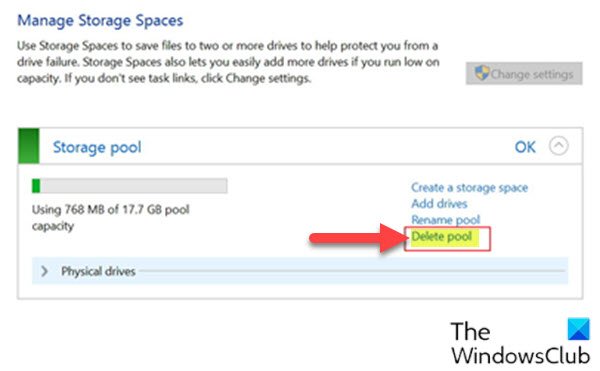
Follow th steps provided below:
- Press Windows key + R to invoke the Run dialog.
- In the Run dialog box, type control and hit Enter to open the Control Panel.
- From the top right corner of the window, set the View by option to Large icons or Small icons.
- Click Storage Spaces.
- Click the Change settings button, and click on Yes if prompted by UAC.
- Click on the Delete pool link for the storage pool you want to delete.
- Click on the Delete pool button to confirm. The storage pool will now be deleted.
- Exit Control Panel.
The Storage Pool has now been deleted.
2] Delete a Storage Pool via Windows PowerShell
To delete a Storage Pool for Storage Spaces via PowerShell in Windows 10, do the following:
Click on Windows Search and type PowerShell. Right-click on Windows PowerShell from the Search results and select Run as administrator. Click Yes in the UAC prompt.
Get-StoragePool
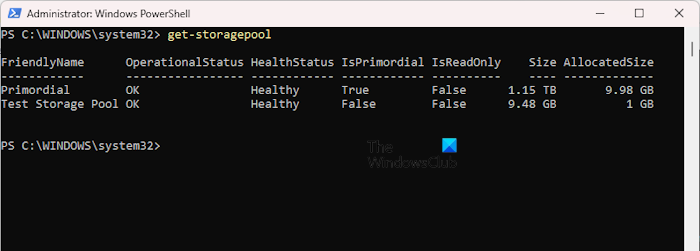
The above command will show you the list of all the Storage Pools you have created on your system. Make note of the friendly name of the storage pool you want to delete. Now, type the command below into the elevated PowerShell window and hit Enter. Substitute the <Name> placeholder with the actual friendly name of the storage pool you made a note of from the output previously.
Remove-StoragePool -FriendlyName "<Name>"
When prompted in PowerShell, tap Y on your keyboard and hit Enter to confirm. Exit PowerShell when done.
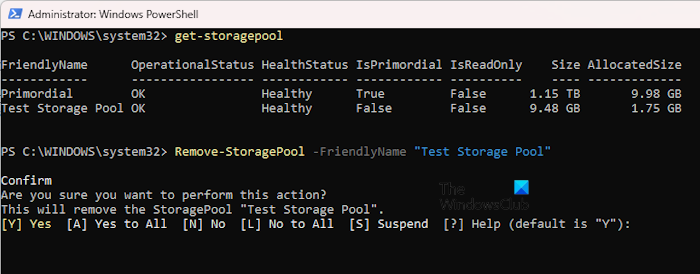
For example, if I want to delete the Storage Pool named Test Storage Pool, the command will be:
Remove-StoragePool -FriendlyName "Test Storage Pool"
That’s it on the two ways to delete a Storage Pool for Storage Spaces in Windows 10! I hope this helps.
What happens if I delete a storage pool?
To remove a Storage Pool, first, you have to remove all the disks added to that Storage Pool. The deletion of the Storage Spaces will also delete the volume on the associated hard disks. Hence, after this action, you will see Unallocated space on your hard disks. This means all the data will be deleted and your hard disks will be available in the non-pool state where they can be re-consumed.
Read: How to Change Storage Spaces in Storage Pool
How do I free up space on Windows 11?
To free up space on your Windows 11 computer, first, run the Disk Cleanup utility. It will scan your hard disk for unnecessary files, so you can delete them easily. You can also uninstall the programs that you do not need to free up some space. If there are some files that you do not need currently but may require in the future, you can compress them.
Read next: How to Rename Storage Pool for Storage Spaces.
Leave a Reply