The Microsoft Deployment Toolkit (MDT) Workbench offers a graphical interface for managing deployments. You can use it to configure deployment shares, create task sequences, add drivers and updates, and customize the deployment process. However, the Deployment Workbench crashes when opening the WinPE tab properties. In this post, we will see how to resolve it.
Microsoft Deployment Workbench
MMC has detected an error in a snap-in and will unload it
Report this error the Microsoft, and then shut down MMC.
Unload the snap-in and continue running
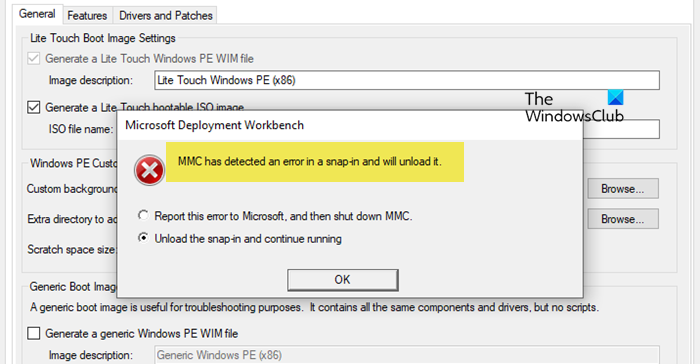
Fix Deployment Workbench crashing when opening WinPE tab Properties
If Deployment Workbench is crashing when opening WinPE tab Properties, follow the solution mentioned below.
- Create an x86 folder
- Download and install Windows PE older version
- Delete the Profile files
- Repair MDT Deployment Workbench
Let us discuss them in detail.
1] Create an x86 folder
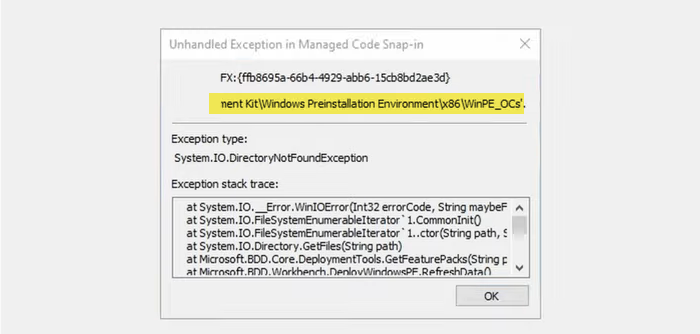
When you get the error message stating an error has been detected, we recommend you tick the “Unload the snap-in and continue running” option and click on OK. This will give you a little of the error that you are facing, which is that it can’t detect the file mentioned in this error, so, you need to copy the location of the file.
It will mostly be looking for the x86 (32-bit devices) folder, which is absent from the latest versions of MDT Workbench. To fix this, we can create a replica of the 64-bit folder and rename it to x86 to force the workbench to think that it is able to locate the correct location.
To do so, open File Explorer and navigate to the folder mentioned in the location we asked you to copy earlier. You will not be able to find the x86 folder, so make a copy of the 64-bit (it might be named amd64) and then name it ‘x86’.
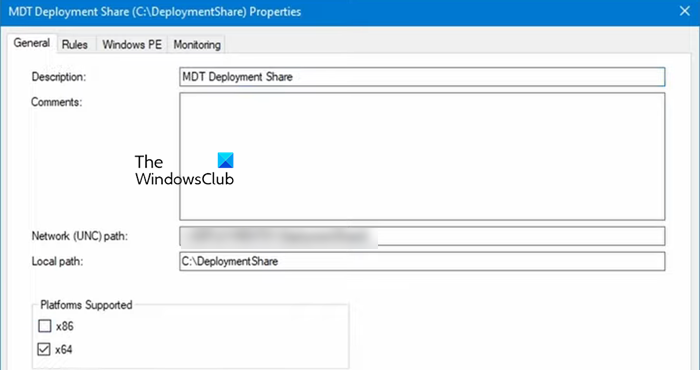
Now, you will be able to open the WinPE tab properties. However, since we are actually using files of 64-bit architecture, in MDT Deployment Share Properties, go to the General tab, untick the x84 checkbox from the Platforms Supported section, and save the changes you made. Finally, check if the issue is resolved.
2] Download and install Windows PE older version

Even though you can get into WinPE properties with the help of the workaround mentioned earlier, you can’t use it on a 32-bit machine as the feature has been deprecated in newer versions of Deployment Workbench. However, there is an add-on that you can download to resolve the issue. To do so, follow the steps mentioned below.
- Navigate to learn.microsoft.com.
- Look for Windows PE add-on for the ADK, version 2004, and click on the hyperlink to download it.
- Then, go to Settings > Apps > Installed apps and uninstall the current version of Windows Assessment and Deployment Kit Windows Preinstallation Environment Add-ons.
- And then install the addon you downloaded.
Finally, open the WindowsPE tab of the Deployment toolkit, it will launch without an issue and work with 32-bit architecture as well.
3] Delete the Profile files
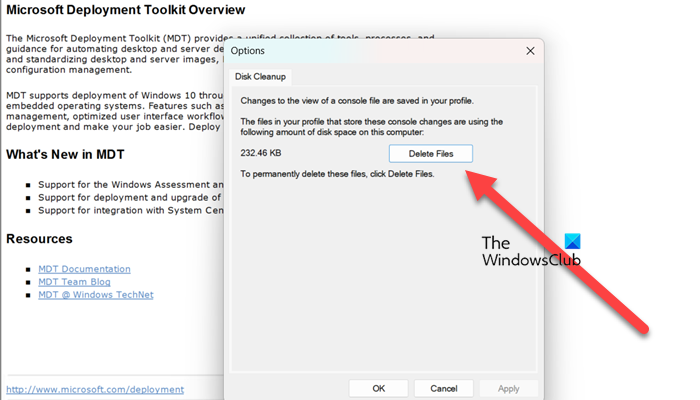
The changes we made to the Deployment Workbench may not be applied, as the older profile files are still there. We recommend deleting those files to apply those changes. To do so, follow the steps mentioned below.
- Open Deployment Workbench by searching it out of the Start Menu.
- Now, click on File > Options.
- Click on Delete files.
- It will ask you to confirm your action, click on Yes.
Please wait for a couple of seconds as it deletes the files. Once it has done so, reboot your computer and see if the issue is resolved.
4] Repair MDT Deployment Workbench
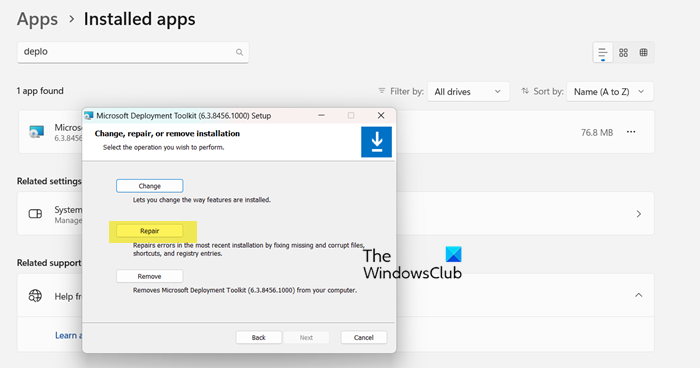
Apart from deleting profile files, you can run the Deployment Workbench’s repair agent after making the changes mentioned earlier( or repair the tool and then make the changes) to see the difference. To use it, follow the steps mentioned below.
Windows 11
- Open Settings.
- Go to Apps > Installed apps.
- Search for “Deployment Workbench”, click on the three dots, and then select Modify.
Windows 10
- Go to Settings.
- Navigate to Apps > Apps & features.
- Select “Deployment Workbench”, click on the tool, and select Change/Modify.
Finally, click on Repair and follow the on-screen instructions to complete the process. Once done, close the Deployment Workbench from Task Manager and then see if your issue is resolved.
Hopefully, you will be able to resolve the issue using the solutions mentioned earlier.
Read: Windows deployment services encountered an error 0xc0000023
Why does the MySQL workbench keep crashing?
MySQL Workbench is a demanding program, so if it’s crashing, check if there are any other processes running in the background that are taking way too many system resources. To do so, open the Task Manager and see the Processes tab. If a program is consuming high CPU or memory, kill it, and then open the workbench.
Read: How to Download and Install MySQL in Windows 11?
How to speed up MySQL Workbench?
To speed up MySQL Workbench, first ensure you are using the latest version of the tool. Also, make changes to my.cnf file and allocate more memory to MySQL. It would be best if you focused on proper indexing and optimizing queries.