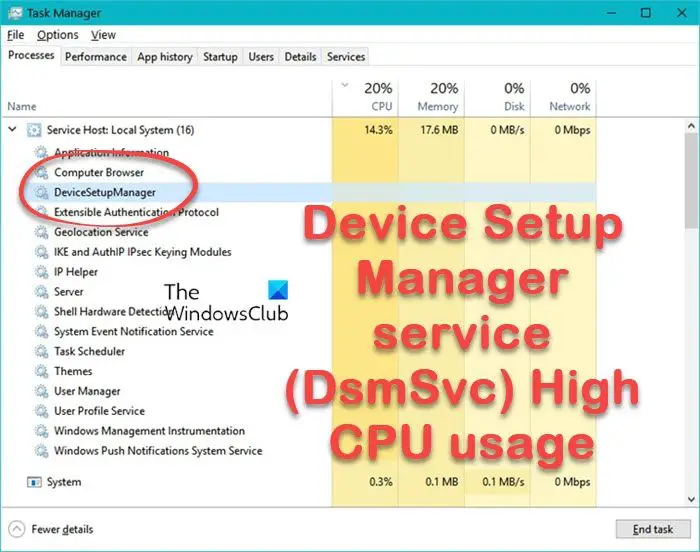
A Windows Service called Device Setup Manager service (DsmSvc) is responsible for managing device installation and making sure all drivers are correctly configured. Sometimes it can cause high CPU usage and affect system performance significantly. In this article, we will talk about what to do when the Device Setup Manager service (DsmSvc) shows high CPU usage.

What is DsmSvc?
DsmSvc, or Device Setup Manager, is a Windows built-in service. The DsmSvc service use the DeviceSetupManager.dll file that is located in the C:\Windows\System32 directory. When you insert an external device such as a USB stick, external adapter, or external hard drive, this service helps Windows install these devices.
DsmSvc enables the detection, download, and installation of device-related software. If this service is disabled, devices may be configured with outdated software, and may not work correctly.
The service doesn’t usually show high CPU usage; that’s because when you add any new device, DsmSvc will try to install it, and once the process is done, the service goes back to idle.
Fix Device Setup Manager service (DsmSvc) High CPU usage
High CPU usage can affect computer performance. If the Device Setup Manager service (DsmSvc) shows high CPU usage, first check for updates and install the latest update released from Microsoft, as it is very likely that they might have released a remedy for this bug. If there is no update or updating does not help, follow the instructions mentioned below.
- Fix Corrupted System Files
- Scan System for Malware
- Disable DsmSvc Service temporarily
- Repair using Installation Media
Let’s get started.
1] Fix Corrupted System Files

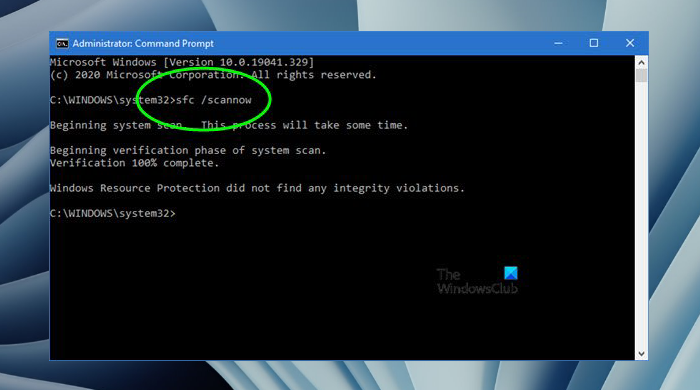
If system files are corrupted, you will face issues, including high CPU usage. In that case, we must repair corrupted system files using some commands. To do the same, press the Windows key and type Command Prompt, and then select Run as administrator. Type the following command in the command prompt and hit Enter:
sfc/scannow
This will take some time, and once it completes successfully, we need to restart the computer.
If the issue still persists then we need to run Deployment Imaging and Servicing Management (DISM) tool If a Windows image becomes unserviceable. This utility will update the files and correct the problem. Run the following command one by one and press Enter button each time:
DISM /Online /Cleanup-Image /CheckHealth
DISM /Online /Cleanup-Image /ScanHealth
DISM /Online /Cleanup-Image /RestoreHealth
Hopefully, after executing the mentioned commands your issue will be resolved.
2] Scan System for Malware
Malware attacks can crack weak passwords, spread through networks, and disrupt the daily operations of an organization. It has been seen that due to malware, the computer may utilize excessive system resources. To rule out a malware problem, you can use Windows Defender or any 3rd-party antivirus software to scan the system and remove malware from the system.
Read: Fix System interrupts high CPU usage in Windows
3] Disable DsmSvc Service temporarily

Even though DsmSvc is an important service, you can disable it from the Windows Services Manager present on your computer.
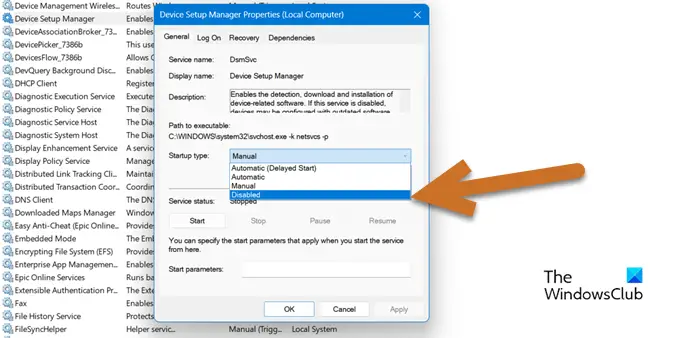
- Press the Windows key and type Service in the search bar and open the Services Manager.
- Locate Device Setup Manager in the list.
- Right-click on it, and click on Properties.
- Set the Startup type to Disabled, click on Stop (if it’s started), and click Apply > Ok.
After disabling this service, the problem of high CPU usage will go away.
If you do not want to disable it, you can set it to Manual too.
4] Repair using Installation Media
This issue can also occur if some of the core system files are missing. The very first solution mentioned in this post aims at repairing the corrupted system. Still, it is very likely that some files may not get restored. In that case, you need to repair your OS using Installation Media. So, do that and then see if the issue persists.
Leave a Reply