Your Windows operating system and many third-party applications create hundreds of Temporary files on your system in one single day. Normally, these files do not cause any issue, but when they increase exponentially in numbers, they block valuable space on the hard drive and degrade the overall performance of your system.
By deleting all such Cache files, you can free up a lot of disk space and keep your machine running at peak efficiency. There are many ways to delete Temporary files on Windows 10. Read further to know them.
Temporary files are created by both the Operating System and the software running on your computer system. Temporary files are denoted with a file type of .tmp or prefaced with a tilde (~). Typically, temporary files are created in the Windows Temp folder and are used for many reasons, these include the following:
- OS requirements, like providing space for virtual memory.
- Back-up files created for work-in-progress like MS Office creates for its open documents.
- Work files for applications that hold data while the program is running.
There are two main reasons to clear out the temporary files in Windows 10 or any other version of Windows. These include regaining storage space and improving computer performance. For these reasons, it is advised that you delete the temporary files periodically.
This folder is located at c:/Windows/Temp and mainly used by the operating system to store the temporary files. You can press Win + R key, type ‘temp’ and hit ‘Enter’ to go to this folder.
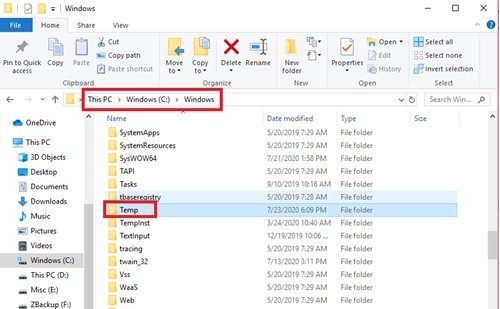
Used by the current logged in user:
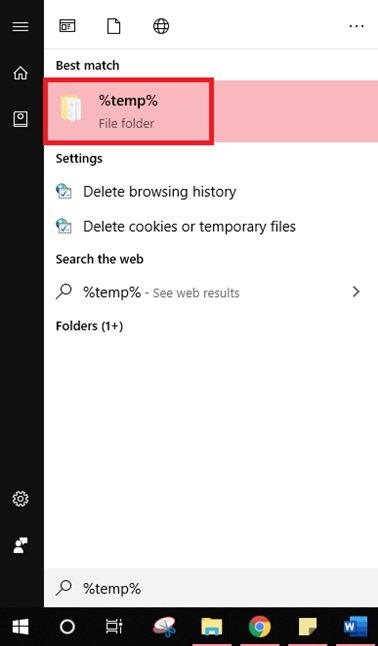
This folder is related to the user logging into the system. You can use the search field on the Windows Start menu to locate this temp folder. Click open the start menu and type %temp% and select the top result from the option.
Ways to delete Temporary files in Windows 11/10
Here is the guide that will take you through the steps of clearing temporary files. Some of these methods are as follows:
- Using Windows Settings
- Using File Explorer (Manual Method)
- Use “Storage sense” to automatically delete temporary files
- Create a BAT file
- Using Command Prompt
- Using Disk Cleanup
- Use 3rd-party Disk Cleaner software.
Let us look at each of these methods in more detail.
1] Using Windows Settings
Windows allows you to use its Settings App to remove the temporary files. Here is how you can use this application:
1] Open the Start Menu and select the Settings shortcut appearing on the left sidebar. Once you select the little gear-shaped icon, the Windows Settings page opens in front of you.
2] In the new windows, navigate to the System section.
3] From the left side options, select Storage
4] You will see your disk’s option on the right section, select your disk, and click on the Temporary files option.
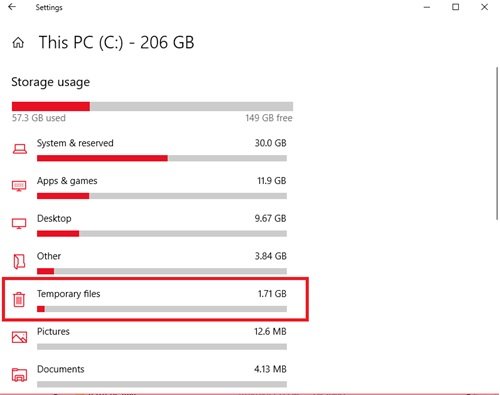
5] Windows will now scan the temporary files folder; once the process is completed, you can select the files you want to remove.
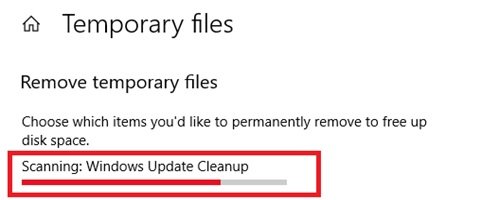
6] To delete check the boxes and then click Remove files to confirm your action.
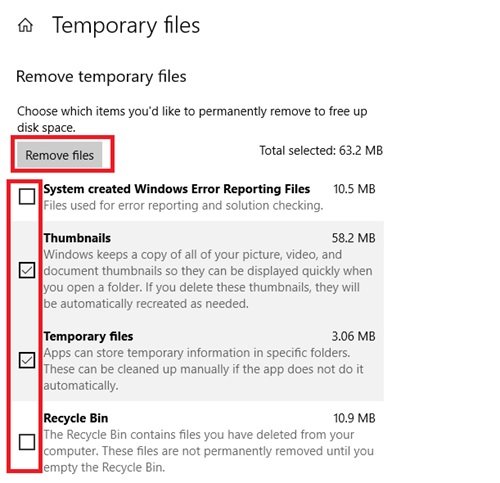
Done! After you successfully complete the above steps, the junk files will be removed from your system.
2] Using File Explorer (Manual Method)
Using the Windows File Explorer is another simple way of removing temporary files in Windows 10. Follow these steps:
1] Press Win + R keys to open the Run dialog.
2] Type the command %temp% and press Enter to open the temporary files folder on your system.
3] Use shortcut Ctrl + A to select all the files inside the folder. Once the files are selected, right-click and select the Delete option from the context menu.
Please note – you will need an administrator account to perform this action. Also, once the temporary files are deleted, these are moved to the Recycle Bin hence, restoring them is possible.
3] Use Storage sense to automatically delete temporary files
A user can use Storage Sense to remove temporary files automatically from the system. Here is how you can use:
1] Go to the Settings application.
2] Click on the System option and select Storage from the left-hand panel options.
3] In the Storage section, turn the toggle named Storage Sense ON.
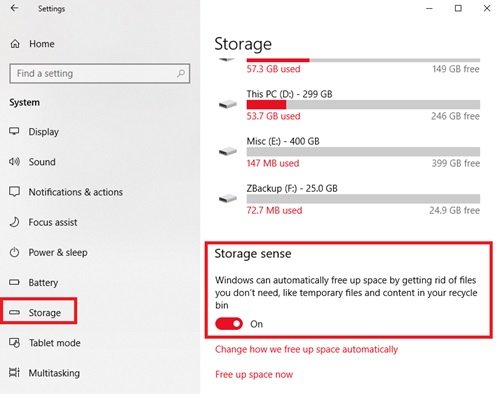
Once you activate Storage sense on your system, it will delete the temporary files including the ones which have been in the recycle bin for more than 30 days. This was the default configuration, but the user can always configure the default settings of Storage Sense.
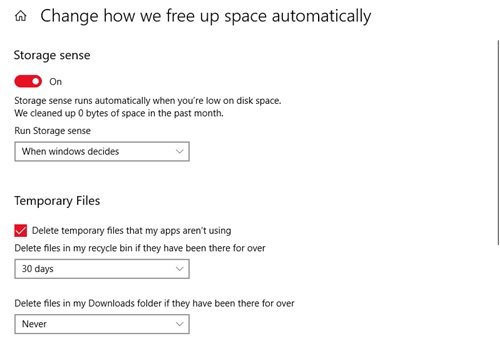
To do this, click Change how we free up space automatically tab and adjust the cleanup settings or run Storage Sense on-demand.
4] Create a BAT file
In this method, you need to create a BAT file. Once this file is created it can be used repeatedly to delete the temporary files on Windows 10. This very simple option works quickly. To create a BAT File, follow these steps:
1] From the Start Menu open the Notepad
2] In the Notepad app, copy the following:
del C:\Users\%username%\AppData\Local\Temp /f /s /q

rd C:\Users\%username%\AppData\Local\Temp /s /q

del c:\Windows\Temp /f /s /q

rd c:\Windows\Temp /s /q

pause
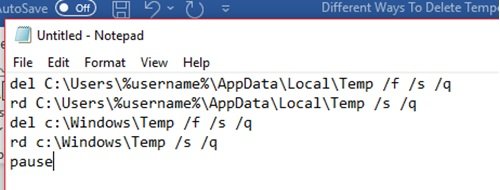
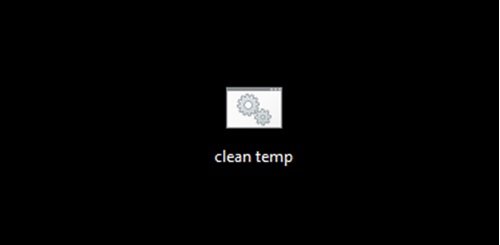
3] Save this file to your desktop using the extension .bat. Here the file is named as Clean Temp.
4] Once done, a BAT file will be created on your desktop.
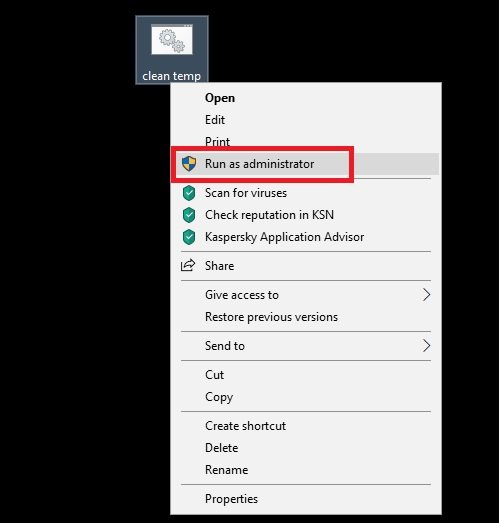
5] Now, whenever you wish to delete the temporary files on Windows 10, right-click on this file and select the option Run as Administrator.
Done!
5] Using Command Prompt
Temporary files on Windows 10 can also be deleted by running some commands in the Command Prompt. Follow these steps:
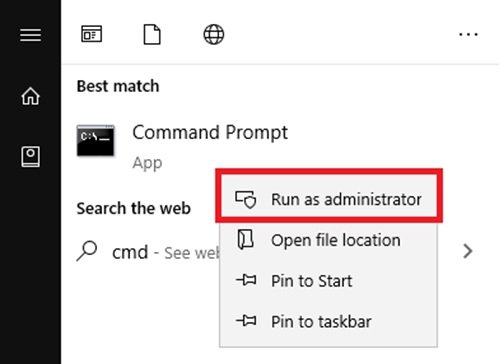
1] Open the Start Menu and type cmd.
2] In the search results, right-click and click the Run as Administrator option.
3] Once the command prompt window is open with the administrative right, copy the following command:
cleanmgr /d <driveletter>
Do not forget to alter the <driveletter> field in the command and remove the brackets.

4] Now, execute the command by hitting the Enter key.
Wait for the process to complete.
6] Using Disk Cleanup
The Disk Cleanup utility is another simple and efficient way to clean temporary files on Windows 10. Read our guide Delete Temporary Files using Disk Cleanup Tool.
7] Use 3rd-party Disk Cleaner software
You can also use a free junk file and disk cleaner software to delete your junk files.
TIP: See this post if Temporary files not deleting in Windows.
We hope that this guide did help you in deleting the temporary files on Windows 10 and you successfully made some room for storing new files. If you any similar tricks to perform this process, do share them with us in the comments section below.